Hasslefree 6th Anniversary Axenarf WIP

tidoco2222

Active member
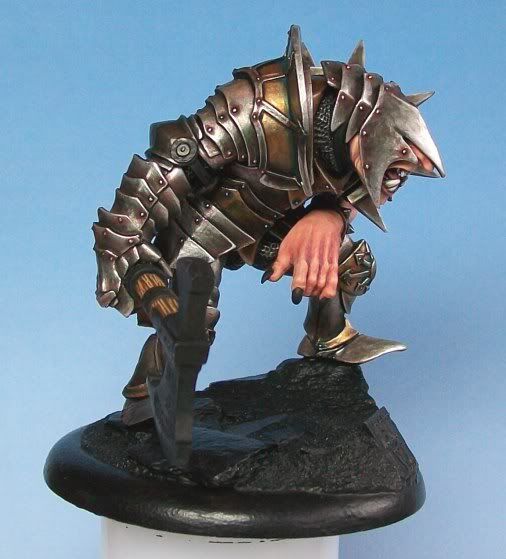
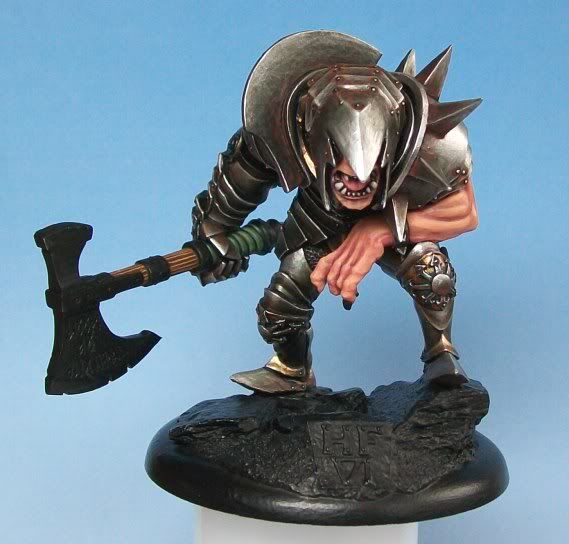
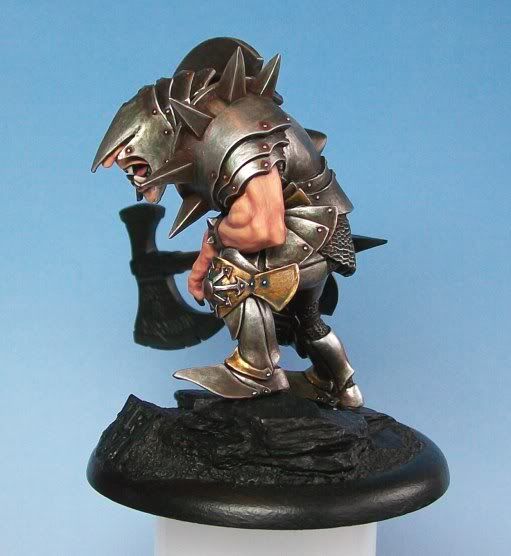
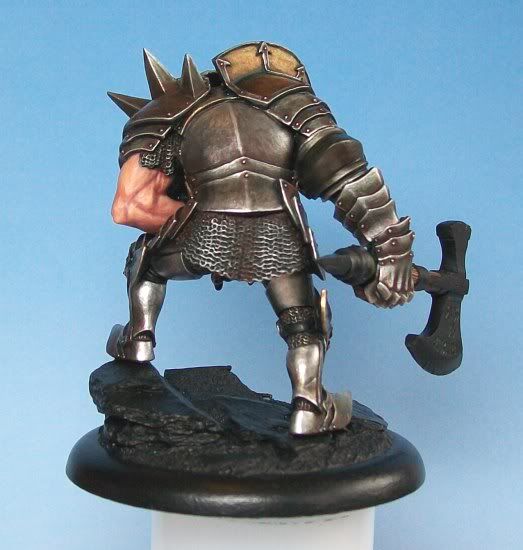
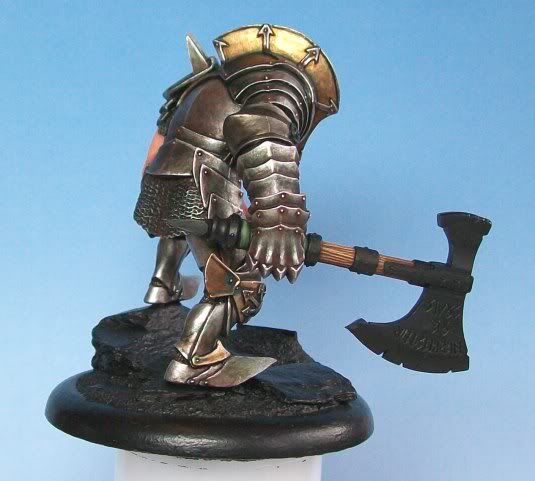
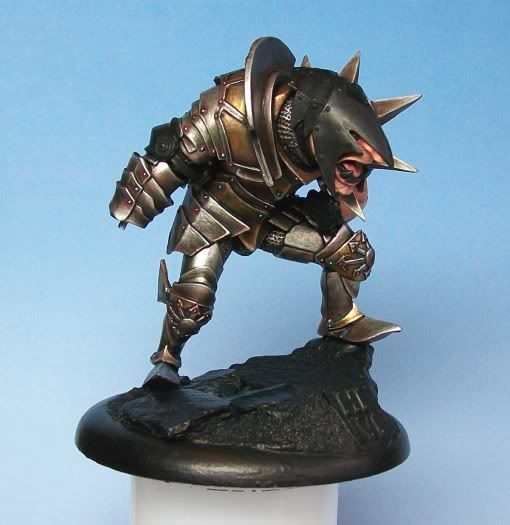
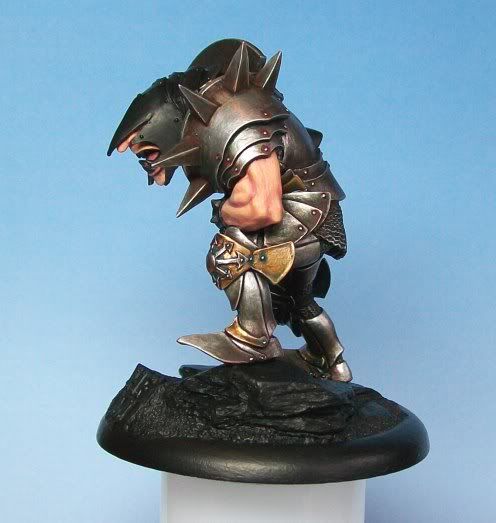
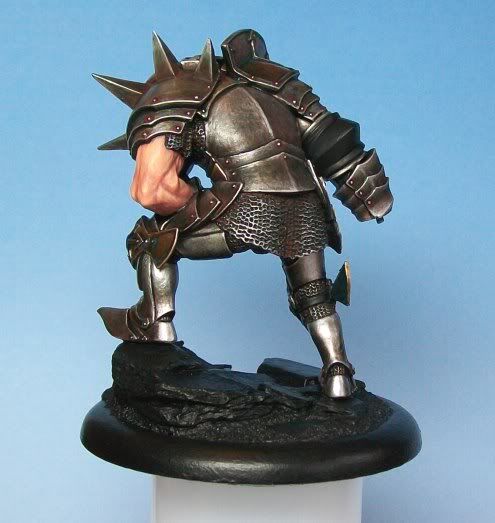
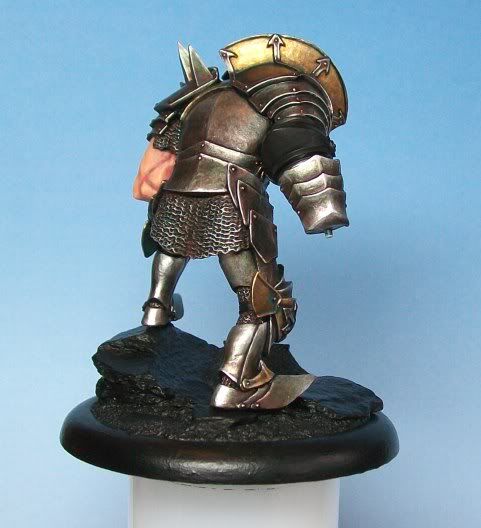
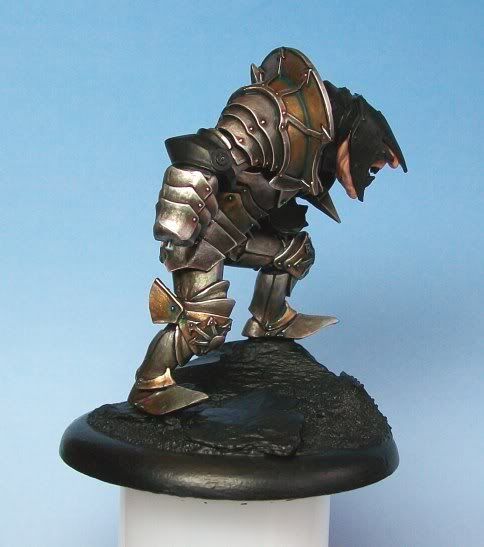
Right well it is official, I don't stand a cat in hell's chance of getting this done for Salute. I just don't have the spare time, I have got some more done to it but it will have to wait for another time before I take it to a show. Possibly Partizan next month if HF are standing and then I can show it off there. So here are the updates that I have got done up till now.

AxenarfLtdWIP5.jpg


AxenarfLtdWIP6.jpg


AxenarfLtdWIP8.jpg


AxenarfLtdWIP7.jpg


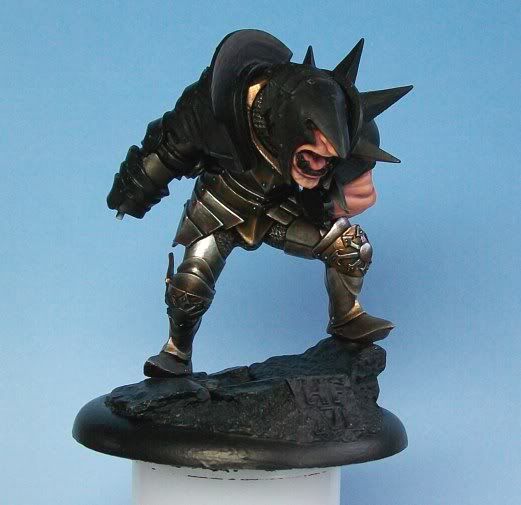
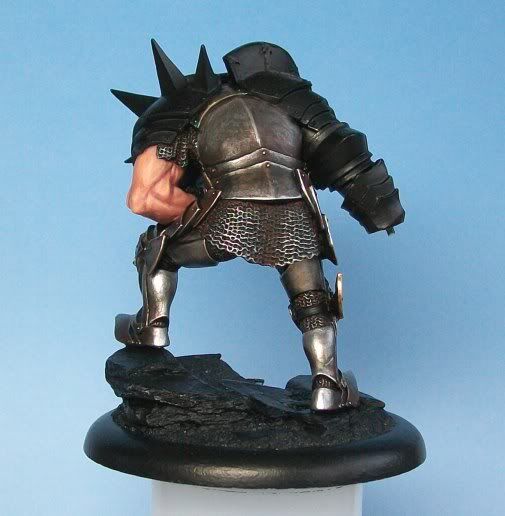
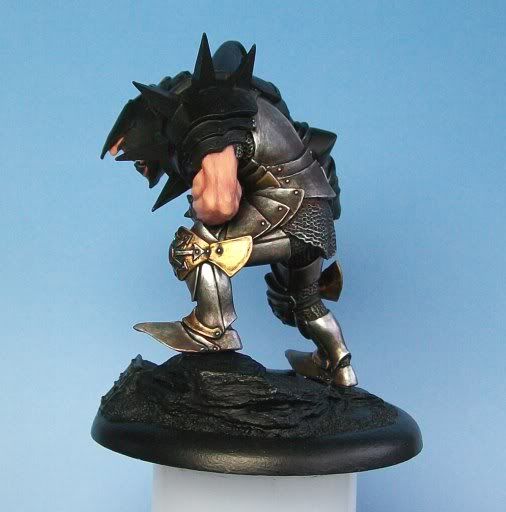
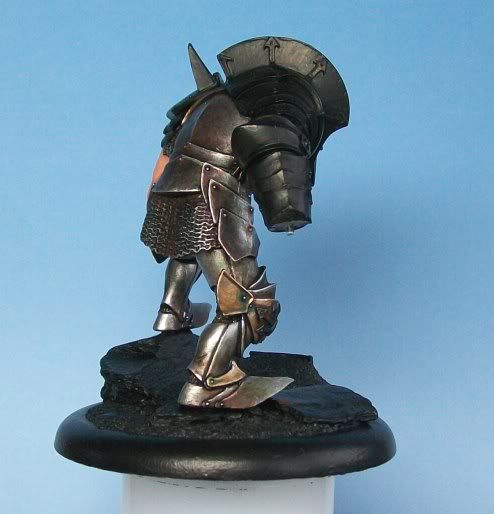
I got some nasty glare off the light source on one shot on the gold but the rest are pretty close to the mini as it looks in reality. So I'll keep badgering on at this, I am still going to take a something from HF down to enter in the painting comp so we will see how they do.
 

Mercius

New member
I love it, looking great. I have recently started using your method for painting metals and I must say it has helped me improve leaps and bounds. I must say though your metals on these piece seem to be even better than normal.
 

MRickwood

New member
Those metals are fantastic.
Might I ask how you did them? or point me in the right direction to read up on it?
 

BPI

New member
That's a lovely mini Tidoco, I saw a WIP for one earlier this year & was sold on him then. Your's is coming along very nicely, metals are lovely as usual but that flesh is looking very nice too :good: Shame he won't be done for Salute but better that than rushing him. Keep up the good work.

Cheers, B.
 

tidoco2222

Active member
These are the two articles here on CMON I read and adapted to my own work.
http://www.coolminiornot.com/article/aid/375
http://www.coolminiornot.com/article/aid/379

Cheers guys, those two articles are good but my metals have moved on since then, for instance I am still using GW paints but I haven't used inks tis time the GW washes are absolutely fantastic for making good weathered metals.

I have painted so far each metal plate individually until completion, the silver has been done by starting with Boltgun Metal heavily thinned down, this does mean you have to use a couple of coverings to get it even, then I used 4 to 5 coats of Bedab Black wash letting each coat dry completely before applying the next, after that a coat of Devlan Mud, to highlight I used Boltgun Metal trying to place the highlights gradually and also trying to get the gradient up from Boltgun Metal through Chainmail to Mithril Silver as naturally as possible.
Further Weathering was then added with the previous two washes in the more shaded areas and I also used some Thrakka Green to give another tone into the mix.
Heavily thinned Dark Flesh was built up gradually to simulate rusted areas.
The Gold is just Tin Bitz highlighted up with Shining Gold in gradual stages once I was using only the gold I then added some Mithril Silver in to highlight further with Mithril on its own for some of the hard edges, Bedab Black wash was placed in some of the more shaded areas to deepen the shadows and heavily thinned down Scaly Green added in places to simulate vert de gris.

Hope that helps.
 

Mercius

New member
Awesome! Thanks for the info...I love well done true metallics much more than NMM, just personal taste, although NMM has it's place. I too have been using the Badab Black wash in the place of inks, on the mini I am working on now. It is my first attempt at that layering style and it looks much much better than my old style. Thanks for all the good advice it is much appreciated!
 

jcscull

New member
the metalics are coming along very nicely and the flesh tones look great so far. I like the washing on the metalic areas it is offsetting some of the brilliance from the light source and giving the piece a feel of aged metal.
 

tidoco2222

Active member
This is the ltd edition one mate, it comes with a choice of three heads, the one I used the minotaur and the standard axenarf head, whe this goes on general release it will only have the standard axenarf head but I may still get one and use the minotaur head on that.
 

tidoco2222

Active member
Thanks again all, well Salute is now out of the way and I have a little spare time again to get on with this project, so I have been continuing with the armour on this model and there is a hell of a lot on it and trying to stay focused to keep it all looking cohesive is starting to prove difficult. However I think I am on the right track and thus far am very pleased with the overall look of the mini, with just the head armour and elbow guard left to complete before moving onto the weapon arm which isa going to be painted separately.

AxenarfLtdWIP9.jpg


AxenarfLtdWIP10.jpg


AxenarfLtdWIP11.jpg


AxenarfLtdWIP12.jpg


AxenarfLtdWIP13.jpg


This is easily one of the most enjoyable minis I have painted for a while now but I won't be sad to see it done so I can paint something with a little less metal on it lol.
 

dogfacedboy uk1

New member
Tim, this is utterly awesome painting, real nice armour and the best armour I have seen for a long while. Very nice sculpt to paint. Nice clear photos as always so we can give it the admiration it deserves as well!!! Have you been able to do anymore on the wizard bust???

dfb
 

tidoco2222

Active member
Thanks again for the comments, I am so close now to finishing the mini and now that I am back on the unemployment list I have plenty of time to get it done, so this weekend should see the end of this one,

AxenarfLtdWIP14.jpg


AxenarfLtdWIP15.jpg


AxenarfLtdWIP16.jpg


AxenarfLtdWIP17.jpg


AxenarfLtdWIP18.jpg


I've really enjoyed this one and am thinking of buying another so I can do it again but this time with the Minotaur head.

@dfb not yet but now I have time on my hands I should be able to crack on with it, I also have been lacking in inspiration and didn't want to just go at it and screw it up.
 
Back To Top
Top