Wolf Guard Terminator - Practice Piece

RuneBrush

New member
I've finally got round to installing the bits of software after my Windows 7 install, so can post up my current project.
wgt_practice.jpg


The story so far...

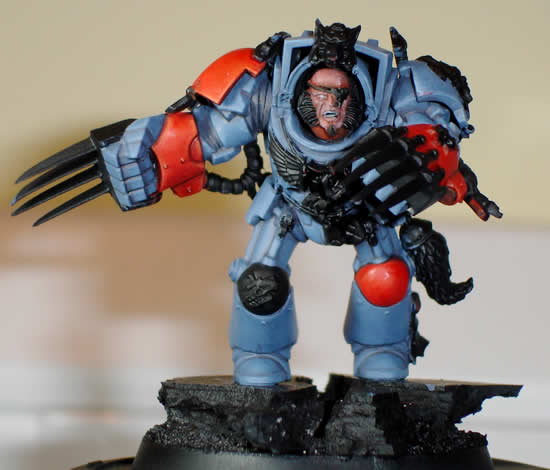
This is the 'practice' model that I'm using to experiment the actual painting of my Space Wolf army. Currently learning how thin to water my paints down, what order to paint things and so on. I will use it in my army, but it it primarly a practice model, so providing it doesn't look shat I don't mind.

The armour is (was) 'finished' however I will accept that I need to darken the shadows and push the highlights father as the picture has less contrast than my dodgy eyesight see's - I also learned that I need to ensure the consistency of my highlight paint is right - the collar around the neck is an example where I got it wrong and it needs a re-paint.

The red is base coat only - I have to shade and highlight it, however I'm quite chuffed with how vibrant it's come out :)

The face has come out OK in my opinion, I struggled highlighting his bald head, but hope that'll come with a bit of practice. I'm not brave enough to try a pupil - the eye was bad enough!

Anyway, any suggestions, comments, critiques etc?

Pete
 

nels0nmac

Member
As it goes this looks pretty good. As you have pointed out it does need some more work with highlighting and shading but it looks pretty smooth and neat & tidy.
I don't know what order you paint the face in but I always find that it's best to paint the eyes first as the black for the pupil tends to creep onto the face, which would be annoying if I'd already painted the flesh.
I would also suggest painting the seals around the limb joints first as highlighting them without getting paint on the armour is going to be tricky.

So keep on going. It's looking good so far. For the shading..... if you are using a base of Shadow Grey I find that Charadon Granite works quite well.
 

RuneBrush

New member
I painted the face the base colour first then did the white of the eye/teeth and then painted the rest of the face. I'll have to try the eye on the next mini first I think.

The armour started off as Fenris Grey with the shading being done with fenris and Scorched Brown in an almost wash like consistency. In future I'll push it farther by adding Charadon Granite instead of the Scorched Brown. I was trying to be lazy with the limb joints and to be honest it wasn't worth it. I was hoping that the shade 'wash' would have been enough to make them look right, but that wasn't the case.

The red is pretty much done now though again I've picked up a few points that I'll do differently on future mini's. I'll try and take a photo later on.

Providing I get enough time tonight, the next step will be the brass/bronze colour I think.
 

Hard Cover

New member
my standard order for marines is this.

1. Base coat whole model in lightest color if it's in abundance(flesh toneson katachans or orks) or most prominent if you can keep the parts separated.IE: Remove the head, paint the power armor.
2. Wash
3. (Optional) Drybrush basecoat color over whole model(I usually wash really dark washes so I have to lighten the model back up)
4. paint all the joints on the model, block in(base colors) of accent colored pads or borders
5. carefully wash anything else that needs to be washed.
6. Highlight the base coat.
7. Highlight anything else.
8. (Optional) rewash cracks between different colored pads if necessary.

As for cleaning up yours, all I can say to work on is the face. drybrush it with some bleached bone, it'll pale it up a bit and the added yellow tone will keep him form looking so sunburned.
 
Last edited:

RuneBrush

New member
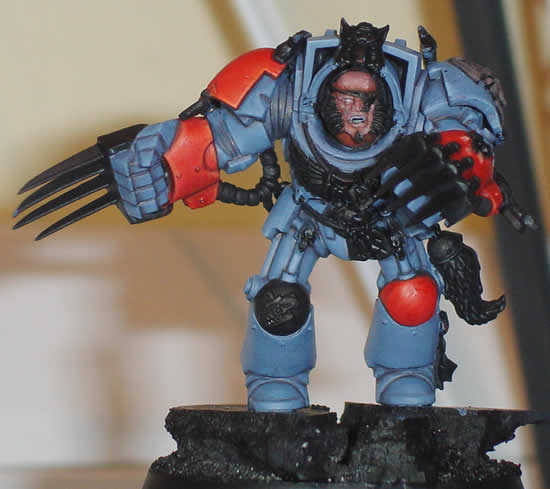
Was hoping to have had this posted sooner, but real life took over for a few days (sadly). Here is an update to the piece.

wgt_practice2.jpg


The red is done as far as I'm going to take it (on this model at least), for future models I'm not going to wash with thinned Baal Red as I don't like the effect it gives to be honest. I've also pushed the shadows a little darker, in fairness these are deeper than they look in the photo. Pushing the highlight lighter will be the next job, along with smoothing out the nasty bits, such as around the neck.

Without a doubt it's still a massive learning curve :)
 

eyewantyourskull

New member
Very clean paint job. I would still push the highlights and shadows a lot more.

I'm picking up the brushes again after a long absence, and the one thing I'm really starting to understand is- Push the contrast in your figure to what you are comfortable with, and then take it one step farther.
 

freakinacage

Well-known member
Very clean paint job. I would still push the highlights and shadows a lot more.
agreed. a bit of darklining between pads and some edge highlighting would really make him pop. don't give up on him, he's looking great and a little mroe effort would really help. as he is, he just looks unfinished (which he is but you know what i mean)
 

malupro

New member
i agree, it looks very good so far.

i have got an question, how do you do your base. what is the material of the bigger parts. im looking for a nice looking base for my space wolves army.
 

RuneBrush

New member
Cheers for the comments, I've done some darker shadow/lining and is actually starting to come together quite nicely, I'm so glad that I chose to do this mini before I cracked on with my actual army as I've picked up lots of improvements already. I Didn't get much done over the weekend as I was suffering from what has just been diagnosed as an inflamed lung lining, so on a course of anti-inflamatories now. I did manage to get a bit of touching up done though, as I'd managed to sploge red on some of the armour :)

@malupro - The base is actually really easy to do - so easy that I've actually done it for every model in my army.
First off, take a lump of Super Sculpey clay, kneed it slightly so that it is malliable (not too much).
Next put it on a sheet of baking paper on a solid work area and roll the clay flat - approximatly 3mm~6mm thick. You're not looking for precision here a bit of texture on the top is fine - as is a bit of a slope. I used a beer bottle to roll it out, but a wine bottle would work just as well.
Now shove this in the oven for 10 minutes on a baking tray. Take it out and leave it to cool for a few hours or so.
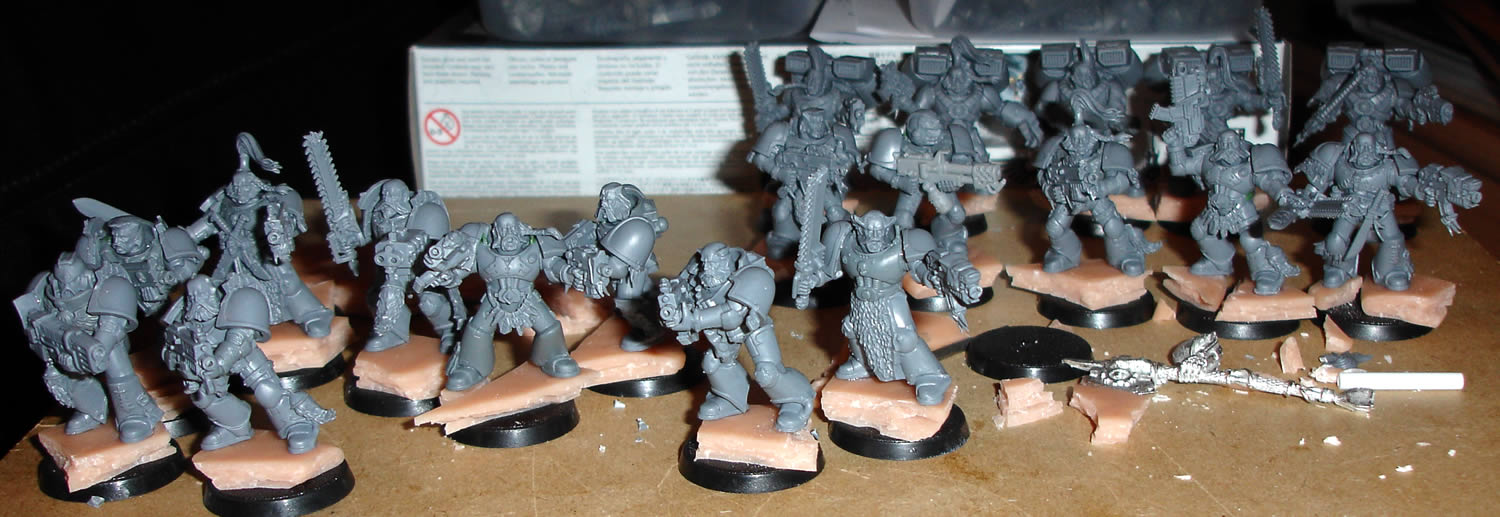
Finally take a pair of pliers and snap pieces off to suit. As the clay wasn't mixed very well you should get fracture lines running across the snap. Pieces then got super glued onto the base and then the mini pinned in place with a short length of wire through the base and into one foot. Any exposed base got pva (white) glue smeared on it and a bit of GW fine flint and then sand put on.

Hope that makes sense, it sounds a lot more complex than it actually is.

Here is a WIP of the army which shows the overall effect:
eighteen.jpg


- pete
 

nels0nmac

Member
A quick base for Space wolves is to use slate. GW do a base pack ( or at least did one) which included pieces of resin cast from slate moulds. If you can't get that then a bag of ornamental slate from a garden centre will do you for a lifetime. A bag costs about £4 and will provide you with masses of pieces to work with. Super glue or miliput them onto the base, spray and paint .....done. You do need to drill into the slate which can be done but will blunt a 1mm bit fairly quickly, by that I mean over the course of about a dozen or so bases.
Check the link to the most recent Space Wolve that has been based in this way.
http://coolminiornot.com/238407

If you have the money then Back2Base-ixs do a resin range that looks similar to what I have done - a lot easier to drill into. :0)
 

RuneBrush

New member
Yup you can also do a similar job with slate or resin pieces. Although the method I use is more expensive than slate it does have three pretty decent benefits. First off you don't have any problem with 'finding the perfect piece' just snap it off as you want it, plus it's flat on the bottom so secures to the base easily. Next up it adds perhaps one or two grammes weight to the base. Finally it drills and can be manipulated really easily in comparison to resin or slate.

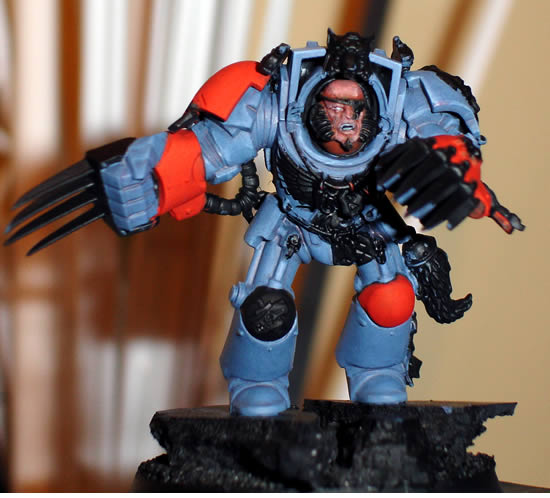
Anyway, here is a small update with the darker shadows.

wgt_practice3.jpg


Looks better doesn't it :) It also helps that I've worked out a better 'snap shot' setup for my Camera. Currently starting on a batch of 5 jump pack marines and will finish off the armour when I have the particular mix done for them (if that makes sense). I need to crack on with the metalics with this piece I think :)

- pete
 

Bradders

New member
Hey

I've just started my Space Wolves too... had the old battleforce for ages but finally got round to starting them. Anyway, from my painting them i've learnt a lot. I think you need to add a bit more light onto the top of the model so that it isn't the same as the bottom. In my opinion it makes it stand out a little more. I've used a touch of skull white to really emphasize the light hitting the armour

Bradders
 
Back To Top
Top