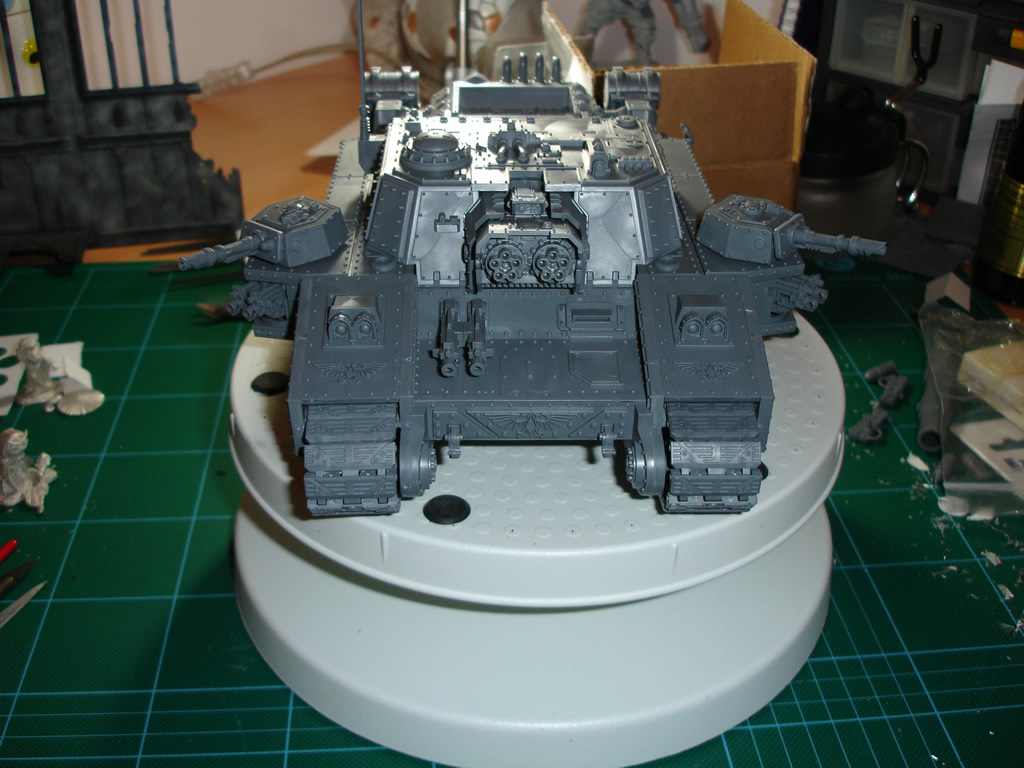
IG Stormlord WIP

RuneBrush

New member
Seems like an age since I posted any kind of WIP - in fact it has been an age :s

Now that my working area is finally back in a usable state I've finally pulled my finger out and am finishing putting together & painting an Imperial Guard Stormlord tank. This is one of the super heavies available and can be made into one of six different variants. This tank is actually belongs to a disabled friend of mine who asked me to put it together a couple of years ago. Because of things like moving house I've been rubbish and just left it to gather dust - this wasn't helped by a can of cellulose thinners leaking and ruining the box it was in, resulting in everything having to be taken out and left as sprues and half assembled bits on a shelf.

He's after Vostroyan colours as per the GW army so because of the time he's waited, I've decided to paint the whole thing for him, along with trying out weathering techniques as per the Forgeworld masterclass book.

So here is the beast - and I do mean beast! Probably ten+ hours worth of tidying up and gluing in stages, just got to finish the two autocannons for the back section and any other decoration I choose. I would say that although this is a lovely model to put together, it shouldn't be attempted by the faint hearted and you do need to be patient and glue things together into sub-assemblies and let them dry fully before proceeding. Test run everything you need to glue. Some bits are very snug fits so a bit of a rub with a file just makes it go together. The two side assemblies are the most important thing to get right - glue them clamp them to make sure they're square and stay square!
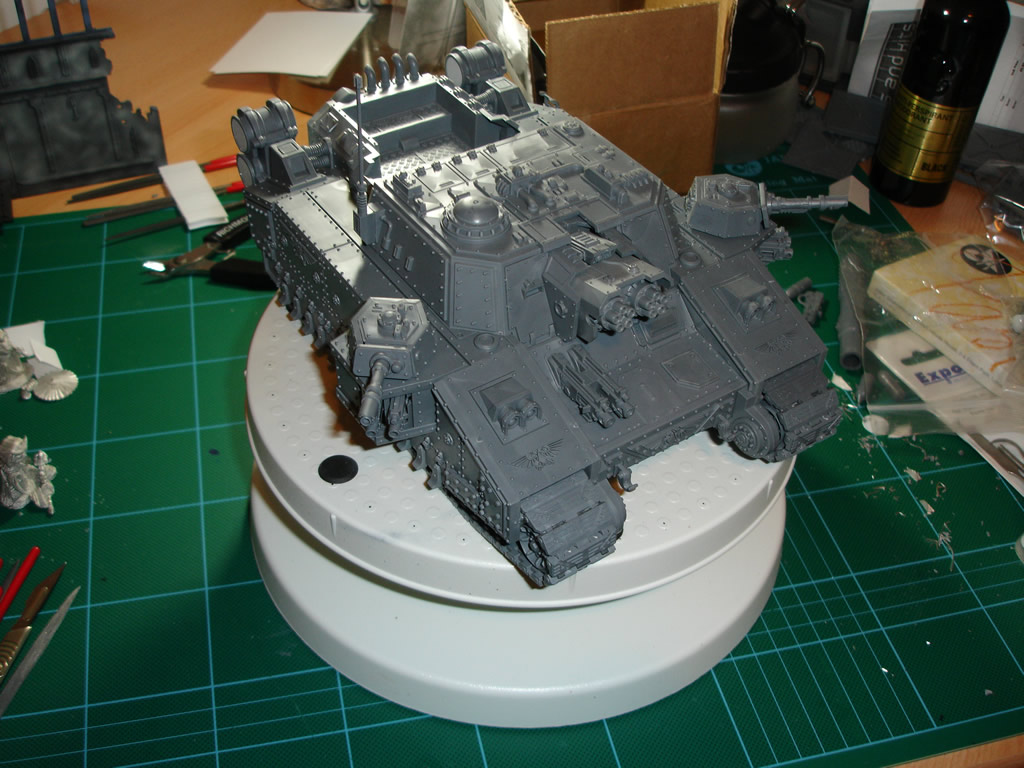
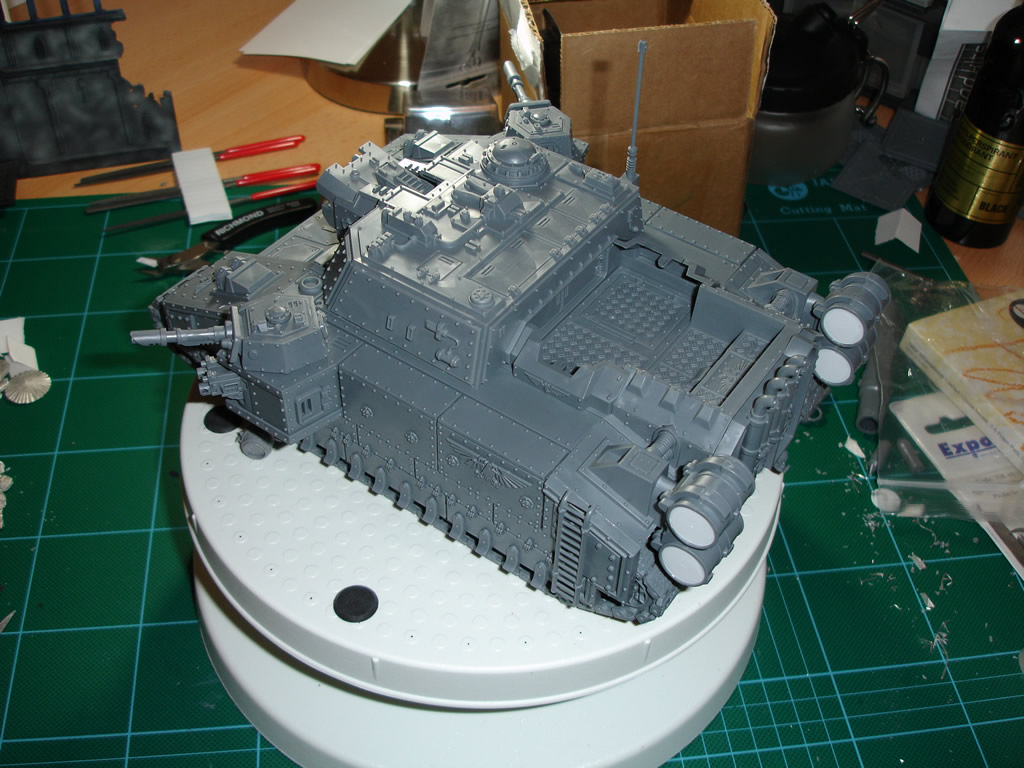
assembly1.jpg

assembly2.jpg

assembly3.jpg


Both track sections at the front do slope a tiny fraction. The inner guide wheels both glued on with a small slant, however they do match (although the picture doesn't suggest this).

The main gun assembly completely removes so that I can paint the underside and metallic components completely. The two turret guns are also going to fully rotate so currently aren't glued so that I can also tackle these as separate components. I'll likely Vaseline the moving elements once they're fully painted so that they don't foul the paint when it's complete.

Infuriatingly I'm unlikely to get much more done before Wednesday as I'm out tonight and tomorrow. I'm hoping that Wednesday won't be too cold and I can go into the garage and undercoat this with the intention that I can start putting base colours onto it over the next week. It's going to be a long just but worthwhile.
 

RuneBrush

New member
Managed to get a little bit of an update on this. Monday evening the weather had died down enough that at 11pm I was able to get some undercoat on this ridiculously large tank. Tuesday saw me tidy up the two read autocannons and get them in place and last night I managed to get those undercoated too. The autocannons fit on with the worlds smallest piece of plastic and one infuriatingly did glue on square, however it's too late to do anything and I'd have to do a major rework to get it fixed. If anybody else has one of these, my recommendation would be to pin the autocannons in place with an L-shaped piece of wire rather than rely on the tiny piece of plastic.


Thankfully the undercoat has gone on quite well despite it being a bit of a rush job :)

Before the other half came home from her evening out I mixed up a few test colours to see if I could match the Vostroyan colour that the Eavy Metal team do for their super heavies. This isn't the Graveyard Earth & Shadow Grey colour that is often posted on forums & GW's website - this actually creates a rather mucky brown colour which I personally thing is horrible. Instead I want the grey/beige colour that This pic shows three test swatches that I'd done on the back of the main gun (where it won't show).


Left-hand swatch is pure Denehb Stone, the middle is a 2xDS and 1xMenoth White Base and the right-hand is 1xDS and 1xMWb. Still not 100% satisfied yet so doing a little bit more investigation.
 

Meph

Cat-herder Extraordinaire
Don't forget that with oil paints or even normal acrylic washes you can adjust the tint and shade as well during the paint process. And also, for mixing colours, don't be afraid to go out of your comfort zone, you can experiment by adding a little bit of whatever; green, blue,brown, ... to add a very subtle shade to the paint. Once you find the tint that you want, you can mix up a batch in a little jar for later use.
 

cassar

BALLSCRATCHER
Don't forget that with oil paints or even normal acrylic washes you can adjust the tint and shade as well during the paint process. And also, for mixing colours, don't be afraid to go out of your comfort zone, you can experiment by adding a little bit of whatever; green, blue,brown, ... to add a very subtle shade to the paint. Once you find the tint that you want, you can mix up a batch in a little jar for later use.

Smart arse..Lol my head is full of technical ouch.
 

Bloodhowl

Active member
my recommendation would be to pin the autocannons in place with an L-shaped piece of wire rather than rely on the tiny piece of plastic.

If those are the tiny bits of plastic right next to the turrets in the picture, why not cut down a nail to use instead of the plastic?
 

RuneBrush

New member
Don't forget that with oil paints or even normal acrylic washes you can adjust the tint and shade as well during the paint process. And also, for mixing colours, don't be afraid to go out of your comfort zone, you can experiment by adding a little bit of whatever; green, blue,brown, ... to add a very subtle shade to the paint. Once you find the tint that you want, you can mix up a batch in a little jar for later use.

Very true. I managed to have another play and a mix of 2xDenheb Stone and 1xBleached Bone is a pretty good colour match. The BB adds a green tinge to the paint and the oil washes should push the browns & blacks. I think I've made enough paint up in a little dropper bottle :)

Smart arse..Lol my head is full of technical ouch.
Mine's full of sodding cold :(


If those are the tiny bits of plastic right next to the turrets in the picture, why not cut down a nail to use instead of the plastic?

Those bits of plastic connect the turrets to the side sponsons and are a reasonable fit. The bit I had an issue with is the two pintle mounted guns on the rear compartment - you can just make out the black guns on the black background :D
 

Bloodhowl

Active member
Those bits of plastic connect the turrets to the side sponsons and are a reasonable fit. The bit I had an issue with is the two pintle mounted guns on the rear compartment - you can just make out the black guns on the black background :D
Damn my old eyes. I don't see it.
 

RuneBrush

New member
I'm due to take some more pics tonight so will highlight it out. Finally got round to putting some of the hull colour on last night - I was hoping to have done some sooner but the weekend & monday were wiped out as my cold completely flattened me. I have passed it onto the rest of the office though...

Can't believe how different the tank looks with the two turret guns with just the hull colour on!
 

RuneBrush

New member
Due to the other half being out and some clever programming on the TV recorder so I could record Misdomer Murders and Masterchef (I'm sad I know) I got a good couple hours worth of airbrushing on this beast last night. I'm finding that I'm having to pay real attention to the coverage of this colour as it probably takes three or four passes to get a solid colour with no undercoat showing through. With hindsight I should have undercoated in grey - but I didn't have any grey undercoat so that was a non-starter to being :D

I've still got a lot left to cover and I really do hope I've mixed enough paint up as I seemed to be getting through it very rapidly last night! The paint is also a lot paler than I'd hoped, however as Meph said, the oil washes should tint the colour sufficiently :)


Bloodhowl

Active member
AH HA! I now see these autocannons of which you speak! However, still can't see the fiddly mount bit...
 

RuneBrush

New member
I've actually managed to spend quite a bit of time working on this over the weekend, although Friday was a bit of a no-go as I had sent the other half to bed early and I didn't want to disturb her with the noisy compressor - I did mix up a new batch of hull colour though, which true to form was a shade different to the original colour. It was however a lot more the colour I was originally after so I've stuck with it and resprayed the whole tank.

The hull has been 99% painted now, and it's just a tiny bit underneath that needs to be done. However despite having mixed up around 4ml of paint, I was getting low again :s So going to keep the last little bit I have mixed for any touch ups and mix up new to finish the bottom (if it's a shade off it's not the end of the world). I did the first bulk of masking off yesterday afternoong (always find it a bit of a balls-ache to do) and have reset the rear-compartment floor, autocannons to Chaos Black along with the exhaust vent and gun barrel's on the main gun. My intention is to airbrush these a silver/black colour with a little accents of brass.


(click on pics for a bigger version)


Next step is more masking :( I want to mask off the front heavy bolters and side sponsen's and hit them back to black too. The rear exhaust pipes need to be taken back to black as well, which I'll attempt without masking as there's not a chance I can get behind the exhausts! The lights and aquilla I'll paint by hand as it's going to be more hassle than it's worth to try mask them :D I've also got the two red strips on the front of the tank - I'm toying with the idea of replicating the red strips on other panels as well, to add an extra splash of colour.

Hopefully I'll get the metallics done by the end of the week and can start weathering over the weekend.
 

Bloodhowl

Active member
The rear exhaust pipes need to be taken back to black as well, which I'll attempt without masking as there's not a chance I can get behind the exhausts!

Can you slide a 3x5 index card (or other thin card stock)behind the exhausts?
 

Meph

Cat-herder Extraordinaire
Annoying... ah hell yes indeed it is! Gah... squinting while you're trying to slide in that tiny bit of tape that has to be juuuust right, and then holding it down with a tiny poking device. All the while trying hard not to bite your tongue.
But it's also soooooooo rewarding afterwards. :D
 

RuneBrush

New member
Cheers all. As much as I royally dislike the masking (and it is true, the more tape the better!), it's make or break of a model that's being airbrushed. On my last project I discovered that cutting little pieces of tape (up to 10mm long) and using a combination of rubber ended sculpting tools and tweezers makes masking off a model significantly quicker and more accurate to get a decent crisp edge

Annoying... ah hell yes indeed it is! Gah... squinting while you're trying to slide in that tiny bit of tape that has to be juuuust right, and then holding it down with a tiny poking device. All the while trying hard not to bite your tongue.
But it's also soooooooo rewarding afterwards.
biggrin.png

Oh the rewarding bit is when you gently tweeze the tape off and reveal your masterpiece - hopefully without any extra bits of colour :D

Can you slide a 3x5 index card (or other thin card stock)behind the exhausts?

Not the foggiest! It's worth a go though and I think I have some super thin plasti-card on the top of of one of the cupboards which I think is flexible enough to get behind the pipes. With hindsight, I would have been better off leaving the pipes, front part of the lights and ladder off - but hey it's all sent to challenge us!
 

Bloodhowl

Active member
Oh the rewarding bit is when you gently tweeze the tape off and reveal your masterpiece - hopefully without any extra bits of colour :D

I've said it before and I stand by my statement. Before you apply the masking tape to the model, stick it on your forehead (watch out for them eyebrows!), then stick it to the model. The oils in your skin reduce the tack of the tape enough that it will not lift off the paint on the surface you are trying to mask, but leaves it tacky enough to do the job. Sounds silly, but give it a try!
 

RuneBrush

New member
I've said it before and I stand by my statement. Before you apply the masking tape to the model, stick it on your forehead (watch out for them eyebrows!), then stick it to the model. The oils in your skin reduce the tack of the tape enough that it will not lift off the paint on the surface you are trying to mask, but leaves it tacky enough to do the job. Sounds silly, but give it a try!

Lol, I actually meant no extra bits of colour on the model where you've not spotted a gap :D The yellow tape you can see is tamiya tape which I've never had any issues with taking paint off (yet). It's significantly more expensive than the stuff you can buy from diy stores, but personally it's the mutts danglies when it comes to masking things off.
 
Back To Top
Top