Yeah, that was not my best con experience. Though at the time I just went into damage control mode. I was more focused on evaluating what was broken, how I could fix it, etc than anything else. But if I had a whole display case collapse right now, I'd probably just sit down in front of it and cry. =P And BAM, you should use those millions in cash to line the bottom of the display case. Should provide a nice cushion in case anything falls.
In other news, I've definitely got a sniper trolling my Northumbrian. Been keeping an eye on it for the past few days and there's someone voting 1's each day. The good news is (aside from the fact that CMON keeps removing them) the piece will be out of the "Top Last 7 Days" tomorrow, so that's usually the point at which the sniper moves one. Lucky for him I'm about to upload my samurai to the gallery, so he'll have a whole new piece to troll.
Moving on to my latest project, I just started working on a 75mm historical piece. This is Pegaso's Captain of the Hussars. I love the kit, actually posted an image of the unpainted kit last year when I was contemplating potential Crystal Brush projects. He's been sitting on my workbench partially assembled for quite some time, so with no urgent projects I decided to finally start painting him. He's a mounted figure and I'm starting with the rider. My focus so far has been the head, but I wanted to share a quick look at the rest of him (minus the horse) so you could see what I'm working with.
View attachment 48255
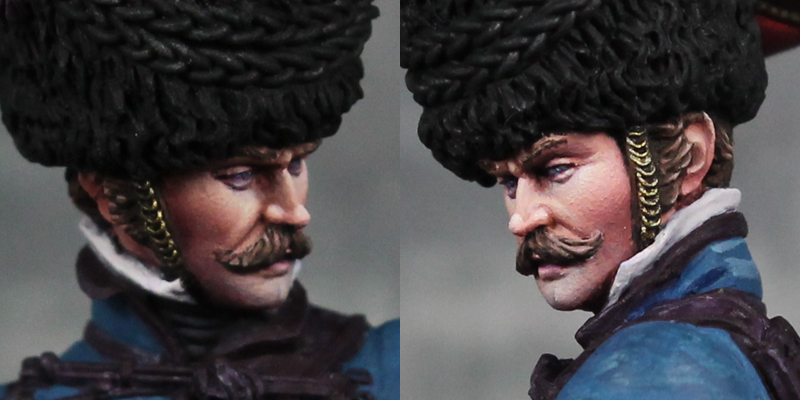
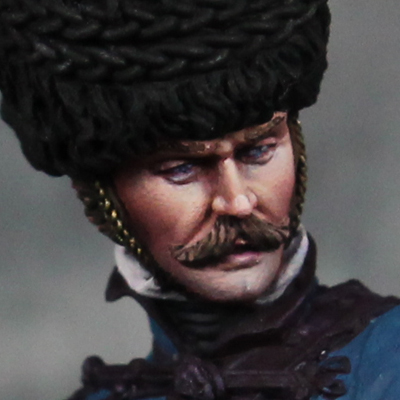
As an add on to my face painting class, I thought I'd say a few words about how I did this guys face. For a display piece I'll take my time with the face (going to go a lot slower than I did in the class!). I'll also approach it in a couple stages. The image on the left is the first pass at the shadows and highlights. From there I'll often take a break and then re-evaluate the figure. I want to see what works, what doesn't. Does it need more contrast? I find it also helps to view the figure in different lighting conditions (just look at him in different rooms of the house/apartment). In this case I felt a few shadows needed to be strengthened, some blends needed fixing, and I wanted to go a bit lighter on the top highlights. So the next pass involves fixing all those things. It's also helpful at this point to paint in some details around the face plus the hair, facial hair, and eyebrows. It's amazing how much this can help the face look better. Then, when I'm finally happy I'll go in and do the glazing stage to add the color to the cheeks, nose, ears, and then some more for the stubble.
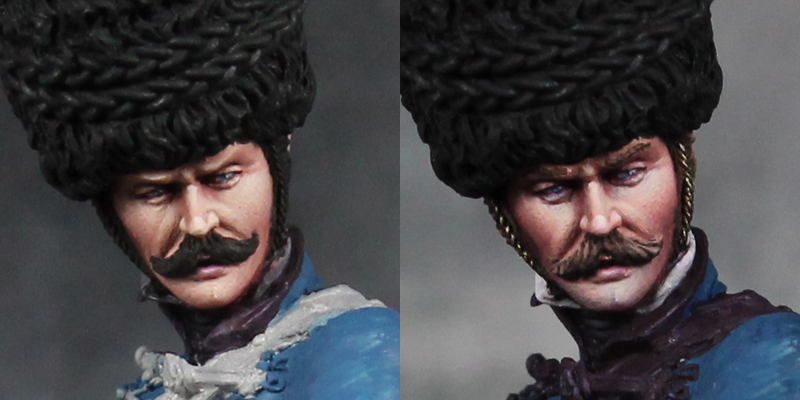
Since his head is turned and slightly tilted, I did more shading on the right side than I did on the left. It's not as noticeable when you look at the face from the front, but it can easily be seen when you compare the two side views.
I've got to fix the shadow above the left eye (the blend into the midtone isn't quite right), but other than that the face is pretty much finished.
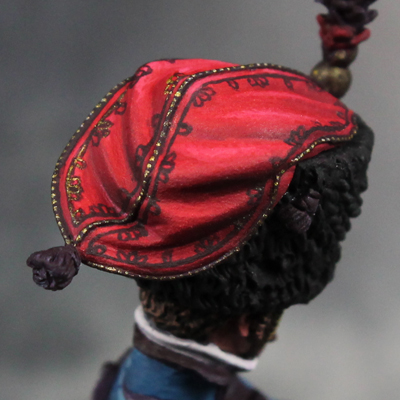
I've started working on his hat. The box art added some extra detailing onto the cloth section. I liked the idea so I decided to do it too. I first put down a dark purple as base and plan to go over it with a gold. I've done most of the sculpted on detail in gold, but the painted on parts are giving me some trouble. I decided to stop for the night and come at it again with fresh eyes. I'm going to try some alternative approaches and see if those work better.