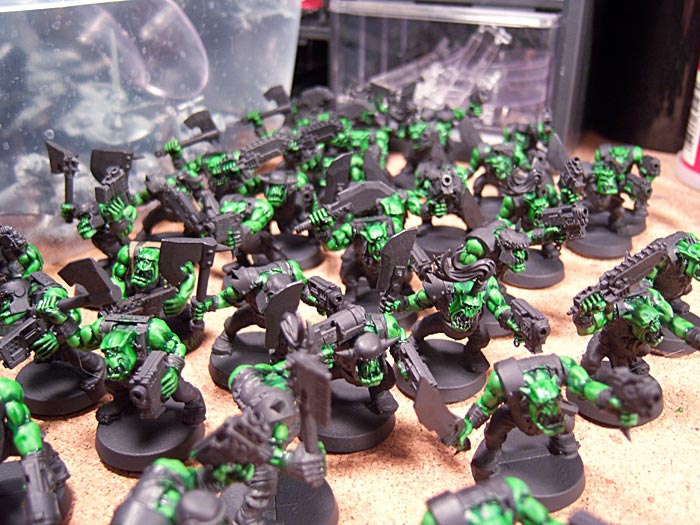
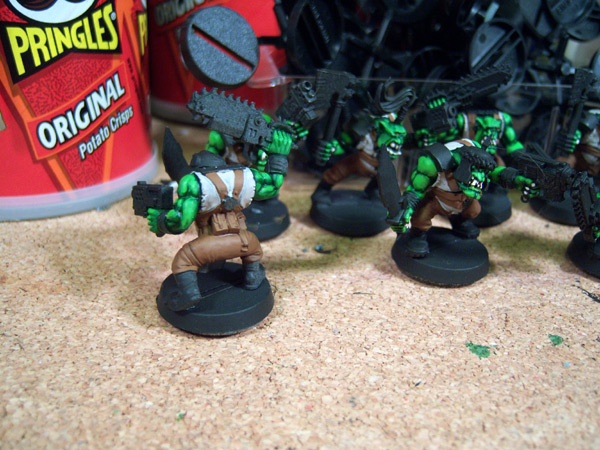
Black Reach Sluggas

Sukigod

Member
Seems as though you folks like to make things hard on folks :D as much as I like challenge. The two boxes of Black Reach boyz seems to have won out on the poll at CMON. I have to admit I lied a little bit, or so it would seem to the carefull observer. There was to be 40 boyz but four of them seem to have gone AWOL so I\'ve added the two testing shoota boyz to the mix to bring my total mob to 38 boyz. No small feat.

poll1.jpg


I\'ve gone ahead and primed them and started the Orkhide Shade base for the skin, getting about half of them dased tonight.

Warboss Red Jack will snap the boyz inta shape while I\'m gone!

sluggas1.jpg
 

Sukigod

Member
Things have been busy around here so I haven\'t gotten much time in on the Black Reach boyz. I am nearly done with the skin. I\'ve taken group shots as I finished each color to show the steps. Pretty boring but I hope it\'s of some interest to some of you.

First a coat of Snot Green...

sluggas2.jpg


Then a smattering of Goblin Green in smaller areas, mostly on the upper parts but still pretty good coverage as this will be the base median color overall.

sluggas3.jpg


Here\'s a bit of a closeup of the boyz so you can see how much detail I do (or lack of...)

sluggas4.jpg


Note in the last photo how light and pale the boyz are after the Goblin Green? My nifty little trick to bring a deeper, more intense green color back is to do a wash with Dark Angels green. I haven\'t seen anyone else do this elsewhere and I don\'t know how or why I started doing it this way but it works for me. This is the boyz after the wash. It helps smooth the transision between colors and brings the green back to a darker, yet vibrant green.

sluggas5.jpg


Well, that\'s it for tonight. The next step will be a very quick touch up of Golbin Green and a final highlight of Scorpion Green. Then it\'s off to pants and shirts! Yay!
 

PegaZus

Stealth Freak
It all looks good. I\'m contemplating a bunch of lavender orks myself. Just to be different. Orange was already done, I know.
 

Sukigod

Member
Spent some time on the boyz this weekend and finished up the skin a couple day later than expected. Here\'s the process to finish the skin.

Here\'s the touch up of Goblin Green.
sluggas6.jpg


Here\'s the mob after the Scorpion Green highlighting.
sluggas7.jpg


Aaaand, here\'s the boyz all ready for thier close up no that they\'ve gotten their teeth and eyes painted.

sluggas9.jpg


Now I\'ll block out the shirts, pants, straps and boots with GW foundation colors and wash all of this in Devlin Mud. I\'m hoping to have this part done by next weekend, leaving the following week to do all the metals and small details.
 

Sukigod

Member
I must be a glutton for punishment.Here and now, I will make a promise - to never promise to paint up more than 15 models at a time.

I spent yesterday drinking and today with a hangover so.... no detailed work, that means Gazghkull is out. Since I can paint troops with a shaky hand, I\'ll work on them today!

Got most of the colors done today - shirts, boots, pants, leather straps, gloves and a few cloth tabbards. All that \'s left before the mass washing is the metals. Weapons, helmets, armor plates, rings and the like. I did actually start some of the metals. I\'ll do three \"colors\" of metal. Bolt Gun Metal for weapons and armor. Mithril for the chains/lins and rivets, and Brazen Brass for some touches of color on some the weapons and helmets for accent.

Here\'s at the end of the day....

sluggas11.jpg

sluggas12.jpg

sluggas13.jpg
 

uberdark

New member
lookin good. my boyz could still beat your boyz though. :p

hehe. i speed painted 40 at once and dont plan on doing that again anytime soon so i definitely dont envy you. hey if you get a chance take a look at my army list over at the waagh and let me know what you think. i am pretty new at the army building since i used to primarily be a painter.

thanks and cant wait to see em\' finished.

btw whats after this army?
 

Sukigod

Member
@Uber - I\'ll go over and take a look-see in a few and remark over there.

Necroghast - why the Prinngles hate? ???lol

OK - progress is made today.
I\'m showing some nice, durty, closeups of the boyz so you can see the difference Devlin Mud can make. I know there\'s a lot of people who want to know \"what does it look like over...\" so here\'s a few colors both light and dark with before and after shots from the front and back.

BEFORE FRONT
sluggas14_th.jpg

CLICK HERE FOR FULL SIZE 1200 PXL SHOT

BEFORE BACK
sluggas15_th.jpg

CLICK HERE FOR FULL SIZE 1200 PXL SHOT

AFTER FRONT
sluggas16_th.jpg

CLICK HERE FOR FULL SIZE 1200 PXL SHOT

AFTER BACK
sluggas17_th.jpg

CLICK HERE FOR FULL SIZE 1200 PXL SHOT

I\'ve got some touch ups like a quick drybrush of meatls to bring the highlights back and then I\'m on to basing!!! YEAH!

Again, @Uber - I\'m also painting Gazzy at the same time so I\'ll finish him up, then it\'s off to the Skullhamma that was tha second choice on my last \"what should I do now?\" poll. I\'m really itching to do some cuttin\'and glueing after this.
 

Aliengod3

Active member
The devlin mud works great. I may have to try that on my orks. Great looking army too. Makes me want to finish my orks and rebuild my battlewagon.

Also how did you make the rivets on your battle wagon? Thanks.
 

Sukigod

Member
@Aliengod3 - Rivets. I picked up something called a \"Rotary Leather Punch\". It looks a bit like a riding spur mixed with a pliers, basically a heavy duty hole punch. I use a pretty thin stock and punch out a ton at a time. The plastic bits tend to get stuck in the punch tube so I\'ve got a bit of wire stuck through the back end to push tehm out when I\'m done. I\'ll try to take picture of it soon and post it here.

Beware - punching your own rivets it time consuming. Do it while watching a movie or something.:D
 

Bigdennis52

New member
I do lots of things while watching a movie, just put it on pause while you need to move stuff around then sit back relax and watch the movie...

probabily why my stuff still isnt getting done ... lol
 

Sukigod

Member
It\'s late - I\'m tired - they\'re done.

sluggas18.jpg


I did take picks of the basing steps and I\'ll put them up here tomorrow. Now it\'s time to sleep. (and on to finish Gazghkull)
 

PegaZus

Stealth Freak
Originally posted by Sukigod
Now it\'s time to sleep.
It appears so! I\'d say \"sweet dreams\", but that seems inappropriate.

Therefore, how about, \"May your dreams not include anything unpleasant with green in them\". Gotta make sure it\'s legal for those green-skinned slave girls from Orion, ya know.
 

Sukigod

Member
@PegaZus - How did you know mu name was Mudd? heh

People have asked me on different forums as to how I base my models. It\'s really simple and easy (which I like very much) and I\'m going to show you how I do it. It\'s in two steps - sand, then grass - easy peasy.

Sanding:
Step 1: I have small tub of fine sand I dug up from a parking lot somewhere. I mix white/pva/Elmer\'s glue with water - about 25/75, water/glue. I like my glue thicker, but not right out of the bottle thick.

Step 2: I use a crappy, throw away brush to put down some glue.
Step3: Put the boy in the bowl.
Step 4: Push/wiggle him down into the sand until the base is buried.
Step5: Pull him out and shake off the excess sand.
Step6: Gives ya this!

sluggas19.jpg


Grass:
Step 1: I picked up a tub of GW grass. I know here\'s so many alternatives and cheaper and.... whatever. I think I paid $8 for this and have barely put a dent in it. It\'s worth it unless you\'re flocking entire hills/terrain boards.

Step 2: Using the same glue from before (and brush) I put down some random spots of glue. I have not let the sand dry, I just don\'t push my brush around to stir up any of the sand.
Step3: Shimmying the boy around in the grass doesn\'t work like it did in the sand. I sprinkle a bunch on top, not worrying where it goes, as long as it covers the glue spots.
Step 4: Tilt the boy on his side and TAP the excess off back into the tub.
Step5: It took me a while to find this trick out and now I pass it on to you. Blow a puff of air on the grass - don\'t worry if you think you\'ll blow it all off - you won\'t. This puff of air will remove the excess grass that isn\'t touching glue and it will amazingly make the grass stand up. Don\'t believe me? Try it for yourself.
Step6: Gives ya this!

sluggas20.jpg


Here\'s a closer look at the boyz showing the end product. The highlights are a bit bright as I haven\'t Dull Coted them yet, but this will show you what the final details area like. Not great art but nice tabletop.

sluggas21.jpg


Some people have also been asking me \"how long did it take?\" and \"how much time per boy?\" kinda questions. It took me 24 days to finish culminating in about 60 hours of painting. In terms of hours/boy, roughly 1.5 hours. My secret? GW Foundation paints and Devlin Mud.

Thanks for looking and hanging in there!

Sukigod
 

Enzed

New member
What is this dullcoat exactly? Its a form of matte varnish I know, but is it specifically made of minis and is it possible to get it in Aust/Nz?
 

Sukigod

Member
Originally posted by Enzed
What is this dullcoat exactly? Its a form of matte varnish I know, but is it specifically made of minis and is it possible to get it in Aust/Nz?

Dull Cote is an enamal (I think) matte spray varnish made by the Testors company. I know they can\'t get it in the UK since it has unacceptable levels of tolune in it. They are in the process of making a \"safer\" version so they can start selling there again, when, I don\'t know.

As ofr NZ/AUS. I\'m not sure if it\'s available there or not, the smae rules might apply. Does anyone else here have an idea if it is or if there\'s an alternative over there?
 

Sukigod

Member
Right back at me, eh uber?:D

I\'ll see your 15 bikes in one week and add a squad of burnas!lol

(December\'s gonna be VERY busy:drunk: )
 
Back To Top
Top