Empire Wizard

dogfacedboy uk1

New member
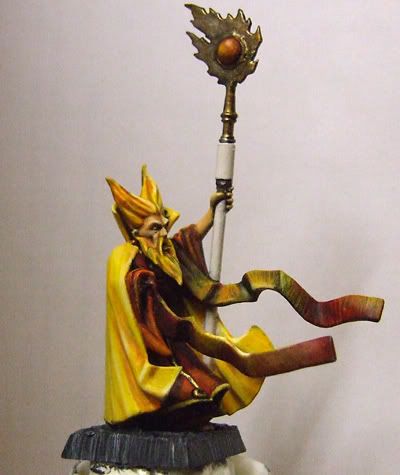
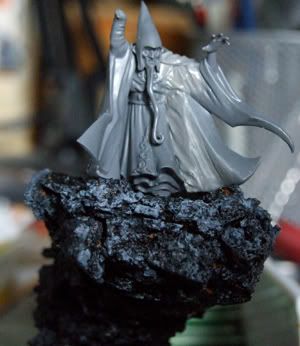
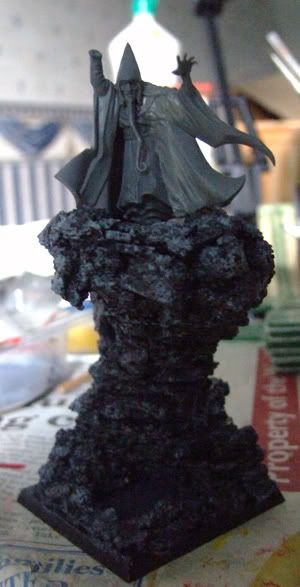
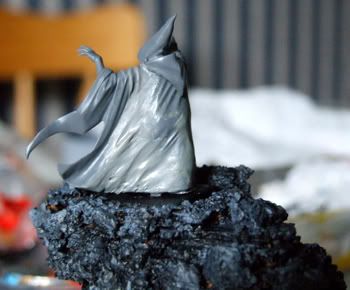
As you all probably know the empire wizard box set has two bodies and absoloutely shed loads of bits for variations and of course conversions, so yes I will be doing more wizards! I will sculpt a couple more bodies from procreate putty and then use the bits to make it up to four wizards! Here is the other wizard, the main conversions here are the arm position to make it look like hes casting a spell and the rear of the cloak to reblend those ugly joins. I m also going to be extending the smoke from the potion bottle he will be holding into a more interesting position. Check out these photo\'s.....

WIP3.jpg


WIP4.jpg


WIP2.jpg


WIP1.jpg
 

OrkyDave

New member
This looks really , really cool!

What did you do to the wizard to \'open\' him up? I like the GW plastic wizards but every one I have seen looks enclosed.

The potion bottle smoking skull will be fantastic! And judging fron the base of your other wizard you should be able to pull it off too!

Reminds me of one of the death Eaters from Hary Potter!
 

dogfacedboy uk1

New member
Hi OrkyDave, yeah i played with the arm positions and thought rather than have that arm over a crystal ball it makes sense to have it casting a spell. All you need is some putty and basic sculpting skills really - enough to rework the cloak on the outside and blend the inside of the cloak to look nice and match the shoulder joins. Just ram a strip of putty in the join and play with the angle until you are happy, then justsmooth it out nice and start putting the folds in. Or sculpt it smooth into a neat shape and leave it to harden. then add thin layers of putty onto the hard base and sculpt the folds onto that.

Hopefully these wizards will look great when complete - I need some more stuff in my cmon gallery its a bit bare!
 

Yetie

New member
I really like the look of your two wizards, this one will look great once finished. You going for just gray smoke, or something a bit different??? The base on the bright wizard is really nice :D Great Ideas and great work so far!!!
 

dogfacedboy uk1

New member
Hi Yetie, well i was going to do a heavily blackened smoke but now you mention it i may consider doing something different. Not too sure on the painting of this one yet, I will finish painting the bright wizard before i worry about colour choices for this guy!!
 

olliekickflip

New member
Hmmmm, now where have I seen that pose before????


Cool conversion...I had the same idea with repositioning the hand. Can\'t wait to see him painted up!
 

dogfacedboy uk1

New member
Originally posted by olliekickflip
Hmmmm, now where have I seen that pose before????
?????????????????????????

I would say that a wizard with an outstretched hand casting a spell is, urrhh, fairly usual really so I was disappointed when they didn\'t include it as an option when i first saw it in WD, hence the conversion. Hopefully I will be able to do a half decent paint job on this guy and his little familiar. We shall see.
 

olliekickflip

New member
No, I just found it funny that we both had exactally the same idea with that hand. It makes it a whole lot easier to paint as well! I guess great minds think alike right!:bouncy:

a
 

flamingdog

New member
This looks like an excellent idea, and it\'s very similar in some ways to a conversion I\'m thinking about, so I\'ll be watching this with interest.

How did you make the rocky base?
 

dogfacedboy uk1

New member
Olliekickflip - right with you! It was late and I was tired! Im still confused why GW did not do an outstretched hand as standard though it seems so obvious that people want this pose.

flaming dog - the method i used was very labourious as i only had a really thin roll of cork sheeting available to me and I think was like between 30-50 layers of the stuff thick - very tedious to do!! Then the small amount of thick cork I had (from some left over flooring expansion strip) that was chunky enoughy to look more convincing I broke up and glued to the sides to break up the horizontal layers. So to do this base properly get a thick cork tile and just make up a layered rock shape with it, gradually expanding the width of each layer. Then glue broken pieces to the sides to break up the visible lines, create a space for the mini on the top layer and job is done. This was made on a 50mm base by the way. Spray it black and paint away!! Mine has had about 3 lots of grey on so far and then washed with black. I have more grey shading yet to be started on this base. I will use about 4 shades when i get around to it which should make it look more natural.
 

dogfacedboy uk1

New member
Here\'s a little update on the wizard. I have been really slow on this one, but I\'m getting there. I decided to try my hand at source lighting, so let me know what you think. Its my first attempt so advice on how effective it looks would be great. The picture isn\'t that great but it shows enough I think to give you the idea.I have started the first coats on the base so i hope to have this guy completed soon.

WIP2BW.jpg


The staff is nearly finished, just the middle section to paint, rehighlight with white and the metallics to polish off. I will gloss coat the central gem after adding some highlights and a matt coat of varnish. The base and cloak will be painted last as i want to conceal the join on the cloak with some procreate.

**UPDATE** Since taking this photo i have toned done the strong yellows and white on the scarf thing with some reds and orange, looks better now i think. Base painting is underway!!
 

DaN

New member
Whilst it does look fantastic so far - I WOULD advise at LEAST having a plain background for your photos - we get distracted easily here at CMoN, and people could end up reading your newspaper :p
 

dogfacedboy uk1

New member
lol Dan. I was actually thinking maybe putting little things in the background of my photos now and then just to confuse people. Seriously, my blue white gradient sheet picked up some crap on it from somewhere (not literal crap) so i put it away. I may use a sheet of plain white paper for wip shots next time. At the mo its just pure laziness to move it from where I am working on it.
 

dogfacedboy uk1

New member
Just a quick update and not a great photo really - still struggling to get some good wip shots without setting up good lighting etc. Really slow going at the mo, but this is nearly finished, just some tidying up on the wizard and source lighting on one side of the base and the top edge of the base and its done!

wizardwipfinal.jpg
 

dogfacedboy uk1

New member
Here is a nearly final stage set of photos for the wizard, still not happy with them - im gonna have to try and dig out my tripod and see if that makes a difference as they are still poor quality and not showing the mini at its best. Still got the base to finish......lol

empirewizard9.jpg
 

Bjorn firewolf

New member
really nice strong well blended yellow, i love the colors, it looks ver classic Games workshop, but the dark base makes a nice contrast.
 
Back To Top
Top