Imperial Rescue Valkyrie WIP

winterdyne

New member
Thought I\'d post this up to get some feedback - currently waiting for a chance to carry on with the decalling (custom printed), then it\'ll be a quick oil wash and drybrush run, and final assembly...

rescue_valk_wip1.jpg

rescue_valk_wip2.jpg

rescue_valk_wip3.jpg

rescue_valk_wip4.jpg


Weathering is done with the salt and hairspray method...
 

Ravenor

New member
Well that is one good start here.
I like the back ground idea, I like the unusual flashy color.
I look forward to see the detailling with your custom markings.
The weathering seems quite OK although some areas (cockpit access steps) tend to be quite clean while the surrounding area is quite weatherd down...
Carry on, that\'s a great job, hope you will put an injured pilot and a smoke grenade....
 

cleen X

New member
Great stuff! The color scheme is a little flashy for my taste but the weathering have made it more dull and it looks really cool!
You really should add a pilot with a smoke grenade on the base, that would have been awesome!
 

winterdyne

New member
Actually I\'m thinking of using the last of my Praetorian casualty figures on the base, painted in fleet dress uniform colours. Quite how he got to a rocky little island in the middle of nowhere will be left to the speculation of the observer...
 

Legacy40k

New member
It looks awesome.

I\'d love to know what colour you used to basecoat the battle damage:

Ie: What colour is showing through on all the damaged parts and how was it applied?
 

winterdyne

New member
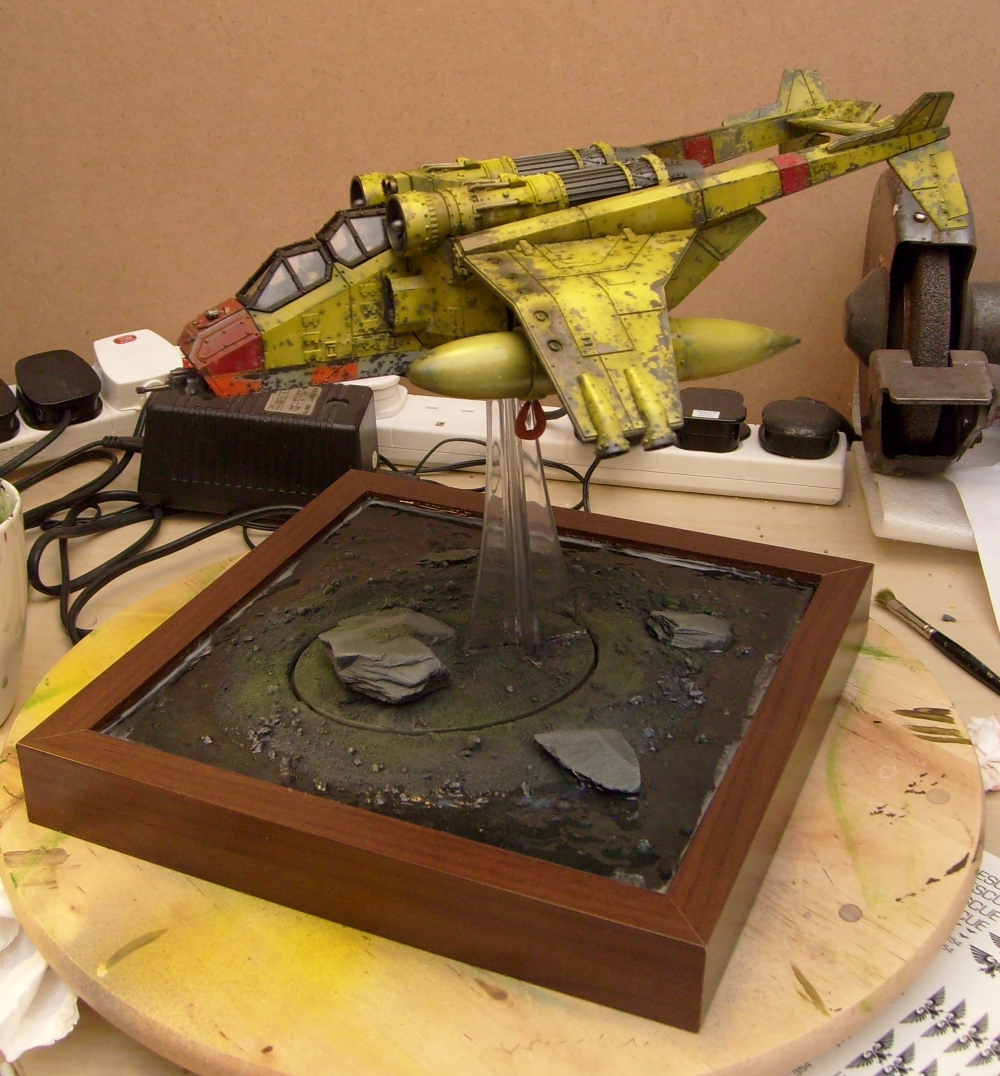
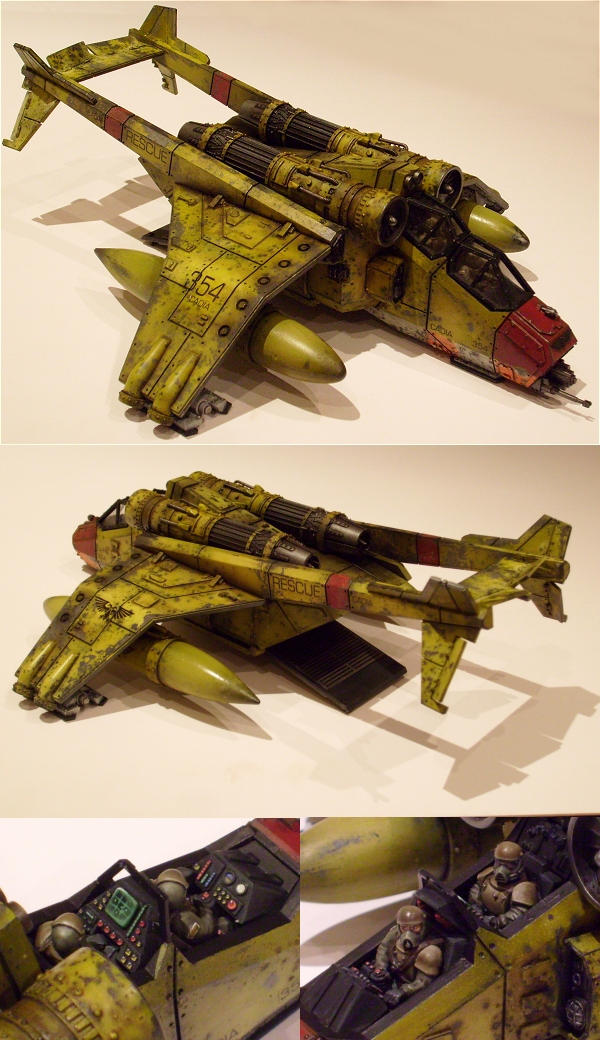
It\'s really a pretty simple paint job.

Halfords Matt Black - rattlecan

GW Boltgun Metal - airbrush, thin coats, highlight centre of panels / dust edges. Quite thin paint - not aiming for very solid coverage here - approx 2:1 water/paint

Add more and more VMC Natural Steel - as above. Also thin paint, getting more towards 3:1

2 Coats of klear. Neat.

Hairspray and crushed dishwasher salt applied.

Mask areas that will be metal - engine fans and exhausts, nose sensors. Many other areas and detials are actually not on the model at this point or will be overpainted again later so don\'t bother masking.

GW codex grey / VMC black grey solid coat applied. Approx 1.5:1 water/paint

Add more and more GW fortress grey / VMC pale grey in thin coats, highlighting centre of panels, dusting edges. Very thin paint! Approx 3:1 water / paint.

Hairspray and crushed dishwasher salt applied again, in roughly the same areas as before. Note there is NO klear coat at this stage - we want to be able to wear through both layers.

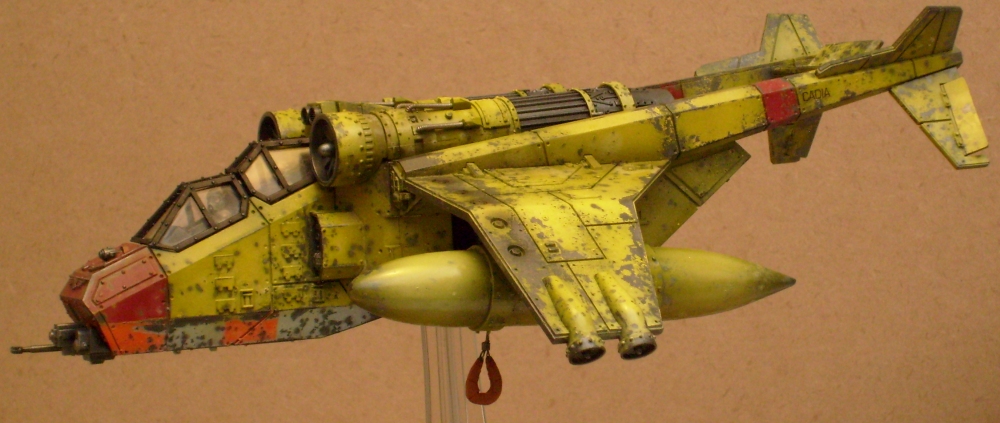
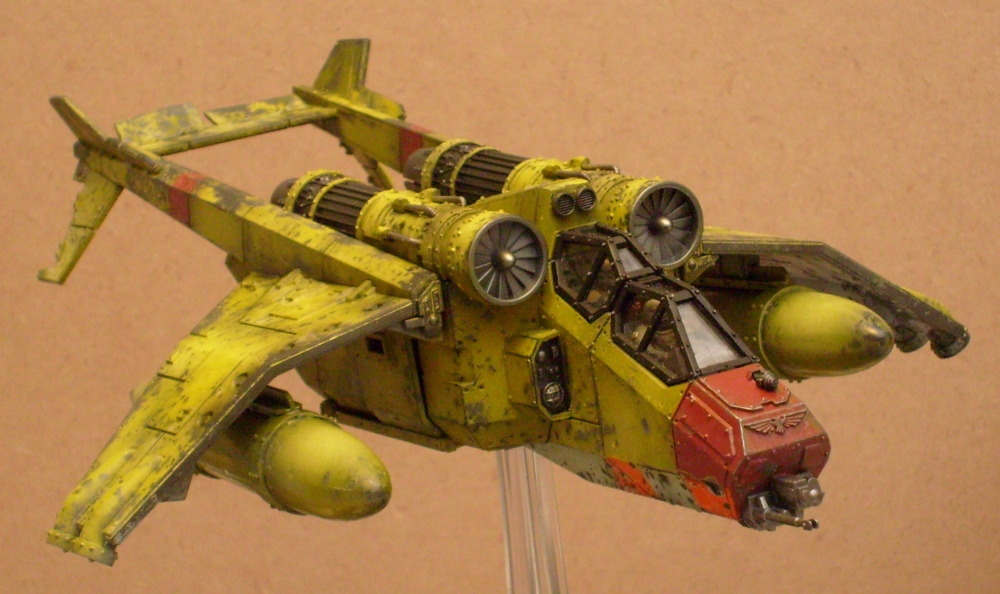
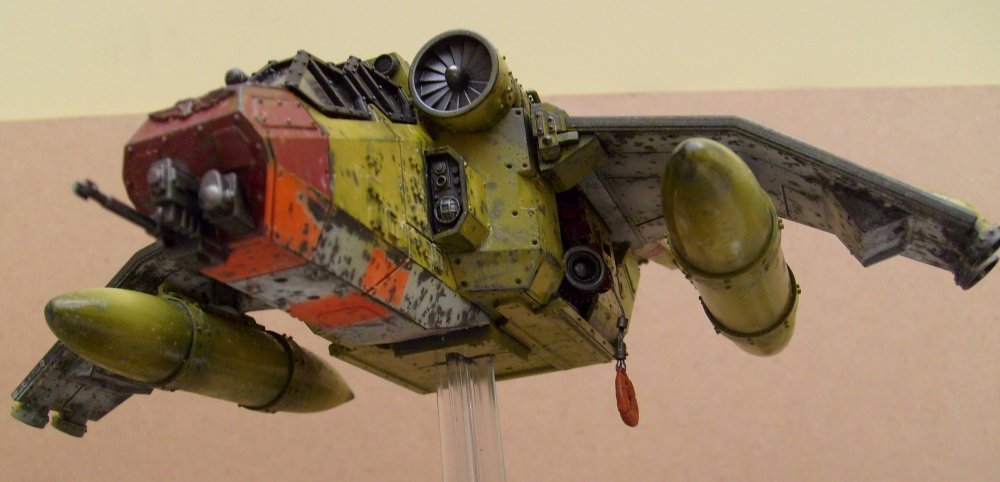
GW golden yellow applied over the grey, many very thin coats (roughly 3:1 water / paint) to build up colour and provide highlight.

Pick off salt / clean with a brush and water. A toothbrush is used to distress larger areas. I had to avoid running the model under water as this tended to remove too much hairspray, but your mileage may vary.

Allow to dry thoroughly and seal with 2 coats of klear.
 

Legacy40k

New member
Originally posted by winterdyne

GW Boltgun Metal - airbrush, thin coats, highlight centre of panels / dust edges. Quite thin paint - not aiming for very solid coverage here - approx 2:1 water/paint

Add more and more VMC Natural Steel - as above. Also thin paint, getting more towards 3:1

2 Coats of klear. Neat.

I don\'t have access to VMC unfortunatly. Is Natural Steel lighter or darker than boltgun metal?

Also, what sort of finish is the clear coat? Matt, satin, gloss?

I\'m not really planning on using the hairspray method for my things because I fear it\'s not well suited to models that will be used for gaming. I\'m afraid it will just keep rubbing paint off. Any thoughts on this?
 

winterdyne

New member
Klear is known as Future floor polish in the US. It\'s high gloss, but more importantly it\'s waterproof when dry and isn\'t oil based (for oil washing). It\'s also very hardwearing.

VMC natural steel is a little shinier than GW mithril silver.

Once the hairspray is dry it\'s pretty solid - it can just be washed off relatively easily. This is why it\'s sealed on after everything. Once that sealant\'s on it\'s really quite difficult to remove the underlying paint or hairspray.
 
Back To Top
Top