Make me a PRO!

Stro

Member
Dont i wish :D ... But anyways here is what i have come up with .. I have recently come upon some WH minis via the wizards trade site .... Me not having much experience painting - needs your advice and help (ya ya i know thats what this site is all about) so here is what I am asking .... I am posting pics of the mini I am trying to paint ... (if you would please) you (as a comunity) will give me advice on each step in painting the mini EX:
where to start
what colors to use
how to mix colors (dilute - what ratio)
how many layers of each color
where to aply highlights
etc..etc..
i think you get the point ... I will choose someones advice and aply it to the mini and then repost pics of the finished steps then get more advice for the next step rince and repeat ..
A little history about me :
how many minis have i painted :
2 and they sucked lol
paints that i have :
Vallejo Game Color (the set that comes in the suitcase)
Experience painting:
Ive painted about 200 model cars/trucks as a kid... got pretty good at it but that is a whole other cookie..
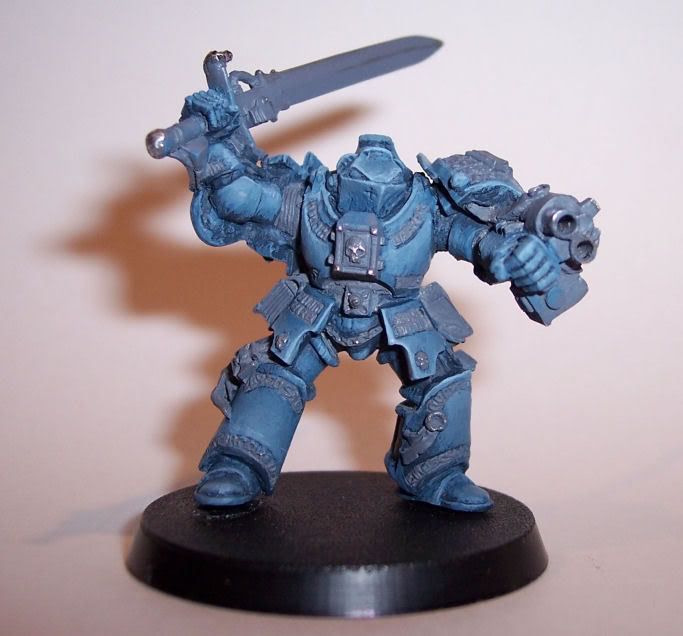
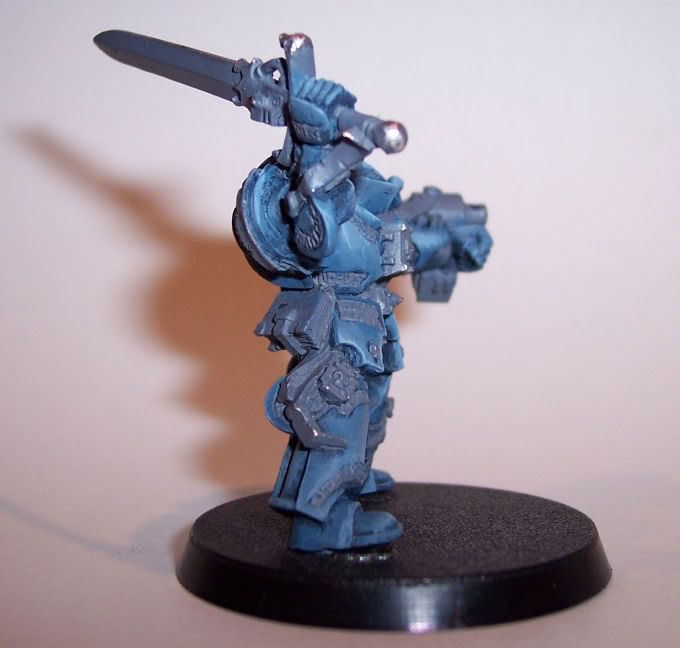
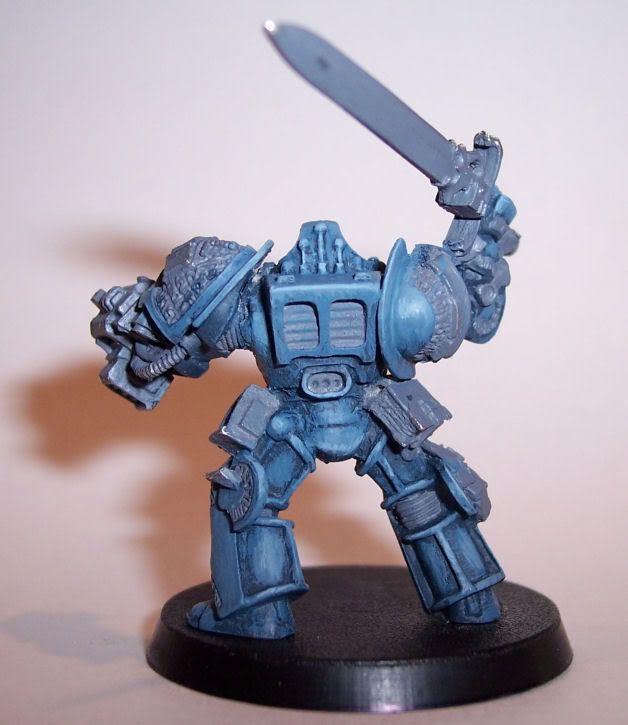
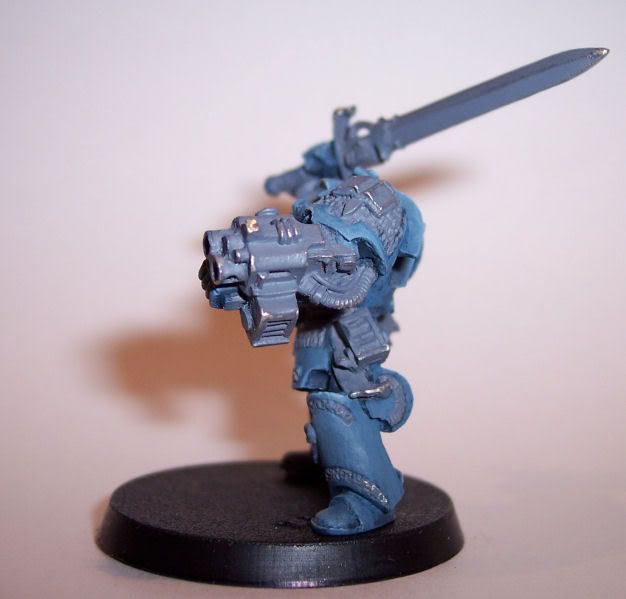
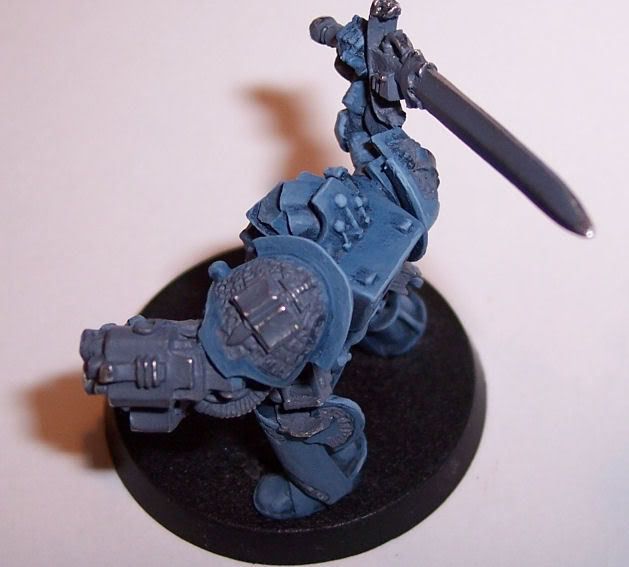
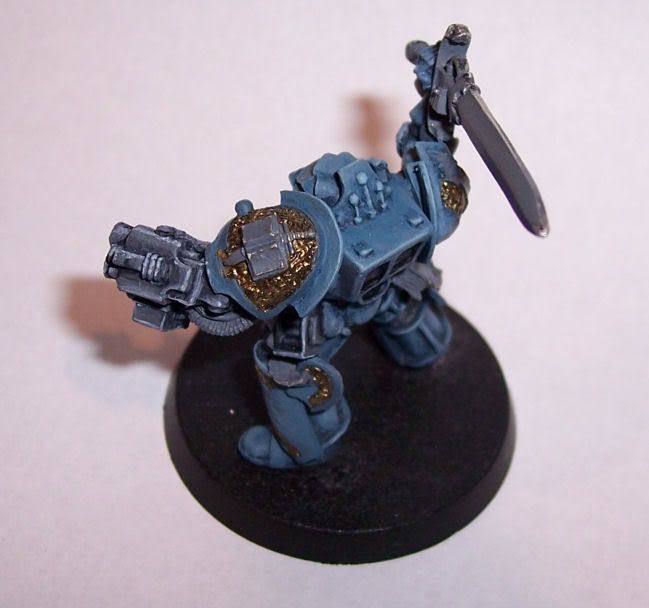
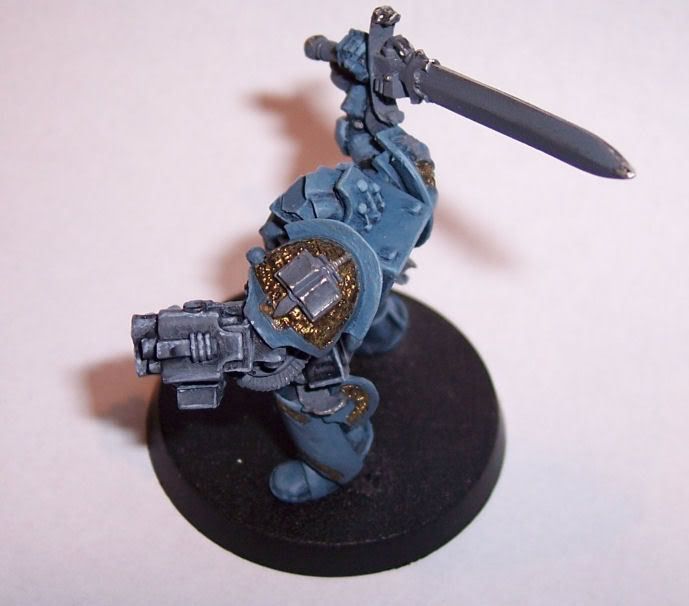
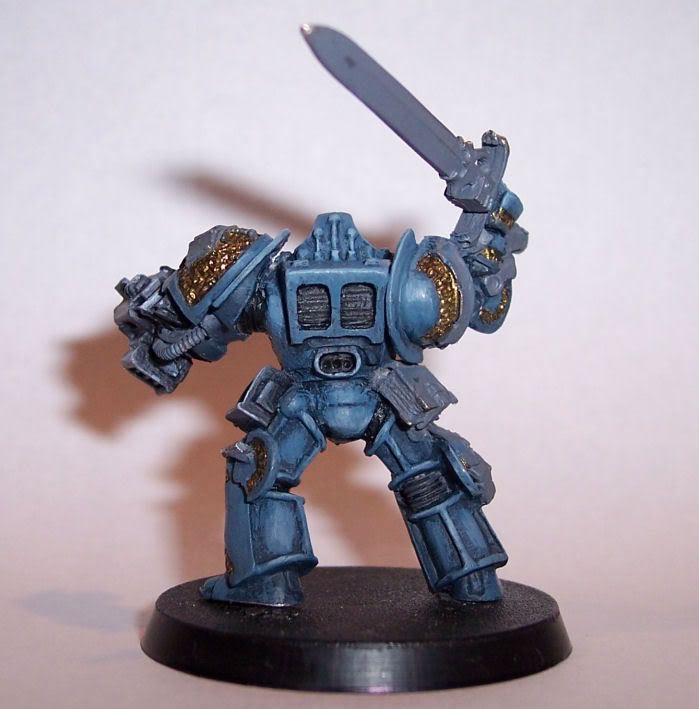
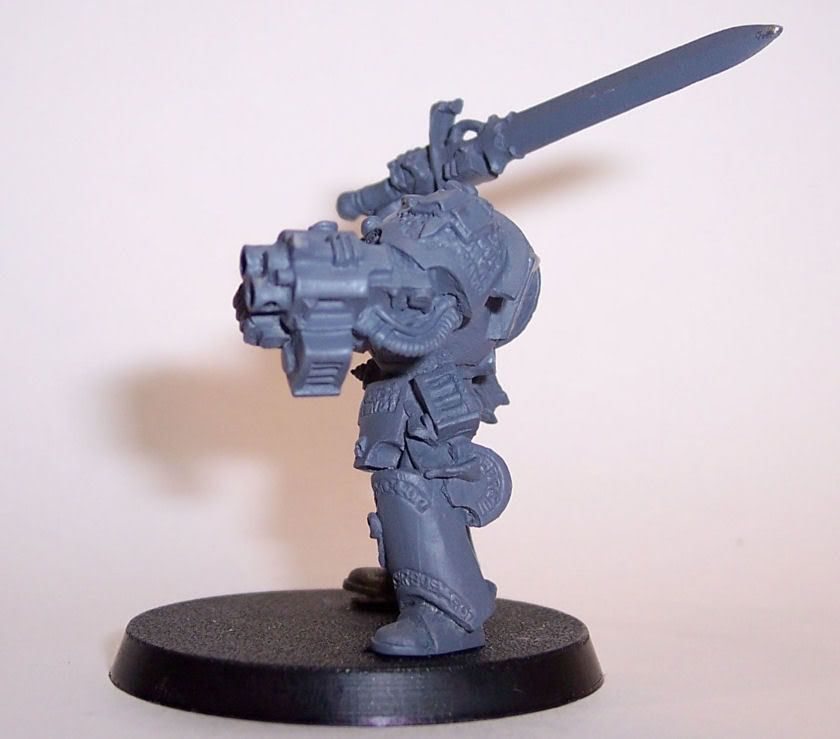
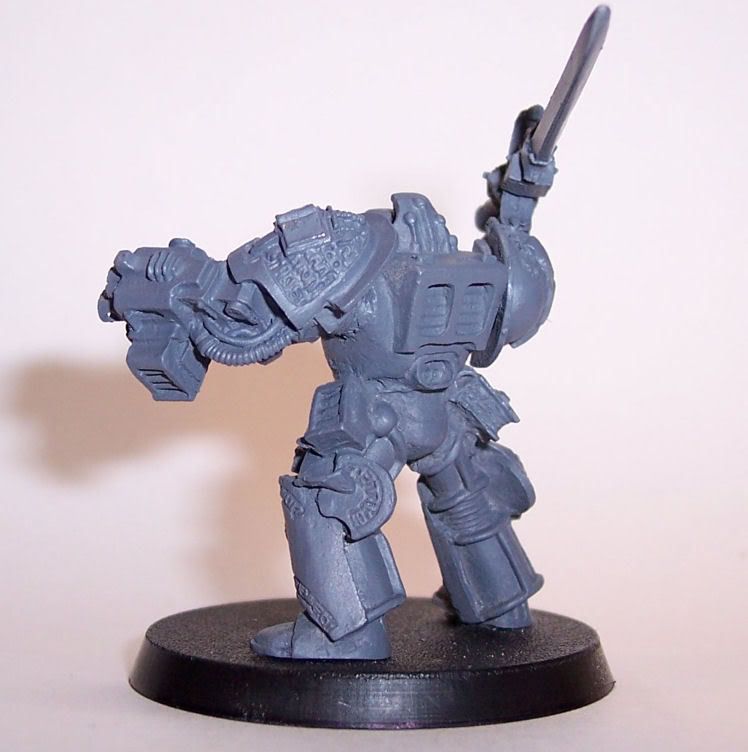
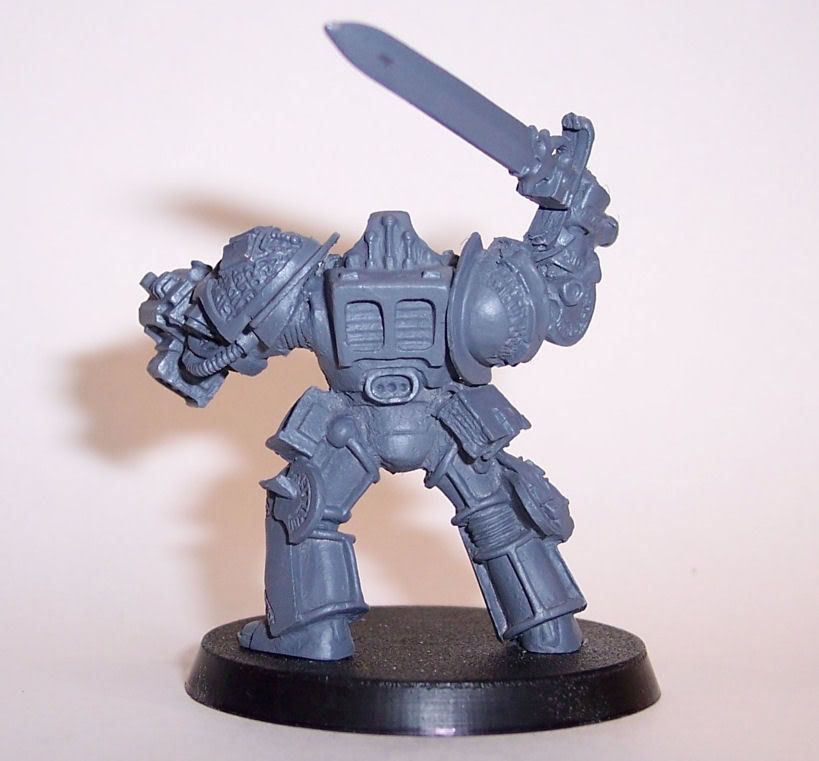
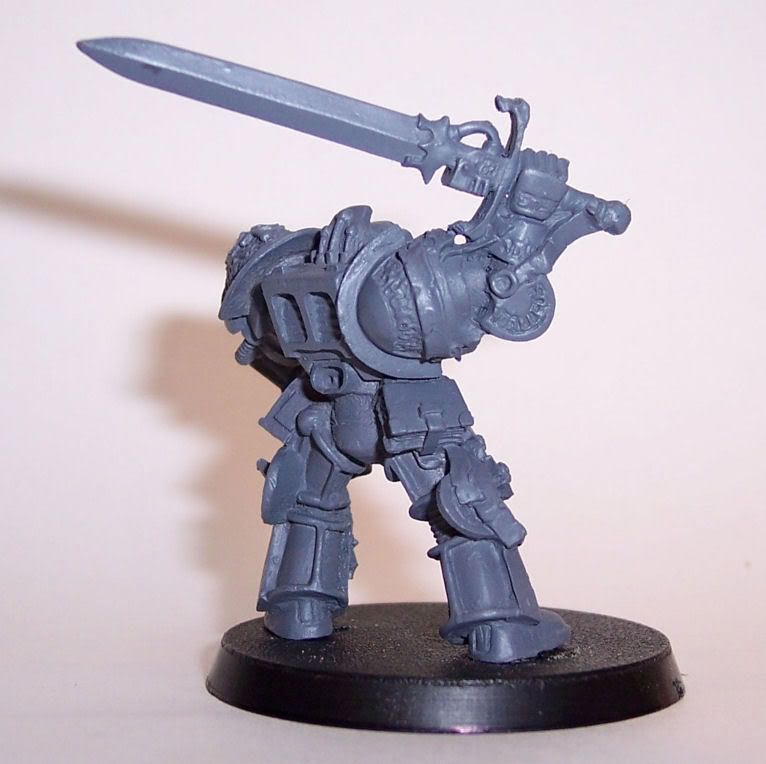
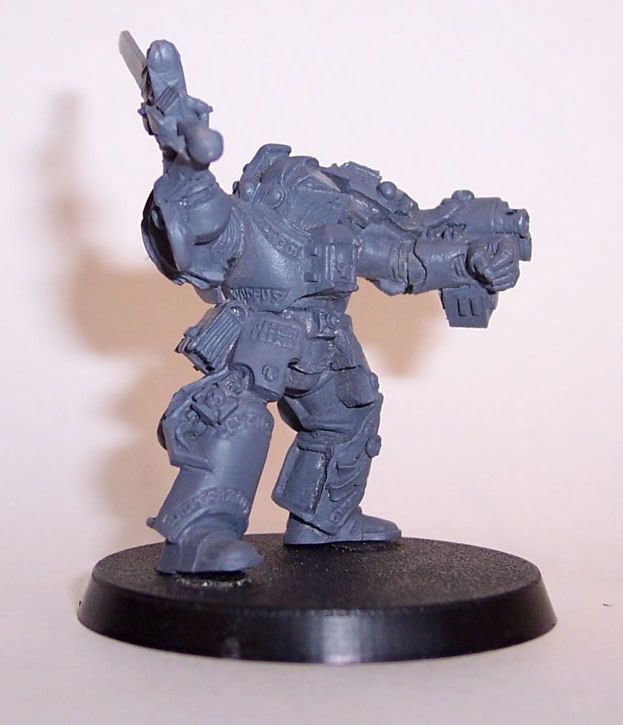
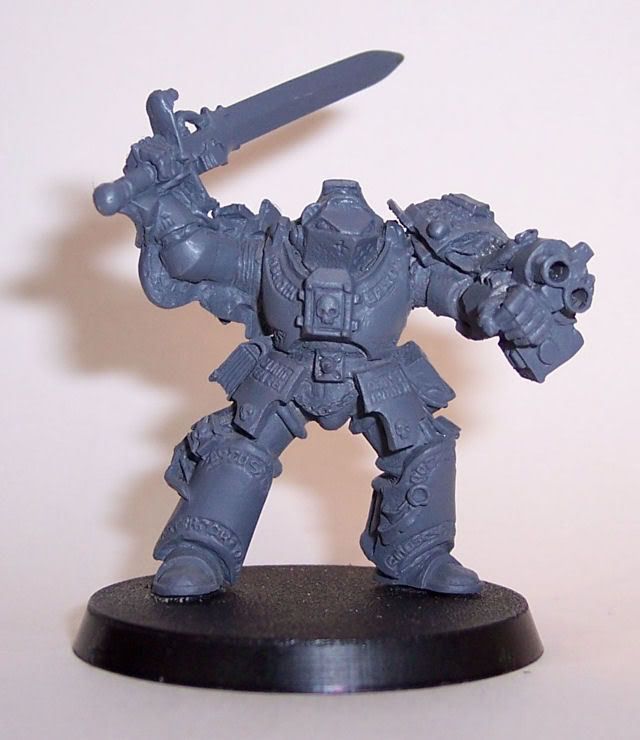
The mini is already prepped ...mold lines filed .. flash removed ... pinned and glued .. and primmed .... gun barrels drilled .....
Without futher ado here is the mini:
terminator035.jpg

terminator034.jpg

terminator032.jpg

terminator031.jpg

terminator030.jpg

terminator028.jpg

terminator027.jpg
 

Stro

Member
Try 7 of them ..
this is what my total trade consisted of:

Daemonhunters Terminators x7
Daemonhunters Grey Knights x19
Dreadnought
plus the codex...
 

EldinTux

New member
Alright I\'ll kick you off. I\'m sure someone will think of something before this but if your model has been filed & drilled & you\'re ready to paint the first job is to prime him. You have a choice of colours (black, white or grey) I personally always brush my primer on & I use a dilluted white (ratio about 1:2, paint:water). I don\'t have any Vallejo colour so I would use GW Skull white. That\'s probably the sum total of my contibition as 1) I don\'t have Vallejo & 2) I mainly paint Fantasy. But I\'ll be watching with interest.
 

Stro

Member
grey Painters Touch rust-oleum sandable primer :D ... only thing i have ATM .. ( with the exception of the white brush on primer - i cant get it on very smooth)
 

EPStudios

New member
I\'ve been working on a GK terminator a bit the past couple of weeks... I can tell you how I painted one in this style if you are interested.

DemonHunter031.jpg


This is still a Work in Progress as I\'m sure you can tell, however it should give a good idea of what I\'m going for.
 

PegaZus

Stealth Freak
Okay, being that professional painter that I am (stop laughing! I got paid a nickel once), remember to NOT look at anything on this site that is ranked higher than a 5. Don\'t compare what you do with what is ranked in the top ten. It\'ll make you sick and then you\'ll quit.

As I don\'t have any color suggestions, pick a color for the armor. Paint it that color. THIN the paint first. Take that color and pick a lighter color to mix with it. NOT white as that will make a pastel. I\'d offer suggestions for that second color, but my brain if fizzled right now and I\'d suggest something stupid. Do ONE set of highlights with this color. Mix in a little bit more of the second color and do the SECOND set of highlights. At this point STOP.

As you\'ve said, this will be mini #3 for you. I wouldn\'t try to blend, feather, wet brush, or anything like this now. Get some basic brush control and learn how to control the paint (both on the mini and on the pallet).

Post what you\'ve got, then everybody can help with details. Then put something on the base and call if finished. Post it to get a score of 4.5, and its time for mini #4. Maybe do it the same as above, but shoot for a score of 4.8. Congrats, you\'ve improved!

Around Marine #3, start trying to blend better and things highlighted more realistically. Post again, and get score of 5.2. Stomp off in a fit that it was your best effort and only score a measly 5.2. Come back the next day and start Marine #4, using a WIP (Work In Progress) to get suggestions and help.

Read the articles here. Read the articles on other web sites. Run the whole net of suggestions.

Course, that\'s just my suggestion. And I was kidding about the nickel.
 

cdamage

New member
Try looking at the article, its helped me alot!


Its only focusing on a helmet but you can transpose the techniques onto a whole mini and get some impressive results.

http://www.coolminiornot.com/article/aid/288

Give it a go!
 

Stro

Member
Here is 2 pics that i dug up on my computer of the 2nd mini i was painting ... it never got finished due to my cat .... hence the glue marks around the neck and between the wing and arm ... while i was painting it I decided i needed a cup of coffee ... left it setting on my desk ... come back in and my cat was cuddled up to the pieces ... :cussing: so in a attempt to save my paint job I tried to reglue it togather .... ooppss to much glue and walla melted paint ... /sigh ... thats when i decide to search the net for some tuts on painting minis and came upon this wonderful site .... the best thing i read about was pinning (it helps protect against little bumps :D ) ... so i spent the last 6 to 7 months reading tuts and articles wips etc... so now im getting ready to finaly try again ...

dragon006.jpg


still had alot of work on the wings and shadding and touch ups ... well ill be stripping him done and repainting him at a latter date ..

dragon005.jpg
 

Stro

Member
Woot ... found a pic of the first mini ... pic sucks ... paint job awful (wasnt happy with it at all) but it was the first time in ever painted a mini and something so small ... i chose it as my first becuase it was a simple sculpt not a ton of detail .. was a way of getting a feel for the paints ... both of these 2 minis were painted befor reading this site so they were both painted with unthined vellojeo paints ....

newpics1093_editedforpost.jpg
 

Stro

Member
Ok here we go .. the begining of mini #3 ... i put about 5 or 6 layers of paint including some highlights .... I\'ll be waiting your comments/feedback ..

Cmon007.jpg

Cmon008.jpg

Cmon009.jpg

Cmon010.jpg

Cmon011.jpg

Cmon012.jpg
 

Evil Bones

New member
you have a good eye as far as placing your highlights. most of your highlights are spot on where they need to be.

next a question, are you thinning your paints? if you are thinning your paints you may want to thin them a lil more because the paint is not going on smooth. you may want to try using a medium ( such as a mix of FUTURE & water).

to help with the high contrast currently in the model you may want to glaze it a lil.

very nice job so far on your 3rd mini.

keep up the good work &

Cheers:drunk::drunk:
 

Stro

Member
Yes I am thinning the paints to 1:1 ratio .. what happened is that Im not using a wet pallet and me being me i was watching Flushed Away while painting and wasnt paying attention to the fact that the paint was drying on my pallet so i just kept dipping and painting and didnt notice till it was to late (lesson learnt) .. i was thinking about doing a glaze but i still dont total understand glazes yet so i decided to leave it as is for now ... as far as the Future .. dont have any yet but working on that .. I do have the medium that comes in the Vellojeo set ... Is that any good ?...
 

Thunderhawker

New member
It also looks like you have been ahndling your mini quite alot (evidenced by the worn off primer on the edges). make sure you get some more primer (or just some more paint) over those areas before you start painting them. You may want to mount him base and all on something. I use the caps from bottles of gatorade and vitamin water because they are wider than say a coke bottlecap. I usually use a bit of hot glue and stick\'em right to it, and its stays till you pop it off with no damage to the cap or the mini. This keeps you from handling the mini directly, at least most of the time, though sometimes its unavoidable.
 

Stro

Member
Another update.... Painted the bolter and spare pack and did up the gold .... ? about the gold ... does it still look to bright ? ... I started with a base of Charred Brown then Polished Gold then added a few washes of Black then some touch up highlights ... didnt want to do anything to hard since this is only my 3rd mini and first time gold ( it looks brighter in the pics then IRL)... Well here it si =


Cmon20070.jpg

Cmon20060.jpg

Cmon20050.jpg

Cmon20040.jpg

Cmon20030.jpg

Cmon20020.jpg

Cmon20010.jpg


http://www.coolminiornot.com/179224
 
Back To Top
Top