Ork Bikers by Sukigod

Sukigod

Member
After taking two weeks off to recover from the Big Mek Challenge with Uberdark (jolly good show, mate!) I\'m back from the short hiatus. I know some of you know I have Gazghkull in process but I\'m not inspired at the moment to continue working on him. I DO have a squadron of six bikers that I started last summer that I\'ll work on for the mean time.

And Uber, I\'d take you up on the bikers challenge but I know for a fact I would never finish in time.

Here\'s the wheels I started last summer.
tires.jpg


And here\'s where three of six bikes are right now.

bikes2.jpg


I\'ve primed and blocked out the first bits of red. I need to do the Blood Red and then highlights yet so it\'s a little flat right now.

(Trying to get these done so I don\'t feel so guilty when the new BW comes in! :) )
 
D
You have probably mentioned this already in one of your other posts but since I am lazy and want to be the first to post a reply on this thread I will ask here. :p What is your recipe for the red? Since I assume you will be doing it the same as you did on the Ork tank?
 

Sukigod

Member
Yep - dats a right. The reds will be done similarly but I\'ll do an extra layer of highlighting on the bikes due to amount of edges and such. There\'s more to highlight.

Black primer> Mechrite Red>Scab Red>Red Gore/Blood Reed (50:50)>Blood Red>Badab Black>Refresh Blood Red>Blend up to some Fiery Orange and touch the very corners/topmost edges with hint of yello/white. This is how I did my Lootas...
http://coolminiornot.com/201717

I\'ll try to point this out as I get to these stages.

Thanks for looks and always glad to help!
 

Sukigod

Member
Two things...

Went to see The Day the Earth Stood Still. Very, very disappointed. Hate to say it but the original 50\'s version was much better.

And a bikers update.

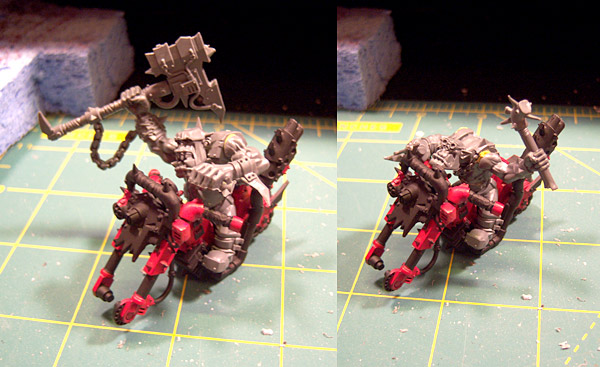
I did a little work as a proof of concept and here it is. See if you can spot what it is...

bikes3.jpg


The biker nob there on the left? He\'s on the same bike and legs as the boy on the right. Yep, Sukigod\'s at the magnets again!

My train of thought is I\'ll most likely never run a nobs squad of bikers AND a squad of regular warbikers at the same time so why build them all (and pay the $$$ for more bikers when I can be buying things like stompas!). So... I\'m making 8 swappable bikers, I\'ll be doing a total of 12 when finished, including a warboss and painboy that will be permanents. The handlebar/handgrips will be a little tricky to plan out but I think I\'ll manage. The only change I need to make from these two is to place the magnet on the small boyz body higher up on the torso as the position it\'s in right now forces him to sit angled to far forward, smashing his face into the handlebars.

Here\'s pick to show where I placed the magnets.Enjoy!

bikes4.jpg

bikes5.jpg

bikes6.jpg
 

uberdark

New member
niiiiiiceeee..... i like the idea of swappable torsos........ but the fun of doing both and buying more is having a bigger army.....and we always needs more orks for the precious. hehehe.

keep up the good work.

cheers

uber
 

Backstabbeth

New member
Those... orcs...are...AWSOME. im so exited to see how it turns out!

Wouldnt have even thought about making them swappable! LOL:bouncy:

really looking forward to it
 

Sukigod

Member
Originally posted by uberdark
........ but the fun of doing both and buying more is having a bigger army.....and we always needs more orks for the precious. hehehe.

uber

I do have 18 second edition bikers that are already assembled and painted(I bought them that way a loooong time ago), adding another 12 would make for a pretty snazzy sized biker gang army!
 

kulandini

New member
Great idea to make the torsos swappable!
I also thought the movie was a disappointment. a pity because I thought it was going to be a great movie. Good luck on those bikers.
 

Sukigod

Member
Did a little painting yesterday - got the base reds done on the bikes and started the base coat for the metals, but the majority of my time was spent magnetizing the boyz riders. If you haven\'t done the magnets things for your models it can seem intimidating at first, especially the \"polarity\" thing, but once you get the hang of it (and end up with a stock of mini-magnets) you almost start looking for way to use them.

As I explained in a previous post, I\'ll (almost) never run both nobs and regular warbikers in the same list so this makes sense to economise the new models. I do have 18 of the old 2nd ed biekrs, should I need to field both types but as I replace the old with the new, I\'ll eventually sell off the old ones (to pay for more new ones... it\'s a vicious cycle, isn\'t it?).

I started by doing a test model first (previous post). Always try this with one model first! This should show you where things might go wrong and help you avoid complications when you sit down to do many of them. In this case, it\'ll be a total of 10 legs and 20 torsos. I learned on that first test boy that my original placement of the magnet on the boyz torso was too low and caused the boy to angle too far forward. If I had just gone and done the same with all 10 boyz at once, I would have ruined 10 boyz bodies and not one. Lesson learned for me - yeah!

As far as the process - I palced a pilot hole with an X-acto where I wanted the center of the magnet (inset 1). This was just a bit up from dead center of the \"bowl\" in the hip area. Then I used a standard home drill bit to drill out the space for the magnet. The drill bit left a hole the exact same size as the magnet (lucky, I guess). My drill bits have a special tip that \"predrills/pilots\" the whole before the regualr bit diameter starts cutting. This leaves a little hole underneath the magnet, this\'ll give the glue a little extra bite. (second inset).

bikes7.jpg

bikes8.jpg


Next is glueing the magnet into the hole. Now I wish I had take photos of this process (I might \"stage\" one later today for examples) as this is usually the most frustrating part, especially if you\'re going to use the swappable part, in this case, the torso, on other models. Any one who\'se played with more than one magnet before knows that they have this thing called polarity. It\'s what makes one end attract and the other repell. Here\'s how I don\'t mess it up and have pieces flying away from the model I want to use it on.

Set up the \"original\" model - in this case it\'s the first legs part. This is the \"master\". All magnets that go into the bodies/torsos will stick to this magnet on this pair of legs. I stick the new magnet on the leg magnet - so there\'s two magents, on inside the legs and one sticking out. Put a black dot on the outside face with a Sharpie or similar marker. This will be the mark telling you what the facing of the magnet should be when you glue it into the torso - black side down. Use this exact same set of legs for every torso. When you are finished, you should be able to use any torso on any pair of legs.

Now, grab one torso, doesn\'t matter which, and put the others aside. Stick a magnet to this one just like you did with the legs. Put your black dot on it and glue this magnet black dot down into a new pair of legs. Do this each time using the same torso for each new pair of legs. When you\'re finished you should be able to use any torso on amy pair of legs.

Now some of you (physicists, electric engineers, experienced hobbyists) might notice. \"well, after the first set of torsos are finished and one body is complete, you can use any set of legs to set up the next magnet.\" Yes, that\'s true since the polarity of all the legs have already be \"set\", but when working with so many parts, I found this way very easy to keep track of everything. I\'m always afraid of getting to the end of magnetizing and finding that \"one\" part that doesn\'t want to play right.

Sooooo.... Whew! After that log winded explination (maybe I\'ll turn this into a tutorial someday) I\'ll show you where I\'m at.

bikes9.jpg


The legs are seperate from the torso/arms and any body will fit on any legs. I haven\'t gotten around to the nobs yet, maybe later today, but this shows you the finished assembly. Now, there is a price to pay for the flexibility I\'ve gained as the handgrips were an absolute nightmare to line up and some of them just don\'t. This is becaue of the small amount of irregularity in placing the magnets in the torsos. This causes problems with alignment because the magnet is going to want to line itself up where \"it\" wants to. Since you can\'t really \"re-drill\" or re-align the magnet once the hole has been made, I\'m kinda stuck. I can live with that though. I\'ll be painting that area up in a way to try an minimize that gap so it won\'t be so noticable.

Cheers!
 

kakita

New member
Does this mean you had to get extra biker hands with the bike handles in order to do this whole swappable thing?

This is interesting, I might to the same if I feel brave enough in the future.
 

Sukigod

Member
@Kakita: There is that sticky issue of the nobs not having throttle controls in thier hands - or buyin\' a bunch of biker nobs arms. I\'m doing five left handed and five right handed modesl (I\'ll be building the other four later) so this will mean, from 5 boxes of bikes, that I\'ll need t oscratchbuild/create 5 right handed biker nobs arms. I\'ll have to convert them from other weapon arms, mostly choppas and the like. I\'ll document the conversions when I get there.:)
 

Mourner

New member
you might be able to pin the handles, drilling a small hole in every bike-handle, and attaching a pin, and just drilling a small hole in the rider-handle. just make sure the holes are in the same place, and only glue the pin into the bike-handle.

this way the magnet should not be able to align itself exactly the way it want, and more the way you want it.

as for re-aligning the magnet once you\'ve drilled a hole, you could try drilling the hole to big, so you have room to spare, you could then use greenstuff to align the magnet just like you want it.
you might even \"stick\" the magnets together, glue one into the legs (or the torso) and press the other one into the greenstuff on the other part.
 

Sukigod

Member
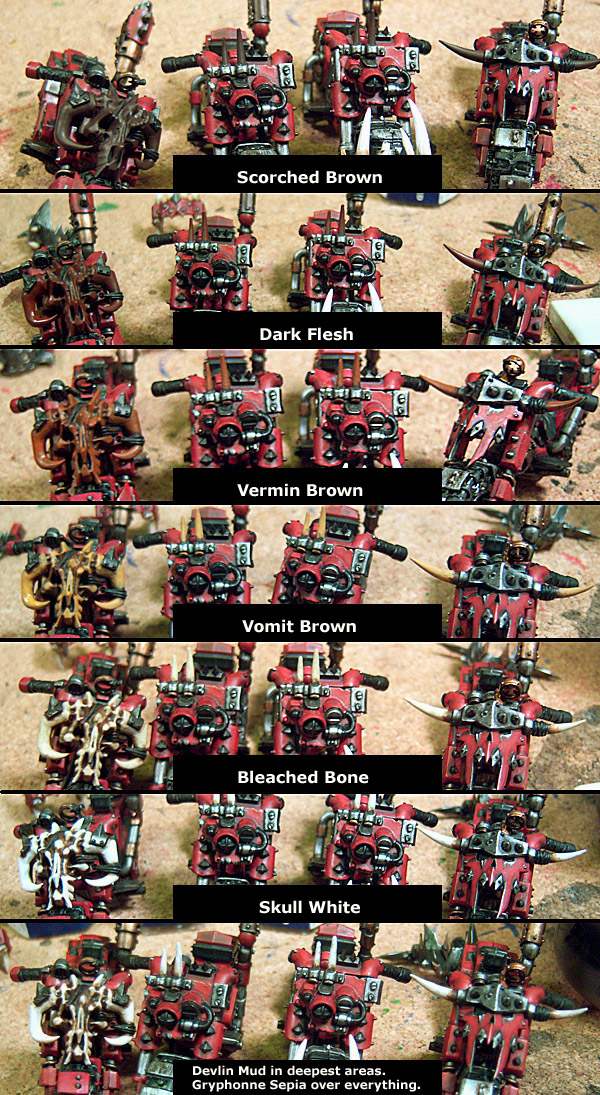
Just look at tha BONES!

I\'ve made some progress on the bikers, seperate from this thread so I thought I\'d catch it up. I\'ll eventually make a single Sukigod Thread as well so I stop the madness!

This is typically how I do all bones - teef, spiked decorations, etc. I use a brush that\'s in kinda rough shape and \"point\" or push the bristles down along the bones toward the dark areas using the splitting bristles add to the straition effect at the bottoms. I also don\'t mind the streaks caused by the bad brushes as it adds subtle grooves in the paint that becomes a bit more pronounced when the wash is applied. The photos below don\'t quite show it but they\'re apparent enough in the final beauty shots.

This show the first step painted over black primer.

bikes12.jpg


Hope this helps anyone interested in painting bone.

Later!
 

Sukigod

Member
VROOOOM! VROOOOM!

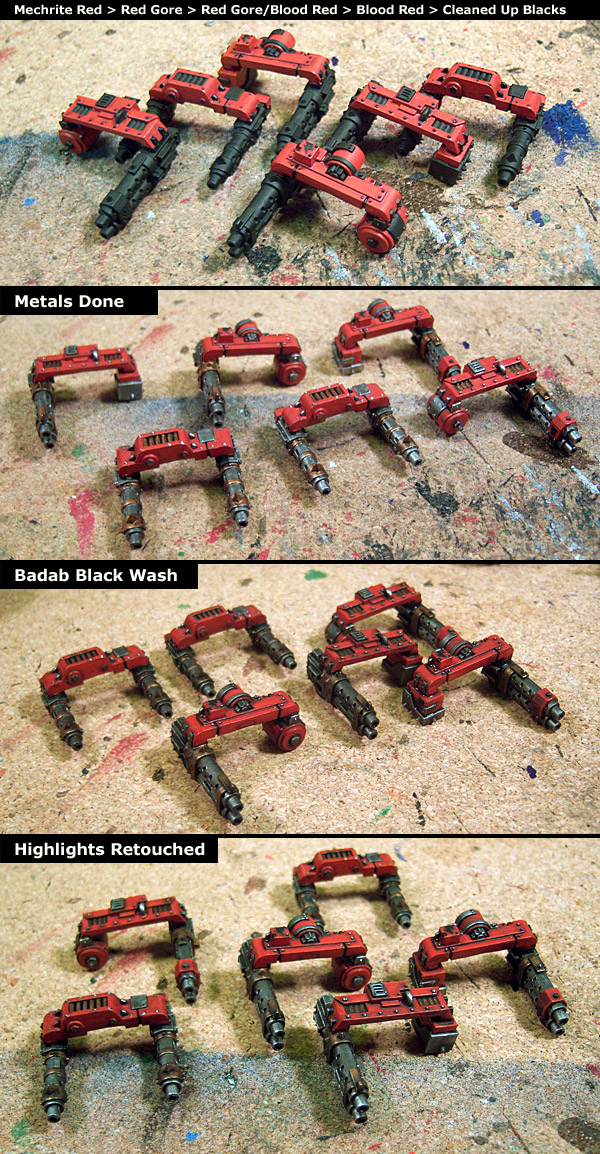
Got the Dakka done on the bikers this weekend and here\'s how I did them for all of you keeping track at home.

bikes13.jpg


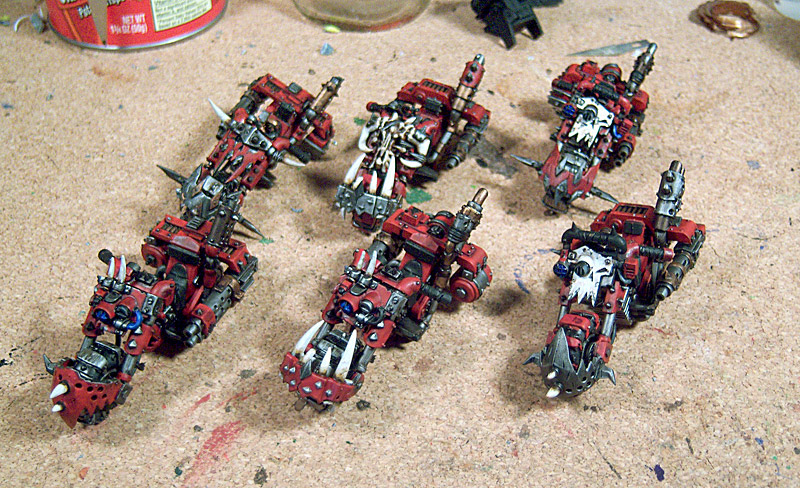
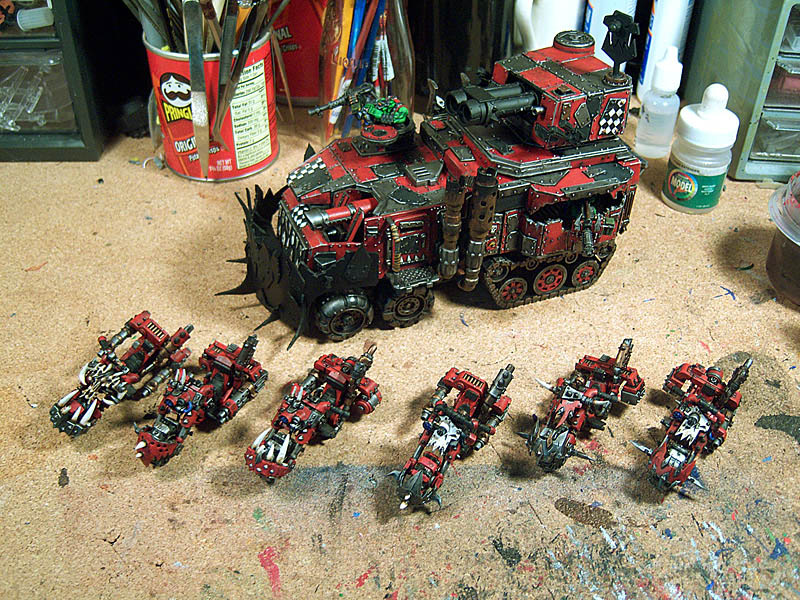
Here\'s the mob all together and glued. I\'ve Dulcoted them since some of my previous washes and glazes we a bit sticky so now they\'re all sealed up. I still have the detailing like the handlebar wraps and gauges to finish up before basing, which should be pretty quick. Then it\'s on to the Boyz/Nobz! Yay!

bikes14.jpg


And a beauty shot with the matching Battlewagon. Pretty.

bikes15.jpg


Later!
 

Sukigod

Member
Did some work on the bases last night - and took pictures too - Yay! Everyone loves pictures, right? Since the bases already wonderfully come textured, I\'m painting this to be \"close\" to the rest of my army\'s bases. Sandy and grassy.

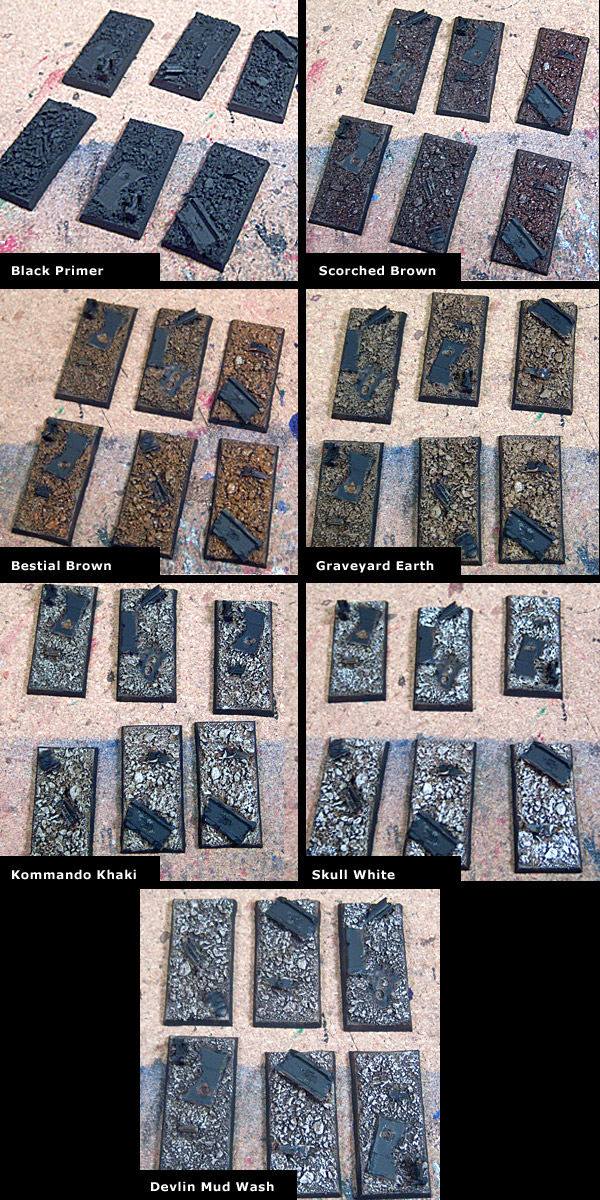
Here\'s the progression from the primed resin base...

bikes16.jpg


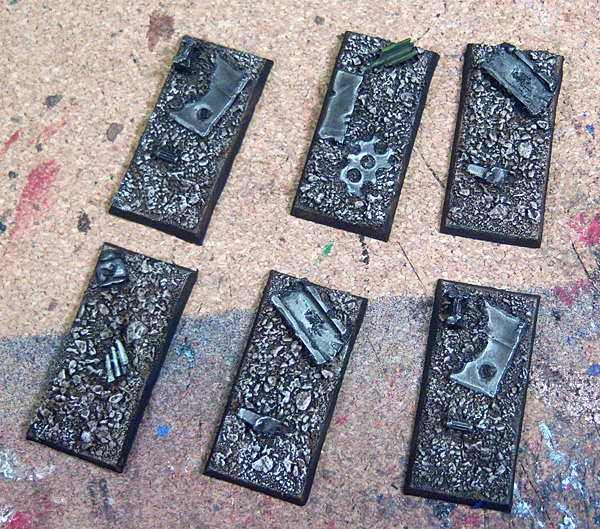
The metals were done after that and turned out like this.

bikes17.jpg


I don\'t want the base to be too bright and detract from the bike. Most of the colors will remain fairly muted as I want the bike to be the focal point and \"support\" the bike (heh).

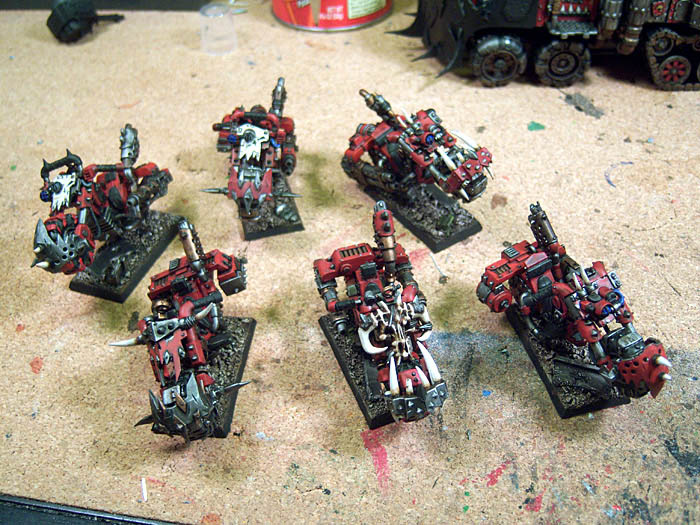
In a hurry to get things done, I attached the bikes before flocking, hate it when I do that but what are ya gonna do? I\'ll flock the base and finish off the detail parts like the handlebar wraps and the dashboard gauges next. I did pin the models to give them support and strength.

bikes18.jpg


VROOOOM!

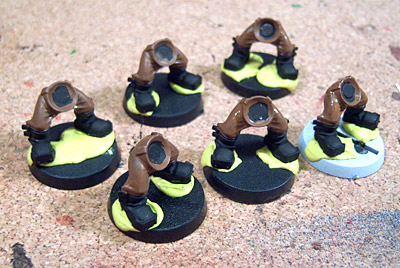
While the bikes were drying on their bases, I started the boyz legs by stickin\' them down to bases with poster tack to make\'m easier to handle and basing the pants in GW\'s Foundation Calthan Brown.

bikes19.jpg


I\'m getting excited to get to making the upper halves after painting and attaching the legs to the bikes. The green of the grass and the skin tones I use will really make these bikers pop (at least I think) against the reds and muted tones. And the magnetizing parts pretty cool too..

Later!
 

uberdark

New member
sukes its so damn good to see you back on again. i didnt do much over summer either but when the new year starts up i start going batshite crazy with convershuns. we gotta figure out another challenge for you and i at some point again.

anyhow...love the bases... keep it coming.
 

Sukigod

Member
Thanks Uber! Kinda feels good to crawl back into this hole...

I\'d be up for another challenge sometime after mid Febraury. I know, a ways away but with the projects and other plans coming up, I probably won\'t have much free time til then.

I do have another Rhino and Leman Russ sitting there doing absolutely nothing right now....(did I just say that after struggling to finish the Battlewagon I started 8 months ago?)

Maybe something smaller - a series of objective markers based on themes. Something like three markers, each based/inspired on/by a single word or phrase. One submitted by you, one by me, and a random pick of someone here at CMON for the third? That way we each have three really cool objective markers.

Just an idea - I\'ll most likely forget by February. lol
 
Back To Top
Top