Problems With Water

RonnieRiddik

New member
Hi guys.i need of ya help. Ima trying to learn how do lighting effects, and i use water with colors to paint the light ( as for nmm or light skin ) but the color is not uniform with the primer or the darkest color that i put before.. i think i got problems with water, and i don\'t know how make uniform colors as this mini

wolfen2.jpg


i searched tutorials as videos, but i found nothing so i don\'t know how learn the uniform colors to make nmm and lights... thanks
 

Farin

New member
Hi RonnieRiddik

well at first let me give you one honest advice: check your spelling and grammar before posting. It doesn´t have to be perfect ( god knows mine isn´t :rolleyes: ), but i had to read your post thrice before knowing what you´re asking (at least i think so).

Okay you´re question: I don´t think your problem is the water your using. I live in Berlin and our drinking water is extremly hard - still it is used by painters like Ben Komets who won severall Golden Demons and a slayer sword at the last german Games Day.

BTW, You don´t even have to change your water when it´s dirty as long as your painting only one miniature ( or severall with the same colors ). Dirty whater can help a little bit to \"tie\" the colors on your mini together - a tip i got from the first painting mentor dvd.
The only time when you MUST use new, clean water is after using metallic colors. Otherwise the metallic pigments in your water will mix with the colors on your brush and will be visisble as tiny \"sprinkles\" on your mini - this vcan seriously ruin your day

My guess is your troubles with not achieving uniform colors might be the result of trying to apply the color in just one coat - alway thin down your colors to a milk-like consistency (or more ) and brush them on your minis in several , thin coats - The more you thinned down your colors, the more uniform the final result will look, but at least it should take 2 - 3 coats.

for highlighths ( is this what you meant with lights ? ) thin down your colors even more and apply them on the parts of the minis that should be lighter due to the zenithal light.
Then move your brush from the spot that is supposed to remain dark towards the lightest ( = most elevated ) point of the area your highlighting. This way you move the pigments where you want and most pigments will end up at the lightest area of this color. Repeat this , ´til you can´t see any change. Then repeat it with the next Highlight but leave out the part of the first higlight adjacent to the base colour, and so on. With Shadows it´s the same, only converted ( move the brush towards the darkest area,l.... )

The Devourer on your picture was painted that way: Lots and lots and lots of glaces of very thinned color... - takes an eternity to finish ( and is way out of my league and much better than anything i ever painted ) but that´s how the french painter do it.
You can also find short tutorials about how rackham painted their studio minis in the older issues of their \"No Quarter !\" magazine - unfortunatly there hard to find, not many shops have them.
 

RonnieRiddik

New member
thank u very much for ur reply and thank your for tip of move th brush starting from the dark part till the highlighths ( i always did the contrary ). i post one my mini to show u where i make mistakes
img4991cd90bff1f.jpg


as you can see, i tried to make a nmm gold effect in the top of the miniatures, and i got no problems with the dark colors ( black - brown ) but issues start doing the highlighthgs, and the \" uniform effect \" is more hard to do.. i use a lot of water with color ( 80% water and 20% color ) but there\'s a separation between yellow and brown ( and i used a lot of different colors to do the uniform effect ).. maybe if i see a video with this tecnique i can learn it but is not easy to understand how manage the light colors as white , while i got no problems with dark colors as brown or bestial brown


another thing, it\'s betta if a start with the black primer and i add colors even more lighter, or i use a medium color and i put lighter and darker colors to do this effect? thanks
 

Farin

New member
Sorry for the delay in response,a lot to do

Well a video might help you indeed - the first DVD of the Miniature Mentor Line is pretty amazing in terms of quality but exhausting ( ~ 4 hours... ), plus the price.
Anyway watching a miniature being painted from the very beginning is always helpfull.
Alternatevly, try to find someone who is a more advanced painter in your area and ask him about paintingsessions - even better than a video.

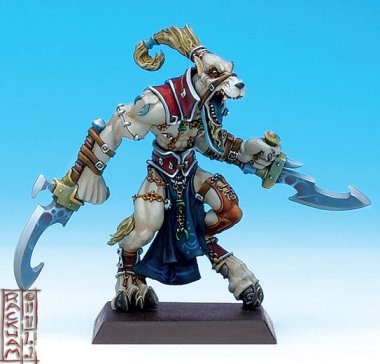
your problem with the NMM is probably a blending issue - unfortunately i´m not good with NMM ( i prefer real metallics), but asking some of the painter here at CMON per PM might ge you further - or just check the article section. Right Now theBack of the Instrument of your Mid Nor looks like you tried painting hot metal - it doenst look like gold, more like metal cooling down after being red-hot.

With you question about Primer and how to proceed - that ´s really a matter of personal taste. ( or should i say believe ?) Some people get really amazing results by using black primer other swear on their grandparents live it has to be white primer lol. basically there are two ways

1.) black primer: prime the mini and apply the diluted base colours you chose. The black primer will darken the colors (Attention: acrylic color ALWAYS darkens when drying , because the acrylic medium has a slightly milky color , making the color appear lighter when wet). then aply more thinned down layers of your base colors, then your highlights, working your way from the shadows to the lightest pparts of your mini.
painting this way makes the blach primer work for you and you don´t have to care for shading . Also in my opinion, black primer is a good beginner´s choice when dealing with real metal, since one can appply the metals like the other colors from dark to lightest shade instead of \"working your way backwards \" like you would have to do on a white basecoat where you would start with the lighteat shade and then use thinned glazes to shade the color.

you can see this technique HERE

2. White primer: White primer makes it harder to achieve a uniform coat of color since your primer is lighter then your basecoat and will bepartly visible through your basecoat (logical, eh ? ;) ) but makes highlighting and shading easy when working with diluted colour - which is also important for blending. just apply several thinned coats of your basecolor - it will flow into the recesses where you should get a uniform color while the elevated parts stand out thanks to the white coat shinning trough the translucent layer - now you just have to make these parts pop out by brushing on your highlights one aftger another. Alo white undercoats lets you paint colored shadows. You can see this technique HERE
 

RonnieRiddik

New member
thank u very much man, that will be very helpful, i think i work better with the black primer, now i wanna try to start from a medium color and put highlights and shadows from it, just to try, you opened my mind, thank u very much again, can i pm u when i\'ll post my new work? just to get your opinion..
 

Farin

New member
you´re welcome

well, you can of cause pm me - but at the moment i don´t have much time due to college ( there´s a big pile of work waiting for me right now ), so it might take a while.
your best shot is always the WIP forum here on CMON. Just start a thread , keep the people updated and you will get lots of opinion from people who are better painters then i am ;)

anyway, good luck with you painting


PS: just realised i send you a link that has nothing to do with white basecoat - that happens when one is in a real hurry , sorry . Just look through the article section , you´ll find plenty of examples for what i meant
 
Back To Top
Top