Mage Knight Dragon Conversion

delta 408

Member
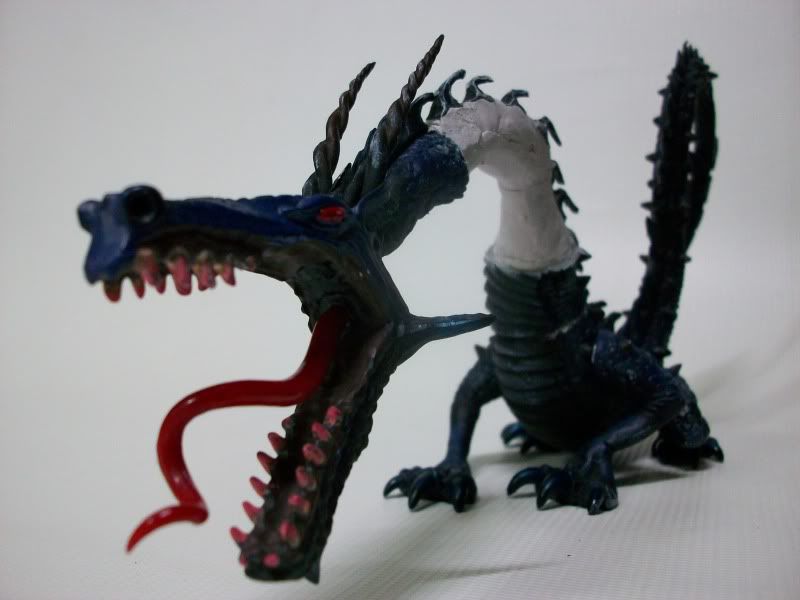
Hi again folks, my next project is a dragon miniature from the defunct Mage Knight miniatures game. Here's what the Venomous Shadow Dragon looks like:

VSDOriginal.jpg


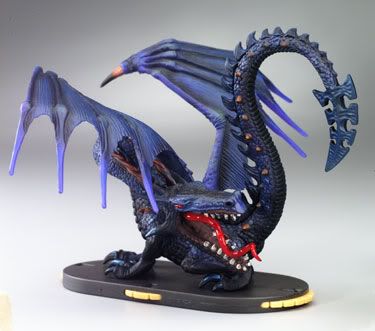
He's a mean-looking guy huh? I plan to reposition his neck so that he's looking forward instead of to his rear.
*image courtesy of Toymania

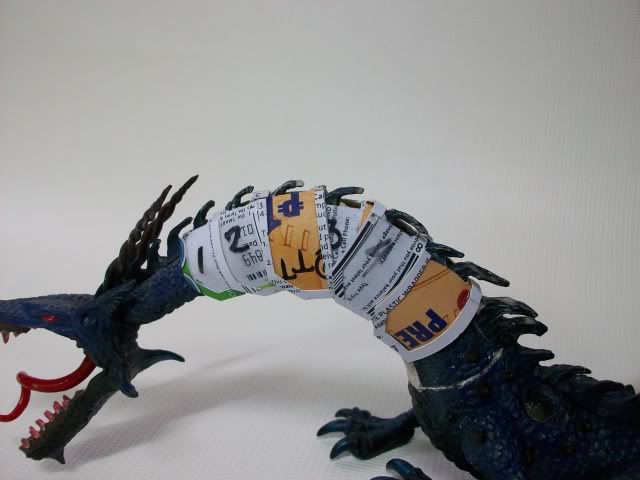
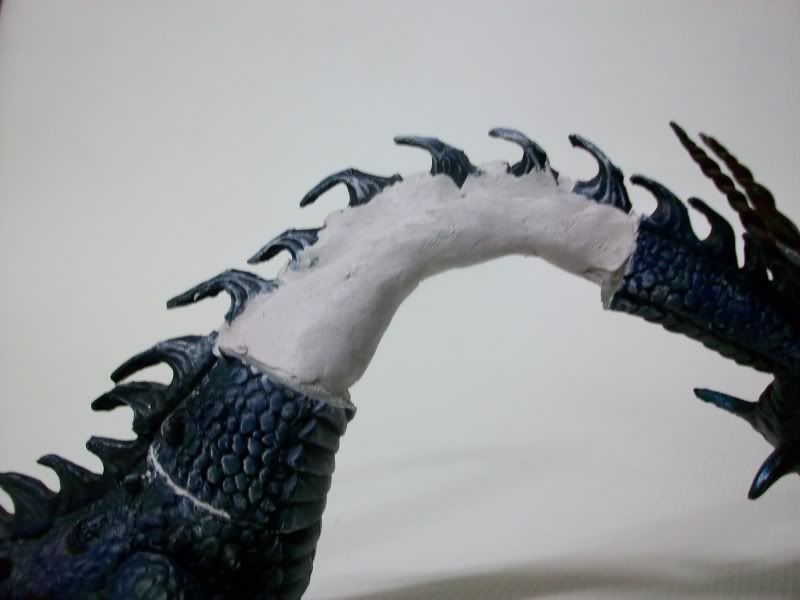
What I did was cut off the curve of his neck and kept the straight ones. Using a few big paper clips, a pin vise and some epoxy clay, here's what the neck looks like at this point:

VSD05.jpg


VSD04.jpg


VSD03.jpg


VSD02.jpg


VSD01.jpg


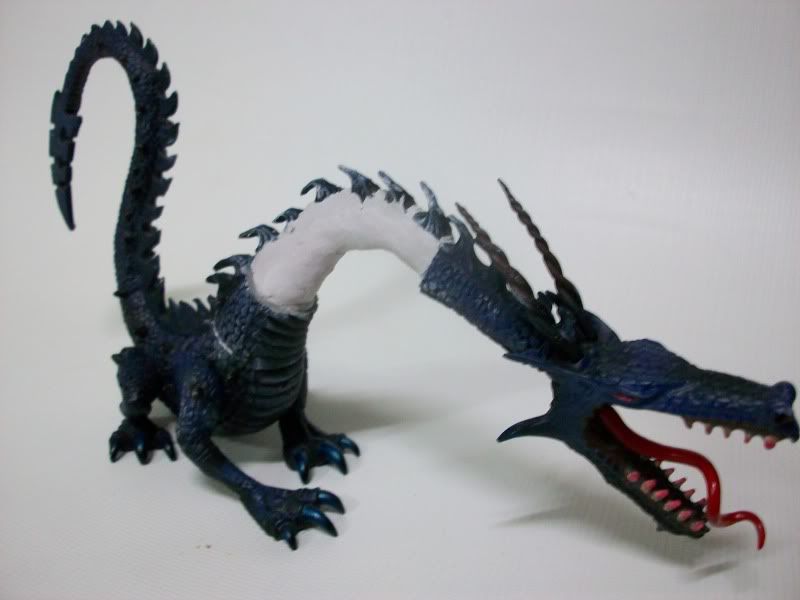
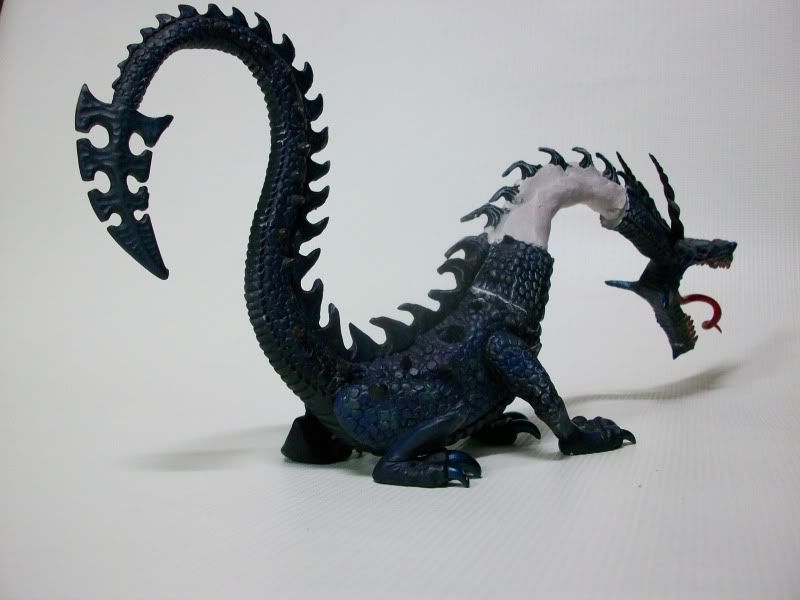
It seems I forgot to take a pic of this guy with his wings. You'll all see that in the next update. :)

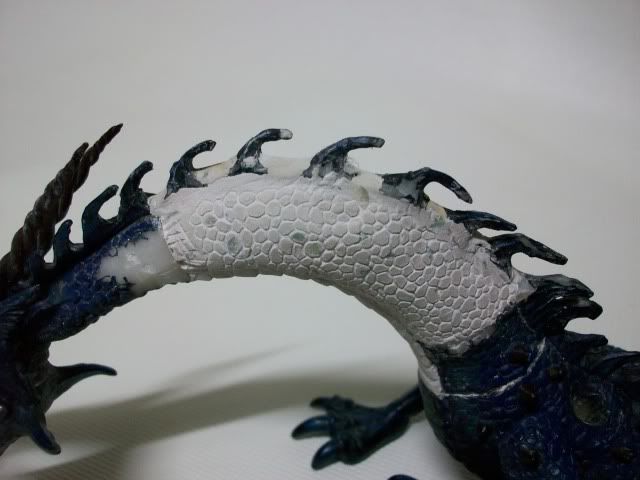
I still need to figure out how to sculpt scales. My friend suggested that I just use my Xacto to "draw" the scales in the epoxy clay which I'm willing to try but if you folks have other suggestions, I'd really appreciate it.

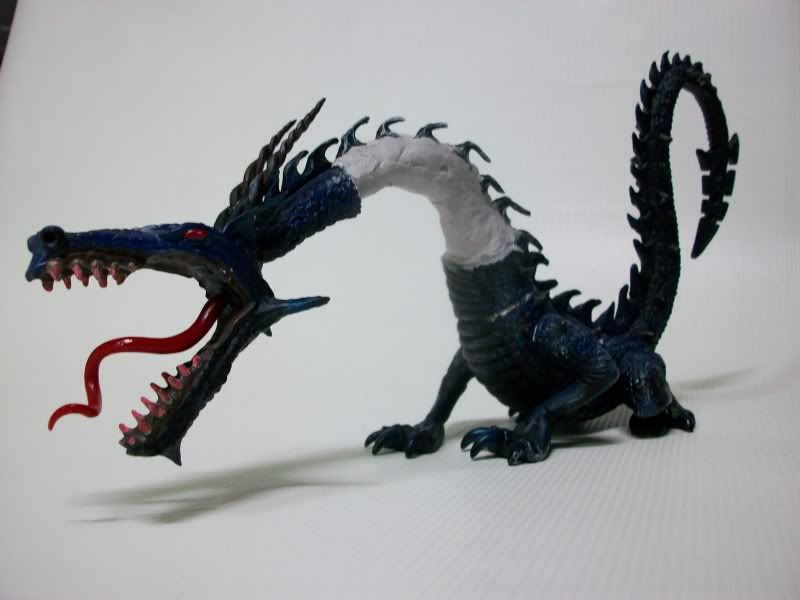
Wouldn't you say he looks meaner now? Comments and criticisms are welcome.

Cheers!
 

delta 408

Member
This time, I managed to flesh the neck out a little more. Epoxyclay is a little more challenging to use than I thought. I managed to successfully sculpt the large scales, but the smaller scales were a bit difficult for my skill level. :( I decided that the VSD would get some armor plates instead. This dragon is sentient though, so the armor plates don't exactly mean that he/she [?] can be ridden by anyone. :)

The plates are made of used prepaid cellphone load cards which are made of thin styrene.
VSD06.jpg


I hope you like it. Comments and criticisms are welcomed.

Cheers!
 
Last edited:

delta 408

Member
Thanks! I'm hoping that I could post pics of this guy primed by Saturday or Sunday.

Any ideas on what to use for painting the skin? I'm looking to paint it in a dark scheme. Maybe black and purple with bluish highlights?
 

freakinacage

Well-known member
ha! armour, you wimp! fair enough though, but makes sure you add more, otherwise he will look weird with a little bit of armour on his neck and nowhere else

looks good though
 

delta 408

Member
Again, I agree with you. The arm and head armor are okay, but it's the body armor that is stumping me at this point.
 

BPI

New member
Hi Delta, nice dragon :good:

Couple of things, you mention priming him, are you going to strip the paint first?

I think you should take off the armour :( & have another crack at sculpting the scales :) You had the underside horizontal sections put in, keep working those till neat. Others with far more putty skill than I can clarify if it'll work but couldn't you pressmold a 2x2cm of scales from elsewhere on the body to capture the scales and then apply thin squares of scaly putty to the top of the neck & smudge them together? Any bits that look a little ragged just pull out a line tear to paint as a wound/scar :)

Definitely work out your colour scheme in advance. Scales, belly, inner mouth, tongue, teeth, eyes, wing membrane, horns, claws, nostrils. There's more going on than that vast area of scales would at first suggest!

Nice project :good: cutting off & radically repositioning a Dragon head would be a bold step for me, that's for sure!

Cheers, B.
 

delta 408

Member
Hi BPI, thanks for the comments. I have contemplated on doing the scales again, but let's see. Greenstuff is hard to come by here in the Philippines and the one I ordered from the hobby shop I frequent hasn't arrived yet.

I would have loved to strip the old paint off, but Mage Knight paint is tough as nails in my experience... I'll just prime over it.

Hmm, maybe it was how I approached making the scales last time. What I did was apply putty to the entire side of the neck and then press a little straw into it to make the scales. It dried pretty quick. Maybe I should have worked in small sections, huh?
 
Last edited:

freakinacage

Well-known member
deffo work in small sections, then you won't put your thumb in somehting you have done. i agree with bpi though, i would definitely have a try at sculpting them
 

funnymouth

Active member
ditto. the press mould idea is a good one too. very fast to execute (i have done it several times) and the end result would be very consistent with the rest of the model.
 

delta 408

Member
OK folks, I'll defer priming the dragon. At the moment, I've stripped the armor off and will have another go at the scales.

How does scribing them sound to you all? Might take a lot of dedication to go that route but it will save me more money at the expense of time. :)
 

BPI

New member
Hi Delta, I think the main thing with the scales is to keep the size appropriate to those on the rest of the model & to take your time & keep it neat. Don't let the gaps between each scale get too deep though if you're scoring them out, a huge amount is going to be suggestable with paint. The last thing you need is little wash canals around each scale that look too dark once you paint :)

Do work in small sections & let each one dry before working on an adjoining spot. By the time you're doing the last section you'll be confident enough about scale sculpting to cut out the first sections you did & start again to make it look better :D

It'll be a nice piece when done, don't rush it through enthusiasm!

Cheers, B.
 

freakinacage

Well-known member
if you are using a stamp you can do bigger areas at once. just make sure you blend in the edges, that will take less time and skill
 

funnymouth

Active member
Might take a lot of dedication to go that route but it will save me more money at the expense of time. :)

freak is right, it will be faster, and depending on the size of the mould it wont take very much GS at all. you will still have to sculpt the seams though. of course if you want the sculpting practice...
why dont you use the white stuff you sculpted the lower scales with? why do you need GS?
 

delta 408

Member
All your suggestions are much appreciated. Perhaps the greenstuff can wait.

I took the dragon with me to the gaming store I frequent and to kill time, I started scratching away at the cured epoxyputty, making sure that the scales I made weren't too big or small and "random looking". Pretty soon, I had decent looking scales. yay. :D Gimme a minute, while I take a quick picture...
 

delta 408

Member
Ok, here we go. :)

VSD10.jpg


I am quite happy with how it turned out because it looks better than what I expected. Looks like I have to do a little more work where the scales meet the spine. You will notice some parts where it's blue. I'm going to put a little epoxyputty there and smooth it out, then when it cures, I'll scratch some more scales.
 
Last edited:

BPI

New member
Wow! That looks so good I just knocked my water pot over my palette in eagerly reaching for the keyboard to post :D Well done :good:

Cheers, B.
 

delta 408

Member
Thanks, BPI. My arm hurts from all that scratching/scribing, though. I used the sharp metal part from a map pin and attached it to my Tamiya pin vise. :D
 
Back To Top
Top