ORK Battlewagon WIP

Sukigod

Member
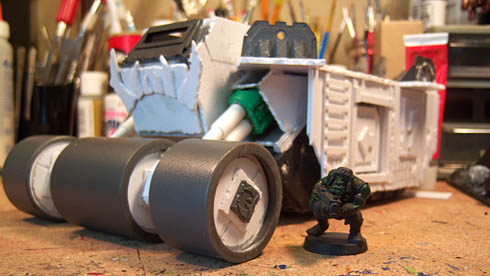
Made some progress over the weekend on the deff roller and had a little mini-vacation with the missus! Overall, a good weekend.

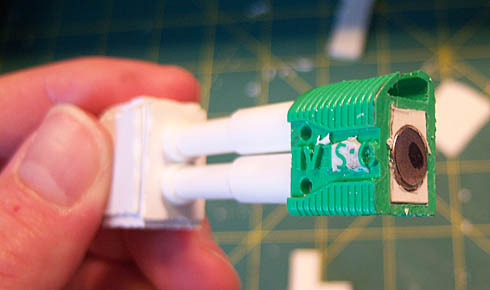
The first pic to day is a composite showing some in process while making the rollers themselves. The first inset is the armature end that connects the rollers to the connecting arms. The red bars show where the rods will stop up against the plastic card inside to give it more stability and strength.

The others are the rollers, capped, and then the detail plates and capper glyphs for the end of the outside rollers.

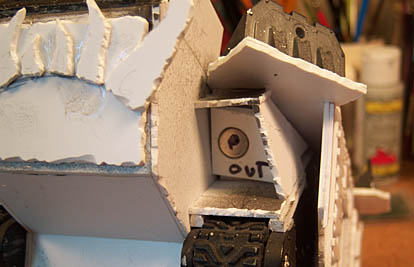
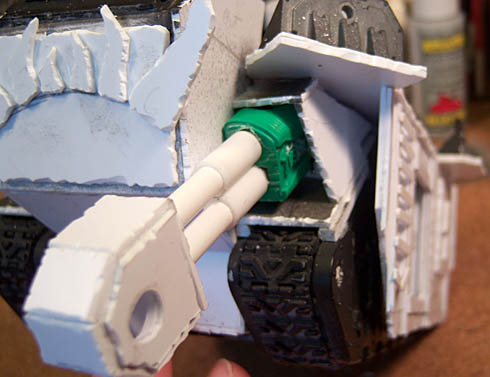
The last couple are the model shown with the roller in place to see how it fits. I\'ll have to shorten up the connecting arms and I\'m still trying to work out how I want the ends to look, the parts that go up into the body. I\'ll have to hide a couple of magnets too so I\'m going around and around in my head on how to do that.

I\'m also on the hunt for a rotary leather punch tool to make rivets. It seems that\'s the one final detail missing here to make this thing really look orky. I can\'t seem to find one in town so off to Amazon.com I go...

bw29.jpg

bw30.jpg

bw31.jpg

bw32.jpg
 

mud duck

New member
headlights on either side of the driver\'s view slot, I mean like half way blocking the slot and the driver in the middle of the cab. Just for the Morkish, maybe Gorkish look. OOOHHHH! LED\'s! Give James a run for his money. hehe.
Big Cannon down the centerline? Proxy/use as a....what is it.... a looted baneblade.. ah \'stormhammer\' is it? I\'m not to sure of the side armor. Not that it doesn\'t look good, which it does, but whats the use of converting and spending the money on a land raider if you could have made it out of board and card with some track links and have it look the same? Ok, sounds like this was cheaper and the LR made a good base, but your oponent doesn\'t have to know that. \"Why, yes. I did spend X amount on the this conversion. So not only is my army going to destory you, I also make more money!\" [insert manical laugher here] Phyiscalogy (gods, my spelling has gone downhill fast :(:( )
 

Sukigod

Member
The nice thing about working on something so large is if I get bored/frustrated/uninspired with one thing, I can always pick another part to work on until inspiration strikes again! The mechanicals for the deff roller is done, it rolls and is removable. The photos below show the particulars and where/how it attaches. I know that I\'ll be putting on plates, spikey bits and rivets, I just haven\'t the image in my mind of what they should look like yet soooo..... I\'ll move in to the upper deck and the railings.

bw33.jpg

bw34.jpg

bw35.jpg

bw36.jpg


Before I show how that\'s going, I want to show you my latest find. TADAH!

bw37.jpg


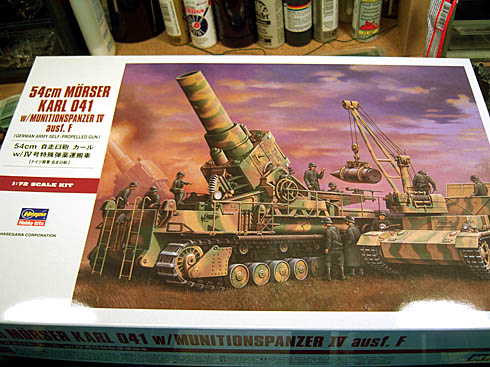
This is a 1:72 giant German gun. In regular 1:32/35 scale this would be way too big for something of the scale I need for a battlewagon (Gargant, yes), but in 1:72 it fits perfectly as my Kill Kannon. I sticky tacked it together to show the scale and general placement for the gun. Since it will be magnetized I can also use it as a Boom Gun on regular looted wagon. Two weapons in one! The extra bits I\'m not using for this build should yield me an extra looted wagon/truck combo and or a buggy as the smaller scale Panzer Ammo Carrier frame is too small to become a full fledged tank on it\'s own and I think I might use the base for a rokkit buggy. WHo knows?

bw38.jpg


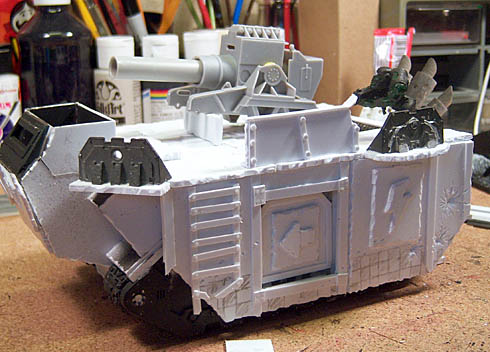
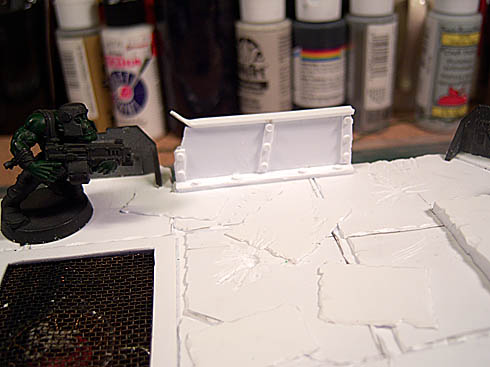
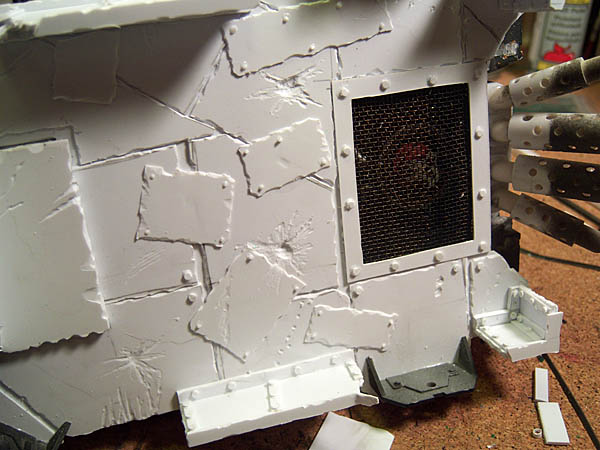
In the pics for the placement of the big gun is the first of the railings I\'ll be putting up to keep the boyz from falling off. The last pic shows the inside detail. Oh yeah, there\'s some rivets too! I picked up a leather punch and found out how dedicated one must be to make the hundreds of rivets that adorn all the orky vehicles out there. Whew!

bw39.jpg
 

spooktalker

New member
This is a great thread! Thanks for taking the time to show all your progress. You\'ve got some excellent solutions in here and the final product is a shoe-in for greatness.

Originally posted by Sukigod
I picked up a leather punch and found out how dedicated one must be to make the hundreds of rivets that adorn all the orky vehicles out there. Whew!
bw39.jpg

Yes, you are in for some serious hand-stress and if you\'re anything like me you\'ll end up gouging up the metal stop-plate that the punch hits after going through the plastic. Don\'t use plasticard. Instead, punch your rivets from a thin sheet of cured green stuff.
 

Sukigod

Member
Earlier, rosac asked what my \"plasticard secrets\" were. Wll, I\'ve laid them all bare in a tutorial How To: Battle Damage\". You should be able to find it in the articles section and I\'ll place a working link here once the article\'s been approved.


Tutorial can be found here.
 

Sukigod

Member
RIVETS!

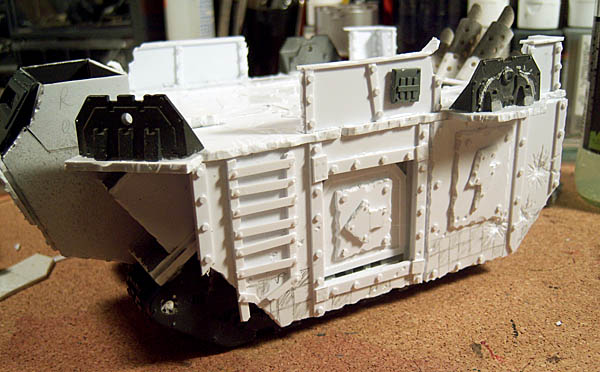
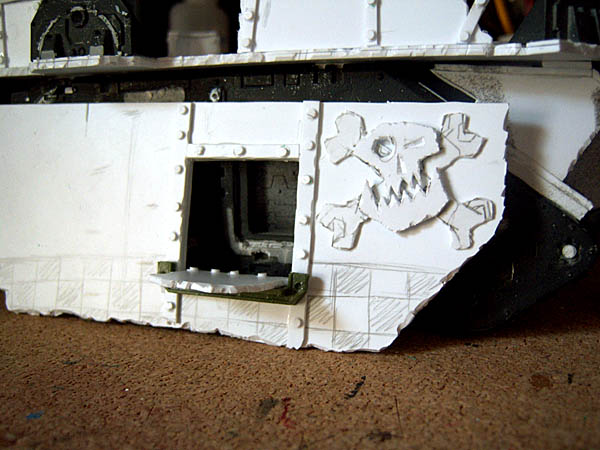
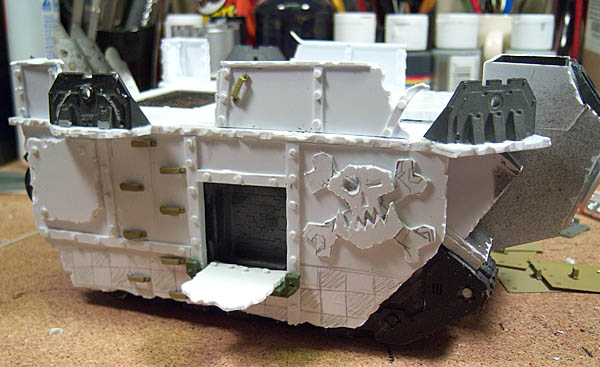
Ok, I put down some rivets, big and small. I\'m liking the way it \"fills out\" the character here. I started working on the other side armor, creating a pretty looking ork glyph for the front plate (IMO). Now I\'m jonesin\' to pick up a paint brush but all in due time, I guess.

bw40.jpg

bw41.jpg

bw42.jpg

bw43.jpg


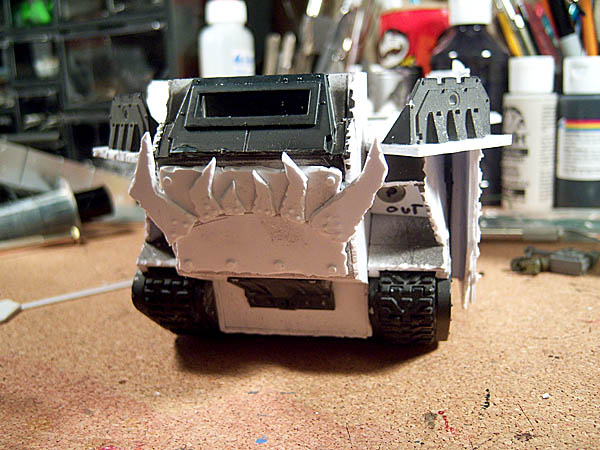
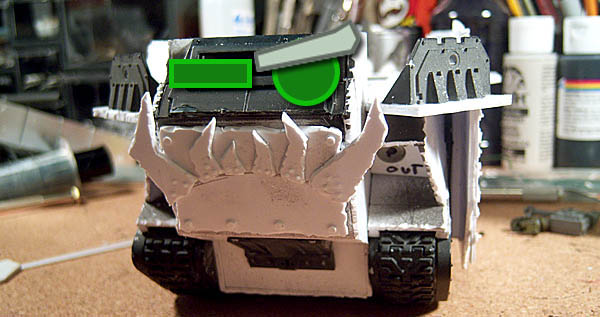
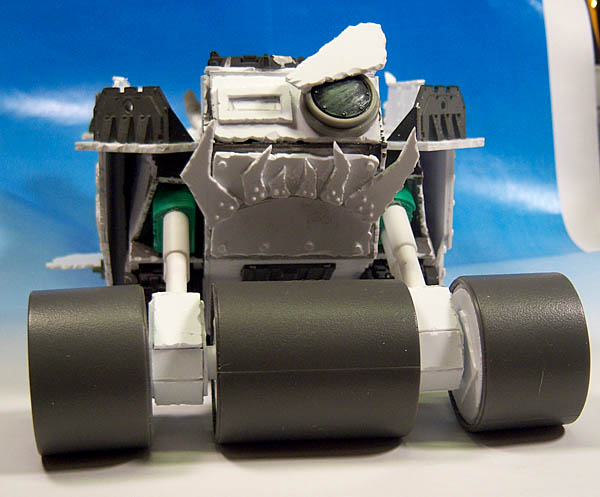
I\'m starting to rethink the front window/drivers compartment plate. I don\'t think it\'s imposing enough and I really want to work in the eyes/grimacing look to match the great big teef in the front. I\'ll most likely chop that off this weekend and build something new for it. Mud Duck mentioned the searchlights on either side earlier - I think I\'ll go with one search light on the right (while looking at it) and a view slit on the left, like in the bottom photo.

bw44.jpg


I\'m also second guessing the scale/style of the armor plates in front of the bolt on big shootas positions around the top deck. I\'ve finally got some ideas as to how I\'m going to do them, just need to pick up/create some parts.

And now that it\'s gon to page 2 (!!!!), here\'s the link to my new tutorial so it\'s easy to find.

Tutorial can be found here.
 

Sukigod

Member
Finished off the other side armor and redid the \"face\". Much happier with where it\'s at now. Very Gork-y. I\'ll be painting the lens of the searchlight a fractured green or blue. Not sure yet.

bw45.jpg

bw46.jpg


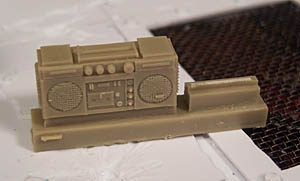
Digging through the bits boxes and came across this.
bw47.jpg


That\'s right, I\'m on the lookout for the Goff Rockers now.... Hehehe.
 

darklord

New member
looks sweet so far, you putting any spikes on the rollers or just having flat?

i can just imagine the ghetto blaster pumping out The Ace Of Spades!! as they fly down the hill
 

Sukigod

Member
Yeah - I\'ts got a certain Lemmy look to it, don\'t it?

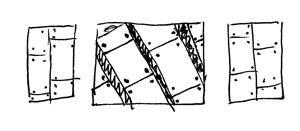
The roller is unfinished, I\'m waiting to be completely inspired to complete it so I moved on to other parts for now. I\'ve got an idea drawn out for a spiral like plating but I haven\'t found the right parts to make it easy yet...

roll.jpg
 

darklord

New member
would plasticard cut into strips then the teeth cut out work? if done in strips it should bend round the roller?
 

Jericho

Consummate Brushlicker
I think it might look funny to have the spiral in the middle and then straight up and down on the other ones. Having the lines of the model going all screwy doesn\'t look too good, even for orks.
 

Sukigod

Member
Hmmm, Jericho, I think you might have apoint there. I\'ll dummy the option up in paper sometime this weekend for looks and see what it does to the over all lines of the model. Thanks!
 

Manus

New member
The blaster rocks :rolleyes:

For some extra killshock effect you could add some grinding parts, like from a rock drill, to the roller(s).
 

Sukigod

Member
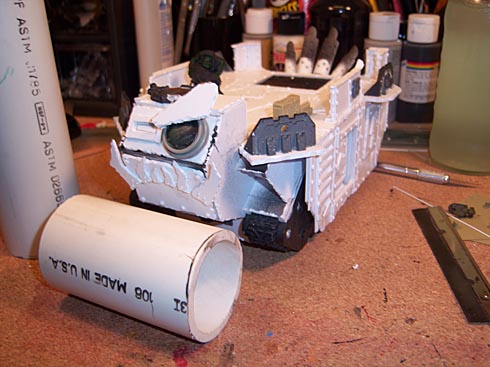
I frustrate myself sometimes... Cleaned out the garage in preparation for summer and found some old PVC pipe bits I\'d been saving for \"someday/something\" and I think I found what that is, although it\'ll make more work for me.

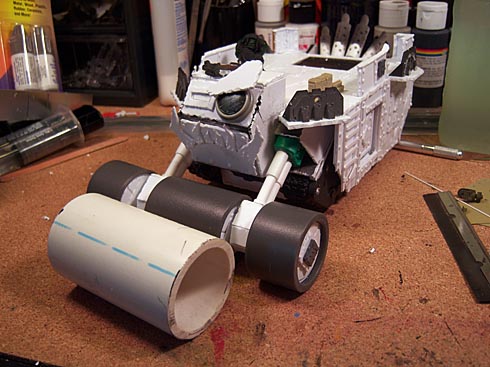
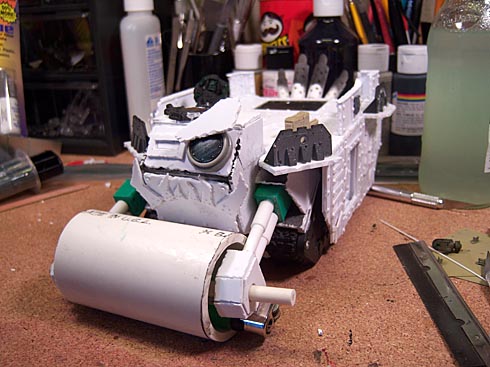
Part of me never really liked the diameter of the deff rolla I\'ve been working on, too weedy. This will be the base for my new roller. Of course, in great ork mek fasion, I\'ll find a use (already have an idea for the front of a Rhino/trukk) for the parts. Bothers me though that I\'ll be starting over on that part but I feel better knowing it\'ll look better too.

PVC Chunk
bw48.jpg


In Comparison
bw49.jpg


Temporary placement... Yeah, this looks better, scale wise.
bw50.jpg


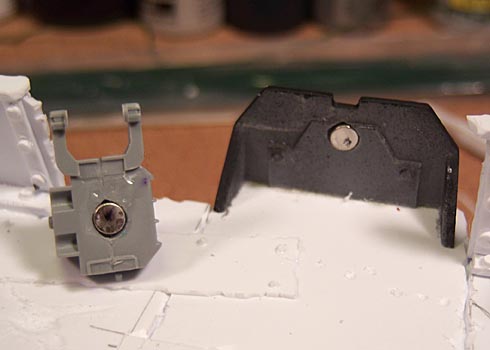
I did have some progress though with the big shootas. Found parts to use as mounts and magnetized them. I wish you could still take the twin linked big shootas as they looked much cooler.

I love tiny magnets! I\'ve got ideas already for the rokkit mounts too.
bw51.jpg


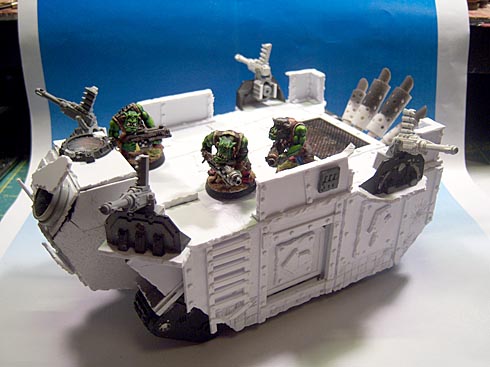
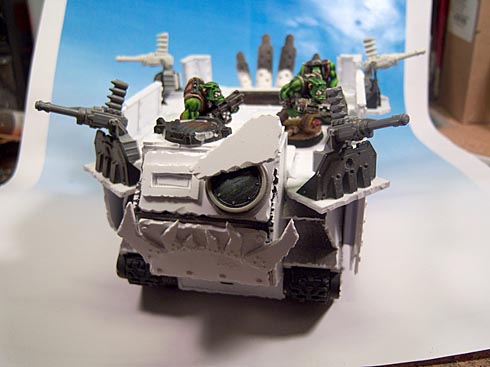
How it sits now, with boyz for scale. Looking much more battlewagon-y.
bw52.jpg

bw53.jpg


@Manus - I thought about something like that too, a giant rock grinder, the idea is definately orky but I\'m not sure how I would carry it out. Maybe as a counts-as deff rolla. It\'ll see about trying to come up with something for the next wagon.
 

Sukigod

Member
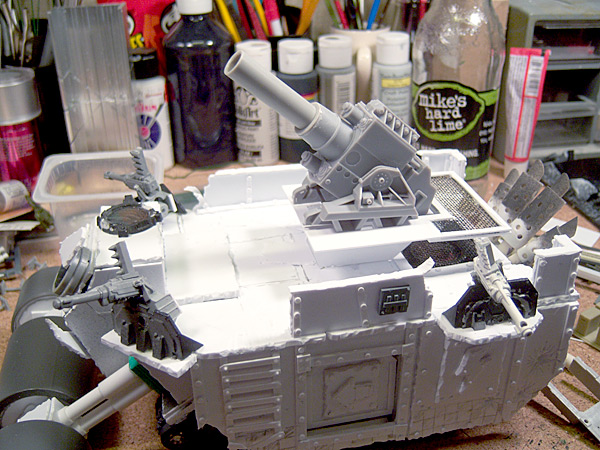
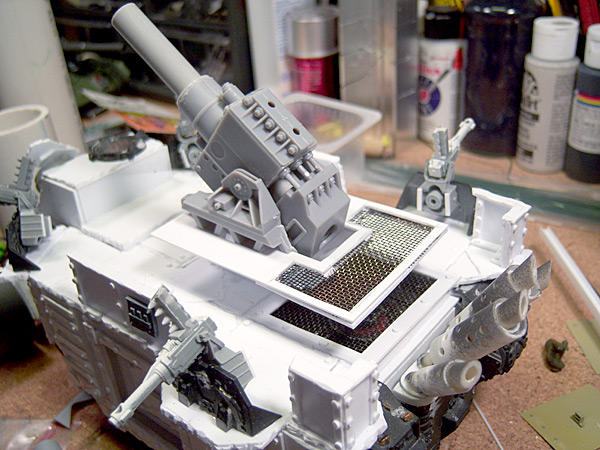
Started work on the Kill Kannon platform last night. I\'m looking for sturdy but transparent so you can see the plating and girding needed to stabilize a gun of this size. The idea is ramshackle beefy.

I\'m realizing lately that I\'m not finishing one area before moving on to another - the deff rolla is incomplete, the big shootas need to be finished off, the drivers compartment is still unfinished and I\'m starting on the big gun..... Oh well, I\'ll have to get back to them before I can start painting anyway.

BIG GUN!
bw54.jpg

bw55.jpg
 
Mate, looking good! I much prefer the larger single roller to the multipart one. Perhaps you could add some kind of gladitorial spikeage to the outer edges if you want to put something out there still.

That gun is especially awesome, nice and shooty :) the platforms look very nice, too.
 

Quareni

New member
Yes, I agree on the diameter of the roller: The new one is much better. And I think that spikes or blades on the sides would work well too.

The guns on the platform (both big and small) are awesome. You really have some great ideas and know how to pulle them off.
 

strybe

New member
been watching this and I love the new roller, but I agree with others, would be great to have some spikes on the side of it. It\'ll look a bit more menacing!!
 

Sukigod

Member
Thanks everyone for watching and the feedback!

Yeah, I resisted replacing the roller since I\'d put so much time into this one already but in the end I had to replace it. Oh well. The outside ends will be great as bases for front wheels on a trukk or a looted wagon (Forgeworld style, made by me), and the center portion I can use on another battlewagon with a lower profile. I wish you could but a deff rolla on a looted wagon.

I also agree with all the spikey bits comments. I\'m working on getting most of the base forms down and then I\'ll go back over the entire model and add all the dang gubbins and details I can. At nearly every step in this process I rifle through my bits boxes and each time I find a few more things that , when I last went through didn\'t look like much, but going through later I realize would work great as something. If that makes sense. I think I\'m trying to say, everytime I go through my bits box, which is often, I find something new to use somehwere. Yeah - that\'s it!

I\'ve still got a box full of things like tow hooks, chains, sandbags, barbed wire and the like to dress everything up with. This thing\'s gonna take forever to paint! Yes, I\'m the type that will paint it - I have to finish one project before starting another - it\'s my motivation!
 
Back To Top
Top