You are using an out of date browser. It may not display this or other websites correctly.
You should upgrade or use an alternative browser.
You should upgrade or use an alternative browser.
Persifal's Nest
- Thread starter Persifal
- Start date
Persifal
New member
Thnx Milosh. I made some bad decisions in the last paint session, I hope you stay tuned!
Thnx Canny, I think, I know, what do you mean. I will try to paint the other blade with different style of the reflections.
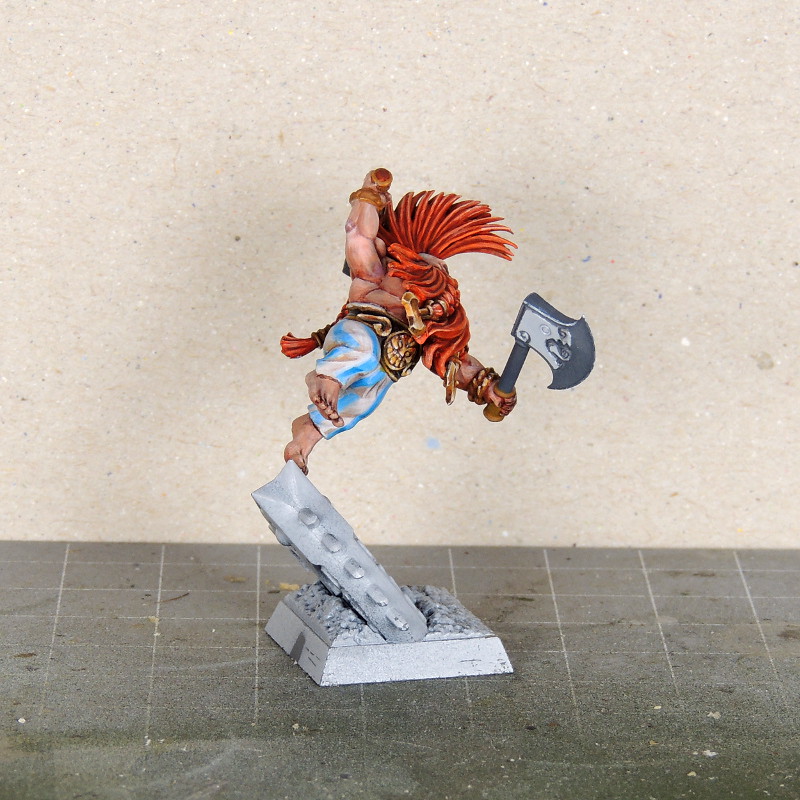
The last progress. Attempt to paint some gold parts. The photos show many mistakes and a lot of work to do.
Fingers are more dark in the simulation of hard worked dwarf. The glyph on the belt must be more dark. Please leave comment, if you have any hint. Thank you.
Thnx Canny, I think, I know, what do you mean. I will try to paint the other blade with different style of the reflections.
The last progress. Attempt to paint some gold parts. The photos show many mistakes and a lot of work to do.
Fingers are more dark in the simulation of hard worked dwarf. The glyph on the belt must be more dark. Please leave comment, if you have any hint. Thank you.
Persifal
New member
Thnx Canny! I'm appreciating it.
I was very busy in the last week, so painting hobby stops for me.
Despite the lack of time, my work on the dwarf goes to finish. I will be done this weekend, ... maybe.")
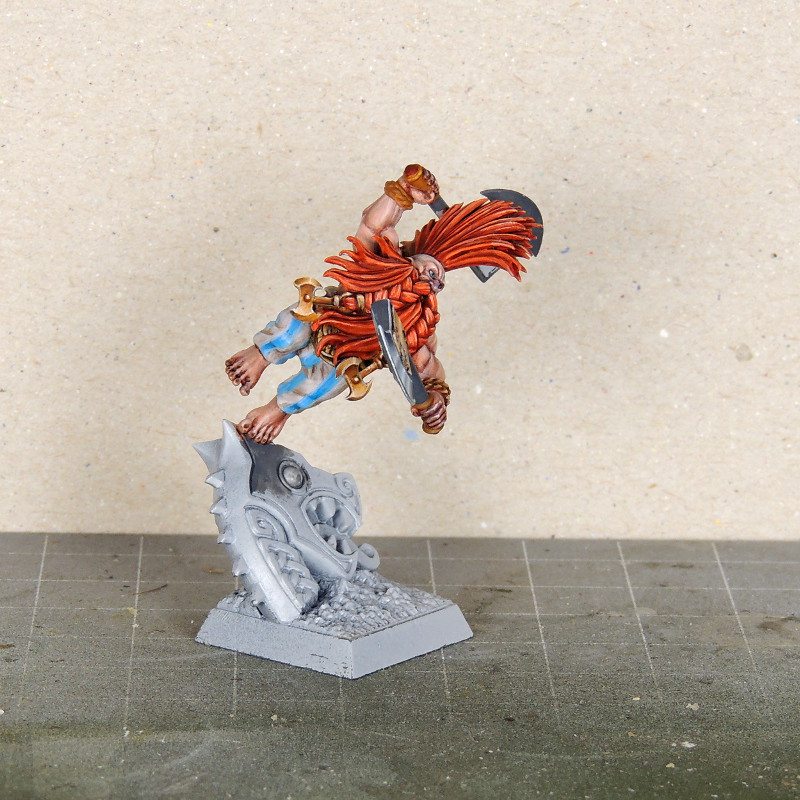
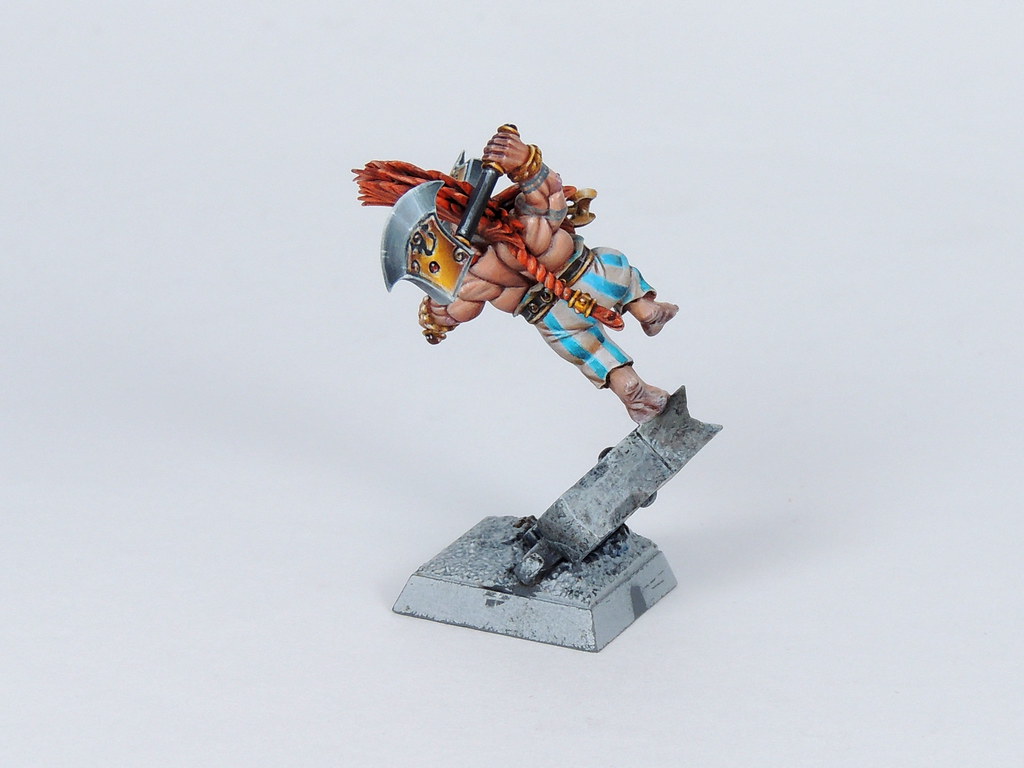
As you can see, almost of the details are painted.
First version of the stone dragon's head was flat, so I added more contrast and I tried to achieve more natural stone looks.
The tattoo on the right arm is a color test. Do you think the color of the tattoo is correct? And the other colors?
Thank you for a suggestions.
I was very busy in the last week, so painting hobby stops for me.
Despite the lack of time, my work on the dwarf goes to finish. I will be done this weekend, ... maybe.
As you can see, almost of the details are painted.
First version of the stone dragon's head was flat, so I added more contrast and I tried to achieve more natural stone looks.
The tattoo on the right arm is a color test. Do you think the color of the tattoo is correct? And the other colors?
Thank you for a suggestions.
Persifal
New member
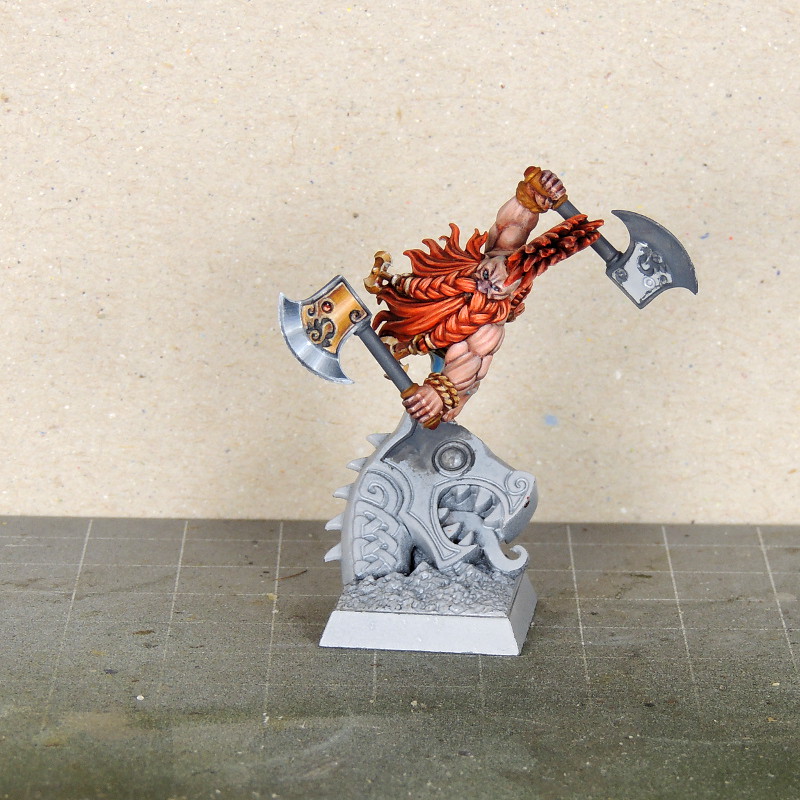
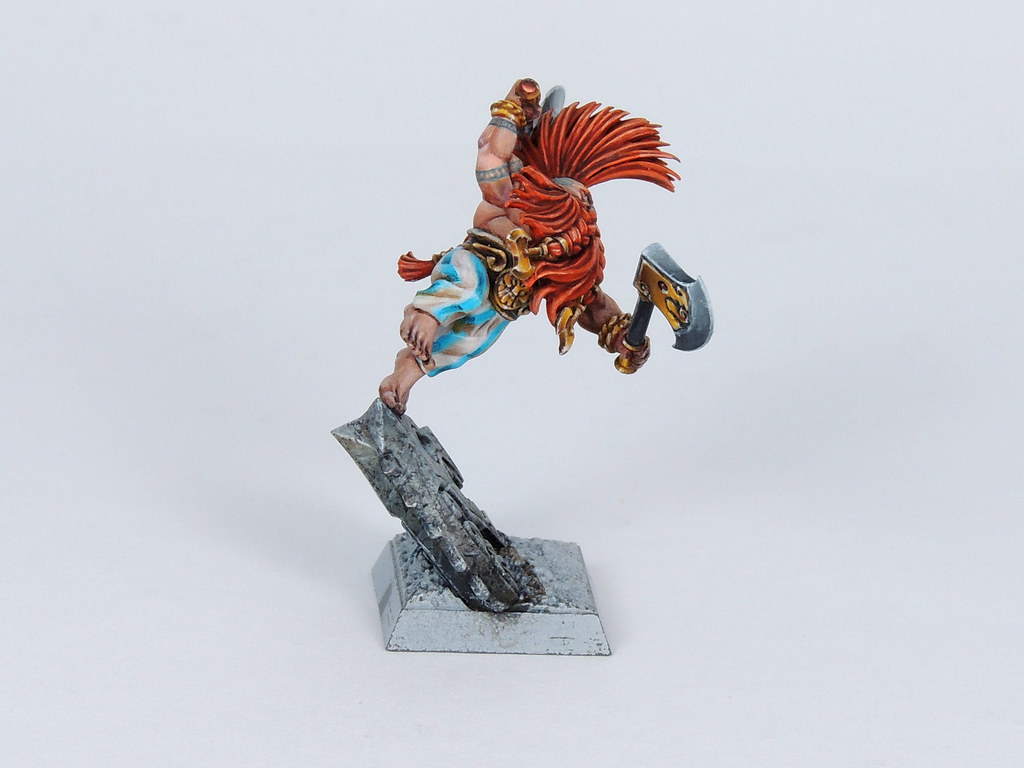
Finally done!
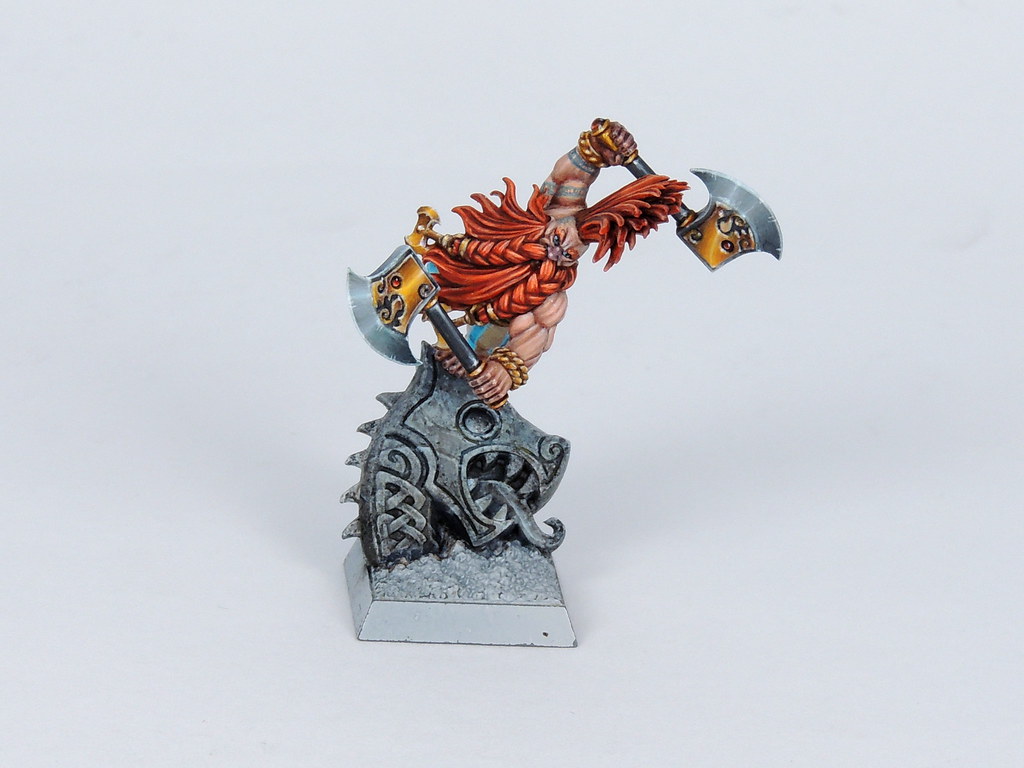
I added s lots of tattoo and finished the base. I wanted the base to be more monochromatic than the dwarf to grow contrast and focus to him. I learn much new about painting of the cold colored metals during this project but I think, I have big reserves in my NMM. The deadwood is made from a jute twine.
Please, let me know, how it turns!
You can vote here http://www.coolminiornot.com/354149. Thanks.
Persifal
New member
I was a little sad. That dwarf is not perfect and I was expected some critique reactions, but it looks like nobody interested last few days. Thank you both for your words.
@Canny: I wanted simple colored base in contrast with more colored dwarf. I hope it worked.
@ischa: The stone surface is painted with sponge. I was surprised how simple it is. I´m glad you like it.
@Canny: I wanted simple colored base in contrast with more colored dwarf. I hope it worked.
@ischa: The stone surface is painted with sponge. I was surprised how simple it is. I´m glad you like it.
DistortedMe
New member
Wow, amazing paintjob! really neat!
I personally like the 'soft lighting effect', as for critics.. only two point for me, the tattoo's seem a bit flat to me, but I would think its one of the hardest things to get it to not look flat, I do like the designs of them. The other point is the blue on his pants seems a bit 'fluorescent' (don't know if thats really the right word), to me it sort of distracts a bit, not the most comfortable to look at somehow. Hope the points make some sens anyway it looks great!
I personally like the 'soft lighting effect', as for critics.. only two point for me, the tattoo's seem a bit flat to me, but I would think its one of the hardest things to get it to not look flat, I do like the designs of them. The other point is the blue on his pants seems a bit 'fluorescent' (don't know if thats really the right word), to me it sort of distracts a bit, not the most comfortable to look at somehow. Hope the points make some sens
anyway it looks great!Persifal
New member
Thanks for comments and voting!
@Crudelus: Thanks, If you say left axe, you mean axe in the right hand? Yea, I had to turn that reflection to other side (turns to the ours right). The final highlight is painted white, but I softness it with yellow glaze.
@DistortedMe: Thank you!
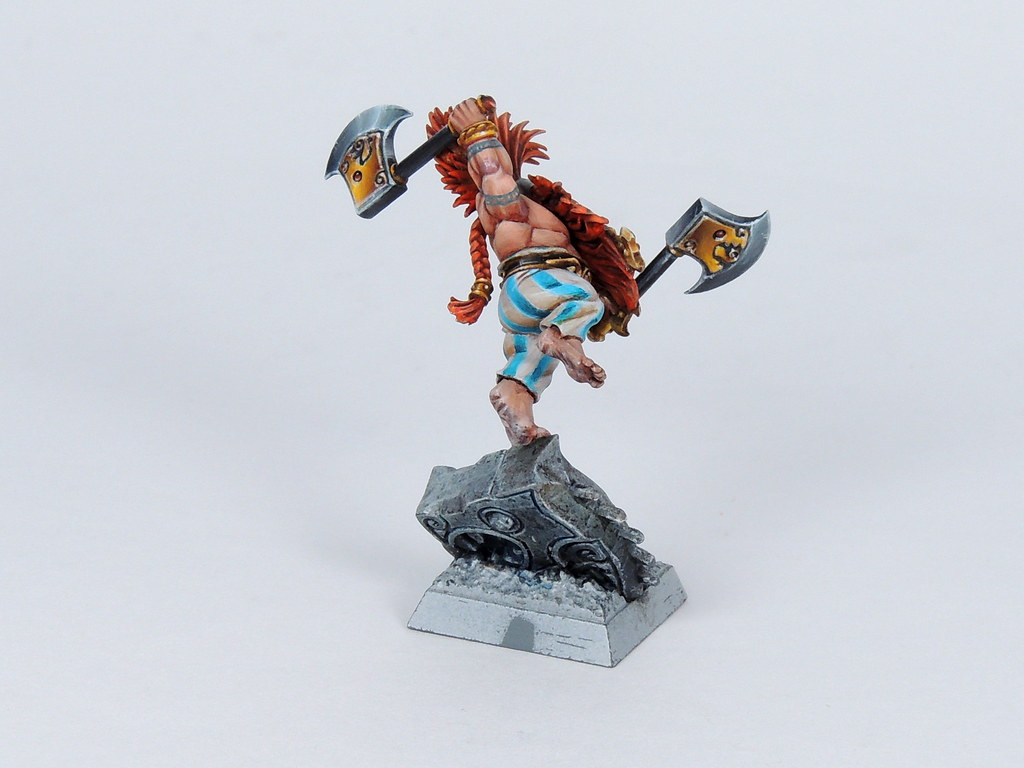
1. Tattoo is painted with one tone of color, but I try to glaze it with color of the skin highlight. Maybe making some shadows on the tattoo will help. But I don't plan make changes.
2. The blue on the pants is more problem of my digital camera. The base of that blue is GW Ice blue and my camera changed it to this glowing thing. I apologize but I used only white balance and I don't like using a color magics of the photo editors on my final photos. So blue is little more shining as in real. Different intensity of shading blue and white is intention that stripes are from a different materials.
@Crudelus: Thanks, If you say left axe, you mean axe in the right hand?
Yea, I had to turn that reflection to other side (turns to the ours right). The final highlight is painted white, but I softness it with yellow glaze.@DistortedMe: Thank you!
1. Tattoo is painted with one tone of color, but I try to glaze it with color of the skin highlight. Maybe making some shadows on the tattoo will help. But I don't plan make changes.
2. The blue on the pants is more problem of my digital camera
. The base of that blue is GW Ice blue and my camera changed it to this glowing thing. I apologize but I used only white balance and I don't like using a color magics of the photo editors on my final photos. So blue is little more shining as in real. Different intensity of shading blue and white is intention that stripes are from a different materials.SkelettetS
New member
very classic obelix pants, i actually like them. looks good. i also like the stone effect, very effective. still think you shoud have gone for TMM instead though, but i guess i cant have it all
oh, and you forgot to highlight the toenails!
oh, and you forgot to highlight the toenails!
DistortedMe
New member
Was thinking, maybe for a next time you could glaze with a darker skin color in de shadows instead of glazing everything with a highlightcolor, cause i noticed how the tattoos on his back do look good not as flat, as there is a real light/shadow on there, on the arms thats a bit less. As for the pants, photographing a mini is a pain lol.... it makes sense that white balance messes it up a bit, nonetheless the quality is still amazing!
And I forgot to mention: the stone.... WOW! when i saw it painted by GW I was like 'aah not a scenic base.... ' but you just blew that away...
Is there any chance on a tutorial-thingy or step-by-step on how you achieved it?
And I forgot to mention: the stone.... WOW! when i saw it painted by GW I was like 'aah not a scenic base.... ' but you just blew that away...
Is there any chance on a tutorial-thingy or step-by-step on how you achieved it?
Persifal
New member
Thanks DistortedMe,
First version of the stone was very similar to the original. Without the metallic parts of course. I wasn't happy with that. So a took sponge with black paint and I made some dark dots over almost all surface. Second layer with sponge was made with some neutral grey concentrated to the future lights. Third layer with light blue gray was made mostly on the lights. Next steps was black and brown wash to make some contrast. The last wip photo are from this stage. Followed some grey glaze, some sponge work, wash and edge highlighting . As you can see, I did not used nothing special. Making next layer hasn't planned and was depends only on my feel. I hope it helps.
First version of the stone was very similar to the original. Without the metallic parts of course. I wasn't happy with that. So a took sponge with black paint and I made some dark dots over almost all surface. Second layer with sponge was made with some neutral grey concentrated to the future lights. Third layer with light blue gray was made mostly on the lights. Next steps was black and brown wash to make some contrast. The last wip photo are from this stage. Followed some grey glaze, some sponge work, wash and edge highlighting . As you can see, I did not used nothing special. Making next layer hasn't planned and was depends only on my feel. I hope it helps.
Ford Fairlane
New member
I love the job you did on this and what I especially love is the beard! As my first mini to paint will be a dwarf, can you please tell us the steps you followed for the beard/hair?
Persifal
New member
Thank you,
Making steps of the beard are:
1. basecoat - blazing orange (old Citadel)
2. wash - dark flesh (old Citadel)
3. layer - blazing orange all raised areas
4. highlight - lugganath orange (new Citadel Edge)
5. more contrast - dark flesh and dark flesh + abaddon black to shadows
6. glaze blazing orange on the light areas
7. second highlight - lugganath orange
I hope its help.
