Sukigod's All-In-One Painting Log

Sukigod

Member
Nice idea marcineczek0! I might try this on the outside engines to see how it looks, might be better when doing smaller turbines too. Thanks!

Ya gotta work on what inspires you when it inspires you, right? Well I was inspired in the middle of the night. I've been playing with some new units and Skorcha Trakks are one of them. I really like how they've been working for me so I set my brain into Hey, work on this in the background" mode about how to build some.

Two things came together at once. I've been using deff koptas without blades and stands to proxy them in the last few games. I then remembered one of our gaming pals bought a bunch of Hot Wheels Batman Tumbler kit things and converted them to Tauros' for his 'umie force. I was the final recipient of the left over track parts. They've been sitting in my bitz boxes for almost a year with nothing to do - until now. My only concern was how well it would fit with the deff kopta bodies.

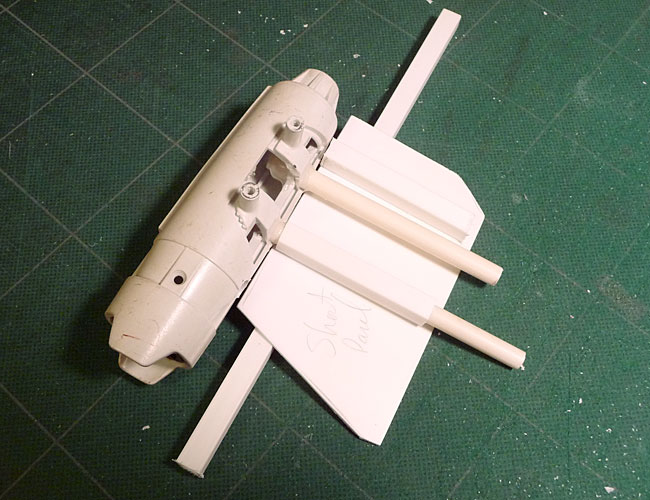
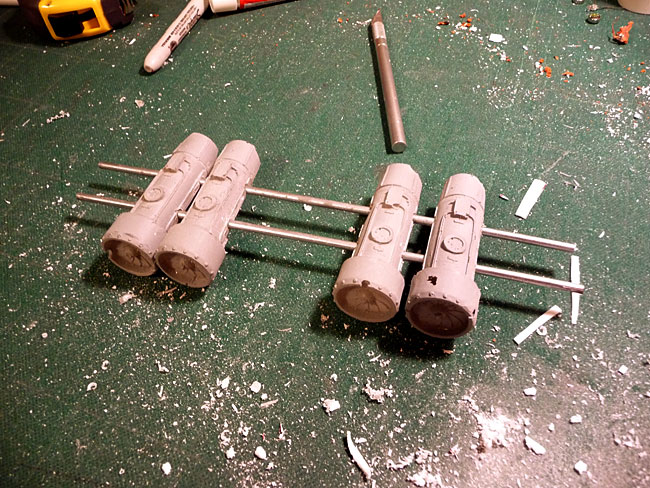
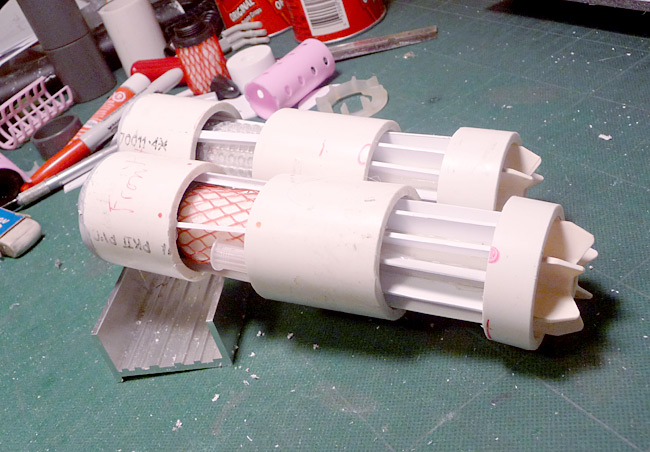
Here's the two main parts.

trakks1.jpg


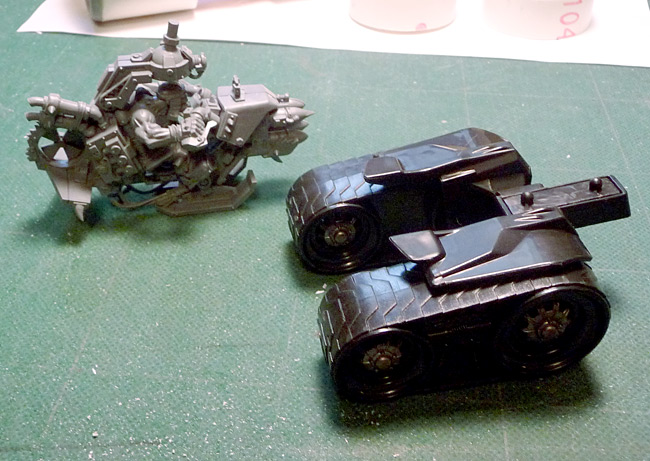
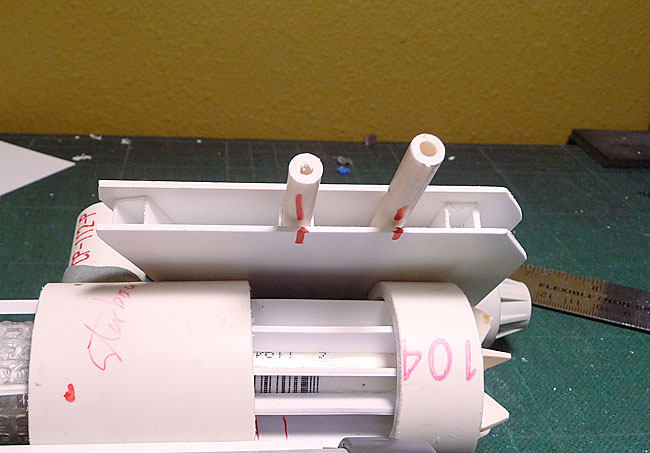
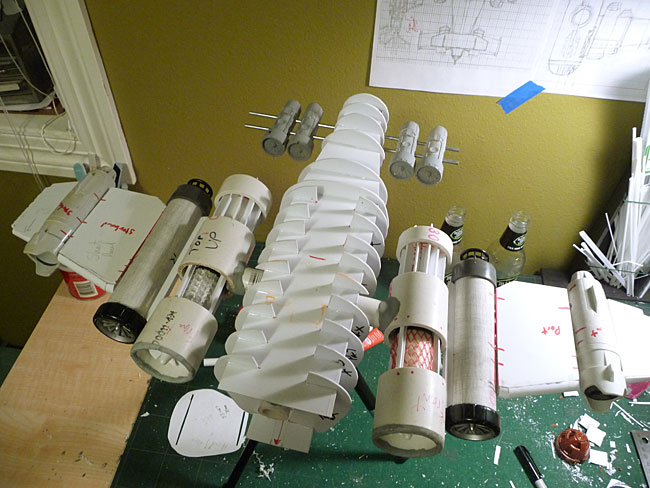
Here's the one on the other for size comparison. Admittedly the tracks are a little wider than I'd like but I think I can make them work.

trakks2.jpg


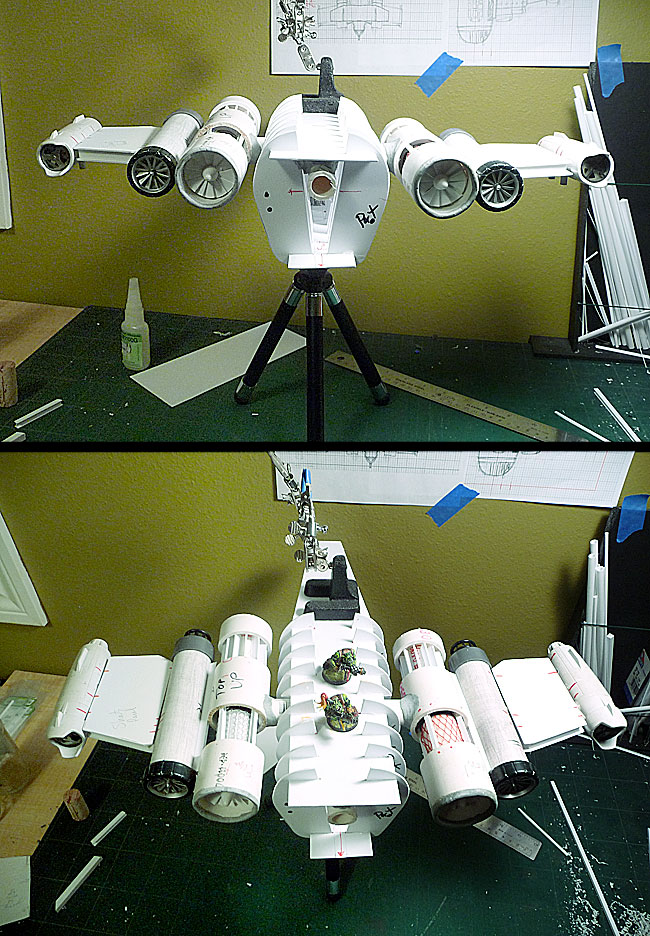
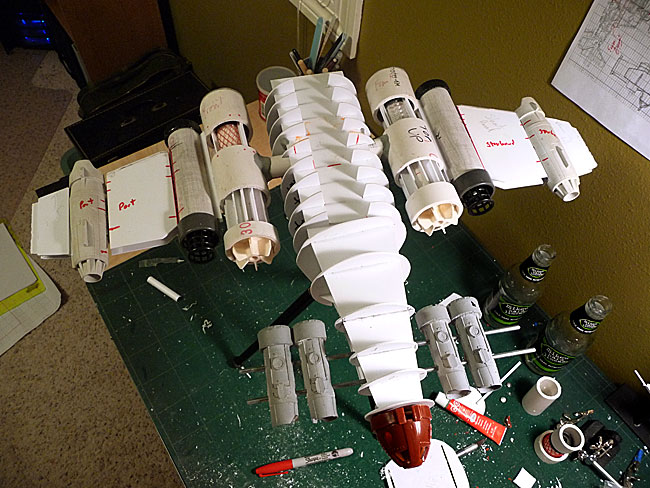
An hour later (and an online shopping trip to purchase two more...) the deff koptas fit snuggly in the middle of them tracks part.

trakks3.jpg


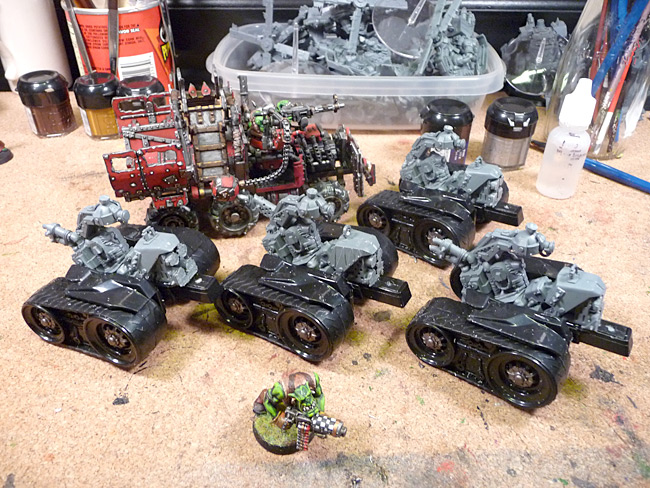
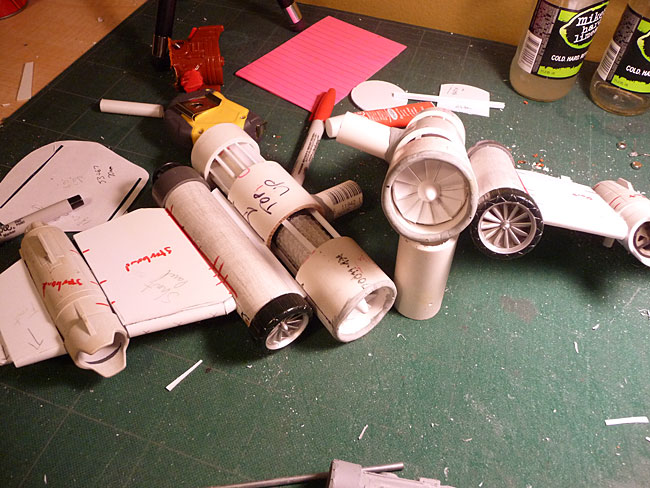
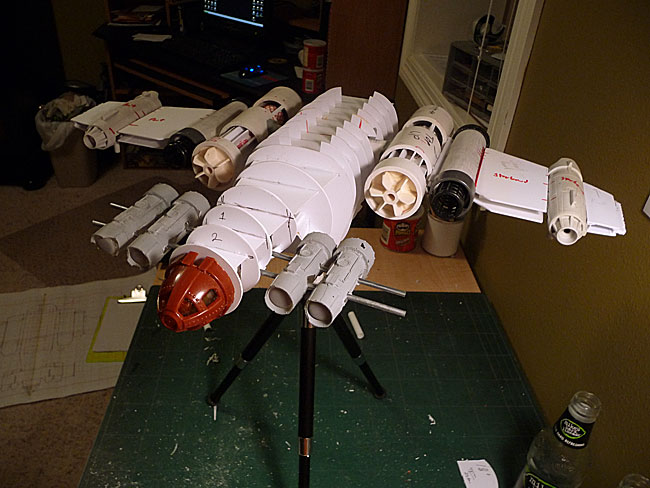
Barry shot with trukk for scale. I'll be adding a platform around the back for a gunner to stand on with the skorcha pintle mounted where the blades were. A bit of armor and spikes to fill out the front and some armor plating to orkify the rest. Thanks to Jason for the tumbler parts!

Later!
 

Sukigod

Member
More bommer work done after the initial spaz about the warbuggies...

Here's some parts in subassembly stage.

bommer28.jpg


I've gotten the putty rounding the engine cowlings done, although not the best. I should have done a one extra engine that I tested everything out on first. Could have been helpful with the bad shaping job on the first engine (you'll know it when you look at it. I'm hoping the paint will mask some of that.

Engines!

bommer29.jpg


bommer30.jpg


bommer31.jpg


I'm going to figure out the wing attachment method next, then i can move on to the second engines that will be strapped to these. I'll be building the general internal structure and everything that needs to be really strong first. Then I'll go back and add all the detailing and pretty things up so most of the work at the beginning won't be too exciting or beautiful to look at.

p.s. the internal fins at the back are from paint roller end caps. You'll recognize these if you ever painted the inside of houses with rollers :)

Later!
 

Sukigod

Member
Thanks Tee999!

Spent an hour working on getting the wing/engine connector worked out. Nothing too complex really. Carefully drilled out a hole big enough to just fit the 1/2 PVC into in each engine housing. Cut some pvc and temporarily hot-glued it in place. I then used a snake of plumbers putty and sealed it up good. Let it cure for 1/2 an hour and test fit the parts.

bommer32.jpg


This is a closeup of the interior of the connection to the 4-way piece inside.

bommer33.jpg


It's only getting bigger. Now that I've got the majority of the weight of the wings attached I find the balance is just fine. Not a wobble to it.

bommer34.jpg


bommer35.jpg


The missus is out for a couple of days with our daughter in Chicago so I'll have a lot of alone time the next four days to get a bunch of work done. I'm hoping to have both wings worked out by Tues./Wed. Then I can start on the tail frame and then start thinking about the smaller details like the deff arsenal in the nose and the cockpit.

Later!
 

Sukigod

Member
(in my worst/best Monty Python and the Holy Grail impression)

I'm not dead yet!

Just extremely busy with a ton of other things. Just returned from driving 1,000 miles (and back) to play 40K with some of the coolest people in the game. Me and three friends drove to Huntsville, Alabama from Minnesota to take part in the Kalm Before the Waaagh! bar tournament. Things didn't quite turn out as planned as Mother Nature trounced the snot outta the South here in the states. Long story short - 178 tornadoes in a week and massive flooding - both across multiple states - couldn't keep us from playing.

Now that I've returned, this leaves only six weeks (GAH!) to get ready for our own tribute to The kALM, The Granite City Waaagh!Fest coming June 18th. Prizes and trophies are taken care of (I'll post the trophies when I get them back - they're sweet), we're now in the process of finalizing/playtesting the missions and making sure we have enough terrain to layout 16 sweet tables. This leads me to our first pic of the day...

platfrom.jpg


I've had a couple of Pegasus kits sitting in my closet for a few years and decided to put them together for Waaagh!Fest as we need more buildings. Pretty simple. Multilevel building terrain with a few strategically placed walls that could give smaller units some line-of-site blocking from certain directions. I'm not going to kill myself in the painting department with these so they'll get a pretty standard metallic drybrush and wash treatment after glueing to hardboard.

The blasta bomma is on hold most likely until after Waaagh!Fest but that won't stop me from picking up incredible deals while increasing my Orky Airforce. While picking up survival supplies on the way to Alabama's National Disaster Area, I spotted these beauties in the toy aisle. Reasonably prices between $10 and $17, these practically leaped at me from the shelves. Perfect for slapping a few orky details, painting up and calling them good.

planes1.jpg


Shown by mu blasta bomma for scale. From left - floatplane, mini-fighter and twin-tailed fighter/bommer. Here are some closeups and what I'

planes2.jpg

This one will make a fantastic fighta bommer. This one has a giant set of grabba claws that pop out from the nose and a pop-up cannon that comes up over the cockpit.

planes3.jpg


I'll use this little fella as a fighter. It's got a wierd wing flapping function that really doesn't add anything I could use game wise. BTW each of these planes fires little missiles from somewhere on the plane. THis one is from the center of the propeller.

planes4.jpg

This one seems to be styled after the P-38 Lighting. I's got a ton of little actions. The engine nacelles pop out into a different position (second part of photo), the upper wings are positionable and there's a tailhook that is attached to a pull string that spins a flaming exhaust - all in all, pretty sweet.

These, along with the two fighta bommers and the blast bommer (when finished) should net me somewhere in the neighborhood of 1,500 points in fliers alone. Not a bad skwadron if I do say so myself!

Later!
 

Tee999

New member
nice update sukigod. Glad to see your not dead.
i see you found the same red toy plane i'm using as part of one of my current projects.
it was a little pain to get apart. :) cant wait to see what you do with them.

Tee
 

Sukigod

Member
//////creeeeeeeaaaaaakkkkkkKK!!!!!!/////

>>hello? anyone in here??? <<

Time to open this vault and resurrect a slightly must thread here. I've been away doing really cool things, like this!

fest1.jpg


We've spent the last three months cranking out terrain and writing missions for a WH40K bar tournament that took place this last weekend. It was a resounding success and we'll be doing it again next year. If you want full coverage and photos you can check things out here…

http://www.waaaghfest.com/waaaghfest-2011/

Now that it's over, I can return to the Big Mek Bench start working on some things I've been inspired to make because of the tournament. One of them being a Big Mek Yard board especially for next years event. As a motivator, I think I'm going to propose a competition between all of is Waaagh!Fest staff members to create a special themed board and put them up to a vote. The best one becomes the "Cage Match" table at the end of the tournament next year. I'm liking that!

I should start cranking out modeling related material by the end of the week - it's good to be back!

Later!
 

Mr.S.Marbo

New member
Looks like it was a good event. I am looking forward to seeing what this huge Ork aircraft is going to be like, it's looking very promising.
 

Kretcher

Active member
I agree with previous writer, also want to say that this thread is an inspiration, sadly I am not working on a orc army at the moment, yeah there are other armies out there :)
 

Tee999

New member
Now that's a gaming event I would love to go to.
I never would have thought of a bar/pool hall for gaming. but its so genius. Open areas with a lot of tables.
And beer!

Can't wait to see more progress on your stuff.

Tee
 

Sukigod

Member
Thanks everyone! THe bar thing wasn't my idea though, to be honest... A great guy named George from Alabama was the inspiration for it.

Alright fans, another picture filled post with a ridiculous level of mundane detail. I know you all like it that way ;)

Ahhhh the workbench - I missed you so! Has it really been three months?!

bommer36.jpg


I promised to start working on the bommer again so here it is. Tonights goal was to get the forward wings engines in place and that's exactly what I did. The second engine is actually screwed into the first engine for maximum stability. Not much glues well to pvc so I've decided to use screwes where ever I can.

The key to doing this is in the first pic, showing a small pilot hole in the outside engine nacelle with a larger hole on the other side. This is so I can actually fit the screw head into the pipe and physically screw it through the interior engine shell. AS shown later, this just happened to be the same diameter as the tubing I'm using to attach the outer engines so they fit fairly snug before epoxying.

bommer37.jpg


I used a large piece of I-beam as a spacer between the two engines and it handily hides the screws

bommer38.jpg

bommer39.jpg

bommer40.jpg


Now the second engine is attached.

bommer41.jpg


I had some rigid, thicker plastic tubing laying around that will work perfect for support struts between the second and outer engines. I drilled a few holes and epoxied everything together. Here's the bommer after tonights work...

bommer42.jpg

bommer43.jpg

bommer44.jpg


OK - I know the starboard wing tilts up at the moment. It has to do with the angles of the screws and holes and how I laid them down on the template for fitting. I'm going to just sleep on a solution that won't force me to do something drastic.

Feels good to be back in design/engineer/Big Mek mode again.

Later!
 

Sukigod

Member
Thanks det! Didn't actually do much work after the pulsa though, to be honest. Been pretty busy with other stuff!

Small progress last night on the bommer. Would have gotten more finished but I stumbled a few times, silly mistakes, all recoverable with a little time and grousing.

My last few large Apocalypse projects have taught me a little about "overbuilding and over engineering" these types of models. The problem comes with them usually being mixed-material things. Metals, many types of plastics, wires, rubber. The problem comes from getting some things to stick to others. PVC is a great, strong building material and it comes in tubes which is very handy for rokkets, engines, silos, aircraft bodies, etc. The problem with pvc is almost nothing sticks to it very well, hence one of the reasons it's used on the plumbing industry.

PVC to PVC with PVC glue sticks like they've been welded together, but I'm not attaching pvc to pvc. Polystyrene glues don't adhere well to pvc - super glues are only slightly better than that. Epoxies work reasonably well but are still prone to shearing effects. This leaves us with sheet screws as our absolute best methods for attaching things to pvc. Things aren't going anywhere without a lot of force. Now, don't get me wrong, I don't plan on throwing this thing from across the room to come crashing down on the table (cool image though) but I do want it to be stable and durable enough to play with and move/transport without having to build in special compartments to hold it's own glue tubes for repairs every game.

So that long winded distraction brings me around to my point/rule for building large items w/pvc. I try to attach polystyrene to the pvc with screws where ever I can and try to hide the screws afterward.Plumbers putty and two-part epoxies are my second tier adhesives. After that it's super glues (very rarely though) and I try to use polystyrene glues only on styrene. Once I can wrap everything that's not styrene with styrene, then I can start all the details and work with the plasticard normally.

Ramble over.....

Here's what I did get done last night. I removed the outer engines, after a little cursing, and fixed the angle on the starboard wing. Then I glues large square channel to the wing panels. This channel perfectly fit over the stabilizing tubes (thank Mork), well, at least one from each side (dang Gork). The channels simply slide onto the tubes and I'll glue everything thing down when they're finished.

bommer45.jpg

bommer46.jpg

bommer47.jpg


Most of the actual stress will be on the tubes between the second and outer engines so I'm not worried about the panels having to be super strong. When I'm done building the outer wing sections they're get epoxied to the inner set of engines to make the best connection. The panels will add to some rigidity to the whole construction when done.

Almost done with the main wing super structure!

bommer48.jpg


I just have to finish the outer wing tips, then I'll move on to the back end of the fuselage and fill that out and start the tail section. Once all the main structures are finished I'll start from the nose and work my way back adding in all the details (like flying deff aresenals!)

Later!
 

Meph

Cat-herder Extraordinaire
Woa... coming together nicely. That's shaping up to be one big behemoth.
 

Sukigod

Member
Thanks Meph!

Made a little progress on the bommer yesterday. Finished the wing tips and made the rear exit compartment. It's difficult (not being a ship/aircraft builder) to wrap my head around how the center ribbing down the rest of the tail is going to look like. I've only got 6 more sections to plan/cut out and it's taking me a long time to figure it out. I'm sure it'll work out in the end.

Here's the outside edges of the outer engines. I've screwed (see my last post) large H-beam channels to the engines and will be glueing the wingtip plates to these as everything out the the end of the wings will be all plasticard.

bommer49.jpg


Here are the outer wing sections…

bommer51.jpg


…and the wings fully assembled.

bommer52.jpg


Here's the bommer with wings attached to the fuselage. The final wingtip to wingtip measurement is 21.25". And yes, that's a stock GW battlewagon at the bottom as a Barry shot. It's gonna be a beastie!

bommer53.jpg


Later!
 

armornv

New member
That thing is BEAST! Don't think I would make a very good Space Marine........ cuz I'd prolly sh*t my pants if I saw one of those fly over.....

I do believe I see an old school thing of Testors tube cement on the table there.....Very nostalgic!!!! :)
 

Hasdrubal

New member
THat is indeed massive! The structure is shaping up quite nicely, that's already a significant amount of work you've done on the project!
 

Sukigod

Member
Got a little work done tonight - won't look like much but it's a bit further along than last night.

Did the rolled portion of the wings leading edges. I sliced a styrene tube lengthwise and trimmed it to fit and glued it to the open edges.

bommer54.jpg


Then I went after the rear engine assembly. I received these engines from a friend - they're Forgeworld fighter engines, just made from a different material ( ;) ), drilled through and slotted with two metal bars cut from the cross members from those stupid political signs you see in the front yards around election time. I finally found a good use for them.

bommer55.jpg


I also finished the interior ribbing for the tail of the plane. Then next couple of shots show the bird put together with the tail engines in place. The metal bars will also give me a very solid and structurally sound frame to attached the rest of the polystyrene wings to.

bommer56.jpg

bommer57.jpg

bommer58.jpg

bommer59.jpg


The last couple show the rear turret temporarily attached with poster tack for placement. And before anyone asks, it's the nose from a toy from Disneys Atlantis movie. I picked up couple over the years at garage sales and the like for probably a buck or less. Worked perfectly!

Later!
 
Back To Top
Top