You are using an out of date browser. It may not display this or other websites correctly.
You should upgrade or use an alternative browser.
You should upgrade or use an alternative browser.
Sukigod's All-In-One Painting Log
- Thread starter Sukigod
- Start date
Sukigod
Member
Thanks mud duck. As I'm painting the first 10 tacticals and 5 termies I think I'm figuring out what my particular interpretation is - I'm trying to make this easy as possible since I don't plan on making this a huge army or devoting as much time as I do to the orks. (*they're my babies!)
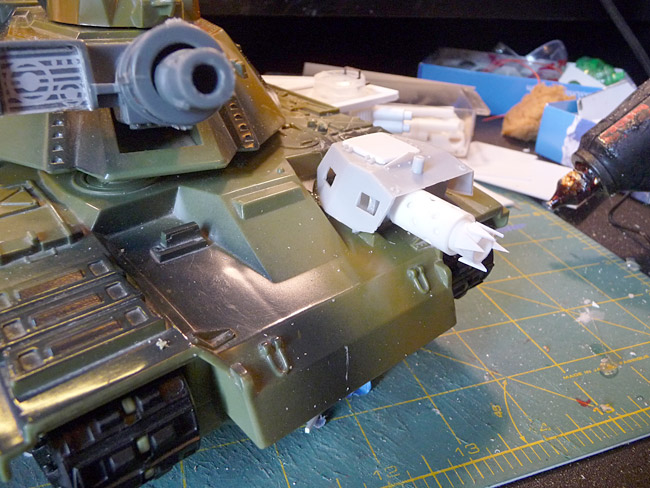
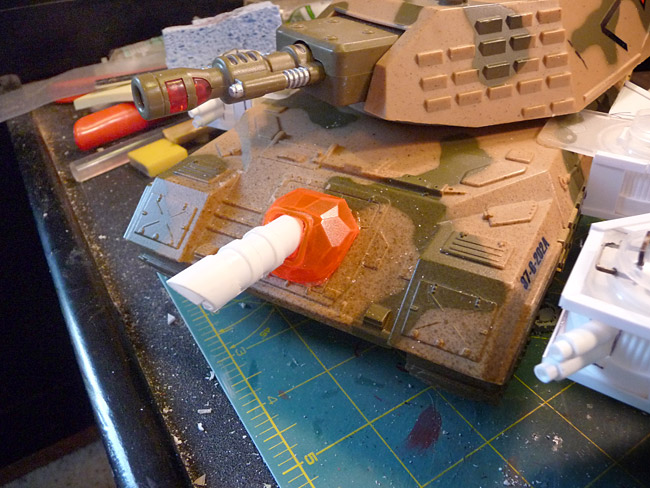
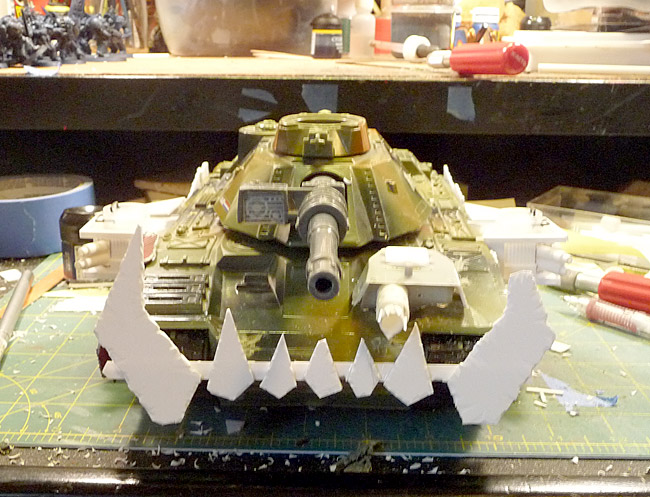
Finished the skullhammas sponsons tonight. I still have the rivets to do but I'll do them all at the end. Here ya go!
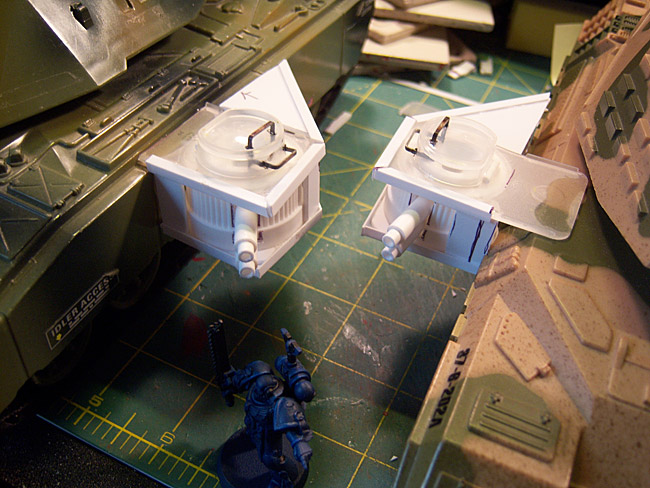
Next are the kannons.
Later!
Finished the skullhammas sponsons tonight. I still have the rivets to do but I'll do them all at the end. Here ya go!
Next are the kannons.
Later!
Sukigod
Member
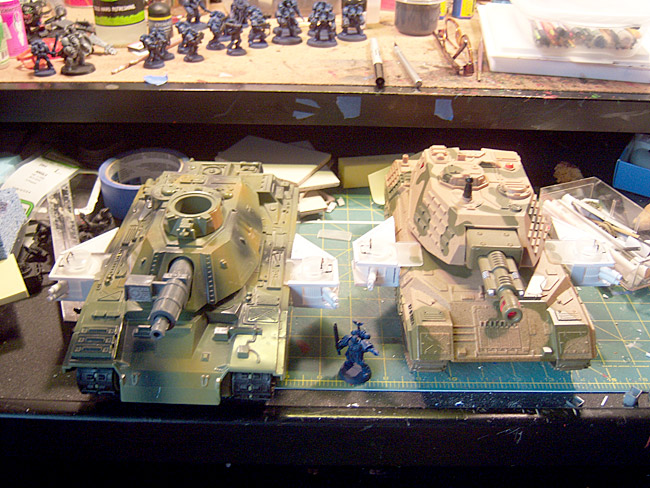
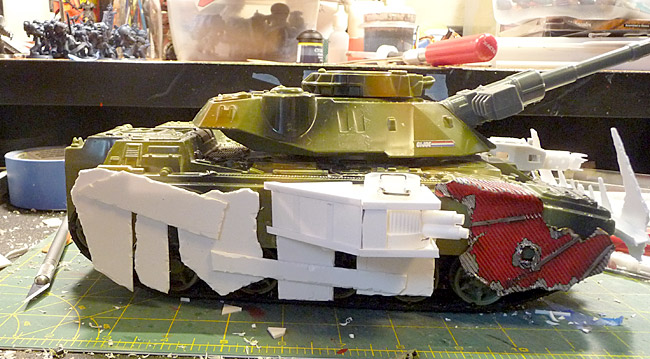
OK. Finished with the first skullhamma, the other should be finished tomorrow with the hope of priming tomorrow night.
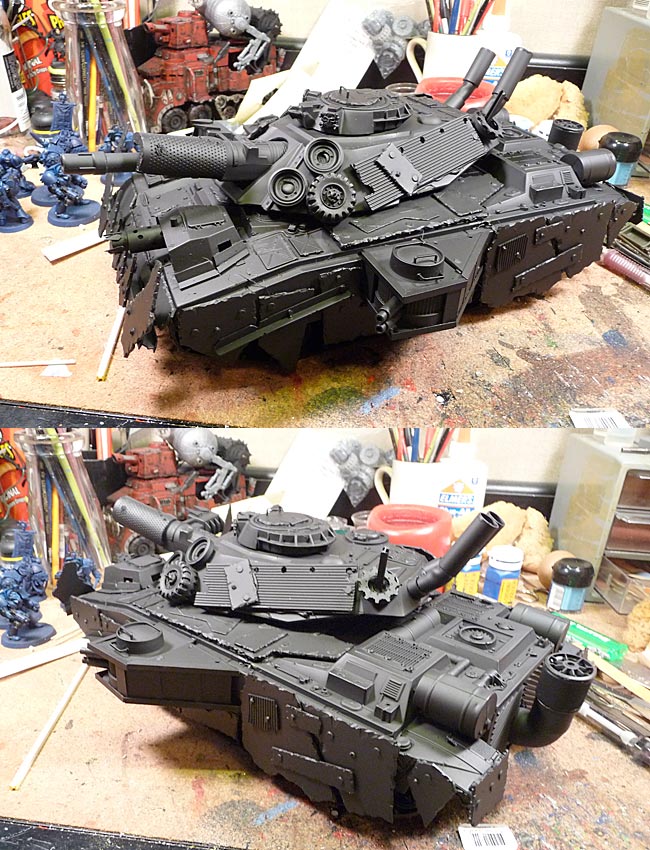
Photos, that's about it. I've greyscaled it because the color version is even harder to tell what's what.
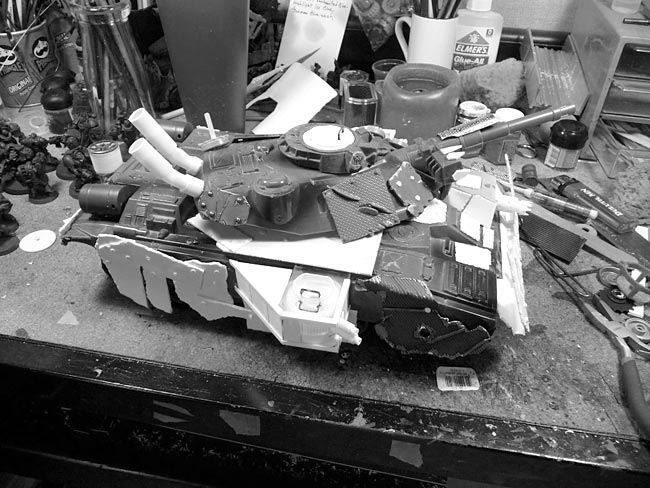
Nothing too detailed or "soopa doopa orky", just looted and plated enough to tell it's not an imperial machine anymore.
Later!
Photos, that's about it. I've greyscaled it because the color version is even harder to tell what's what.
Nothing too detailed or "soopa doopa orky", just looted and plated enough to tell it's not an imperial machine anymore.
Later!
Sukigod
Member
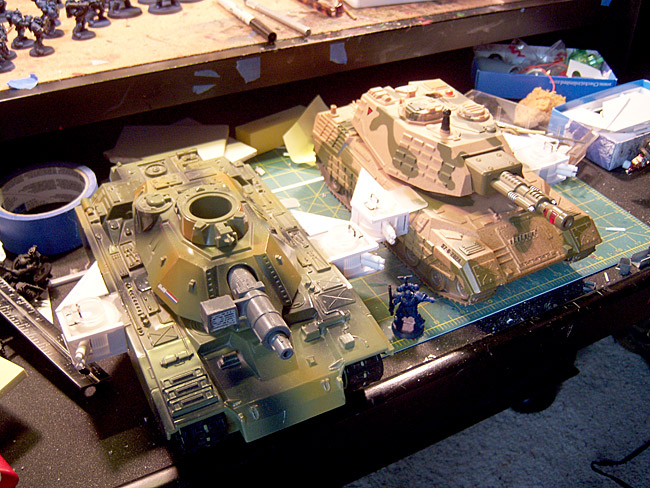
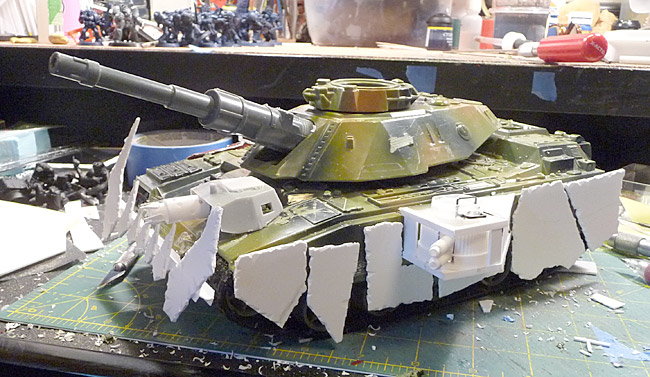
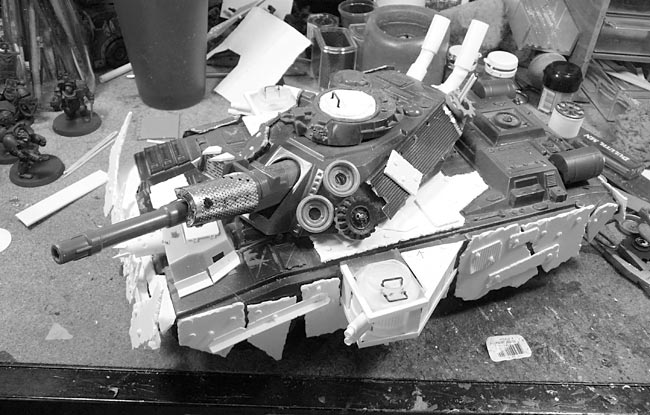
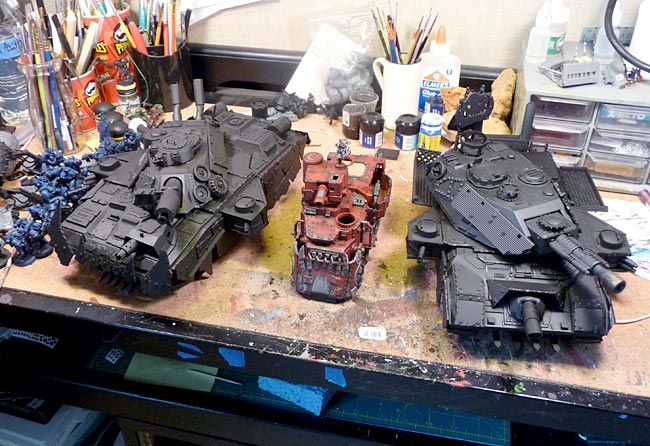
OK - second skullhamma tank build finished. Grayscaled for the same reason as before.
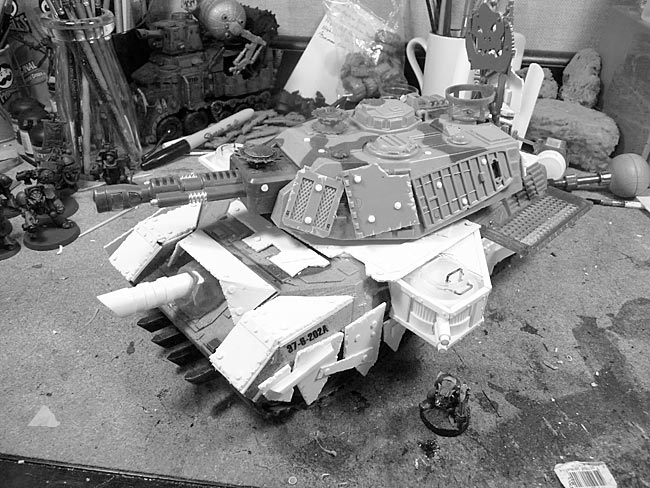
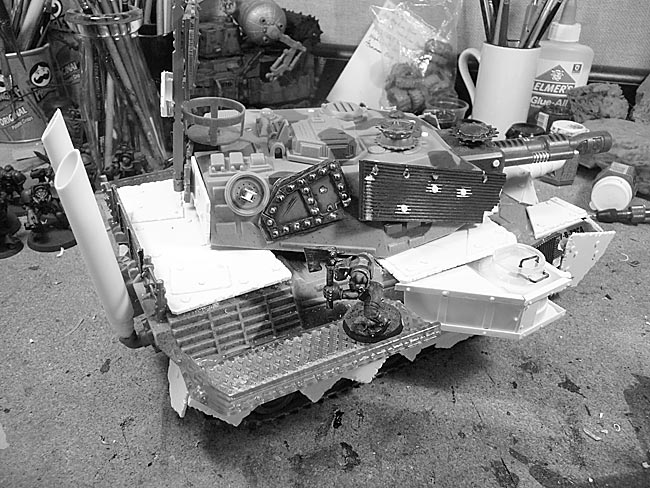
I'm priming this one right now and taking a long time since the humidity outside is so high at the moment. Spray, bring it in, let is dry, go back out and spray again, come back in and let it dry. Evaluate...on and on. I'm actually hoping to get at least the base coat of Mechrite red sprayed down tonight - we'll see how it goes with the primer curing well enough to mask.
Later!

Looking at your last picture there Suki, and I see those Marines off to the side. I for some reason I think to my self that they look like their are at one of those car shows looking at the next years model.
"Hey Bob! Look at the guns on that one! Is that the new X-45 Killa Cannon? Man I've got to get me one of those!"
"Dude! That Booth Babe is totally checking me out!"
"Humf! Ya. If you like'em green, with a bad poster, and fungus based."
etc. etc. etc.
Looking good so far. I think that you are going to have to find more then a couple of times to use these dude.
Sukigod
Member
Thanks mud duck. Funny, I can see that too. And I think after we do our local demo game in Oct there might be call for more Apocalypse size games going on so I think they may be out more than I currently suspect.
Now dey go FASTA!
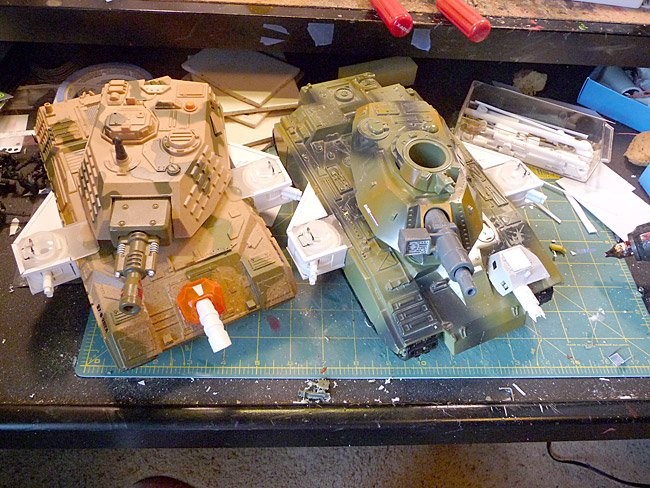
Masked off and ready to go to the garage for airbrushing.
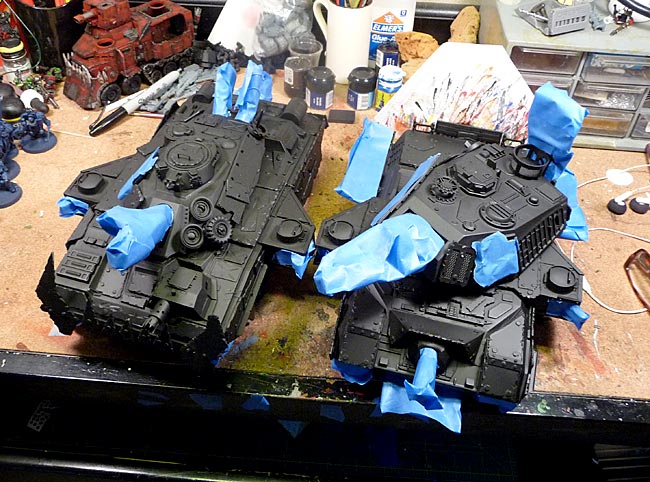
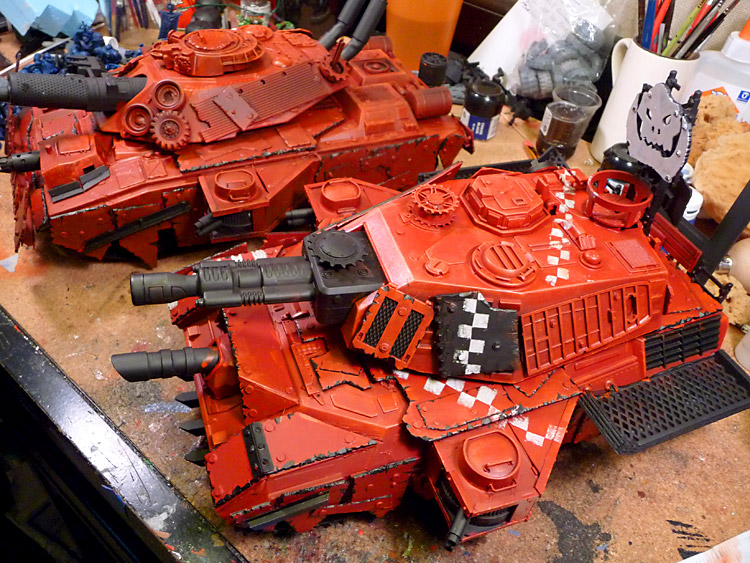
And now they're red!
They're really bright at this point so they'll look a little cartoony - this is even more pronounced in the photos than in real life. Next will be the metals and details, then a couple of overall washes and then paint chipping and done.
Gotta figure out which ones I'll be doing after that. Matching Pulsa Rokkits? A kustom battlefortress? Maybe the pair of flakka dakka wagons? All before Oct.!
Later!
Now dey go FASTA!
Masked off and ready to go to the garage for airbrushing.
And now they're red!
They're really bright at this point so they'll look a little cartoony - this is even more pronounced in the photos than in real life. Next will be the metals and details, then a couple of overall washes and then paint chipping and done.
Gotta figure out which ones I'll be doing after that. Matching Pulsa Rokkits? A kustom battlefortress? Maybe the pair of flakka dakka wagons? All before Oct.!
Later!
Sukigod
Member
Small update, been busy with half my family sick and in/out of the hospital. Everything is alright now and on the recovery track for all involved.
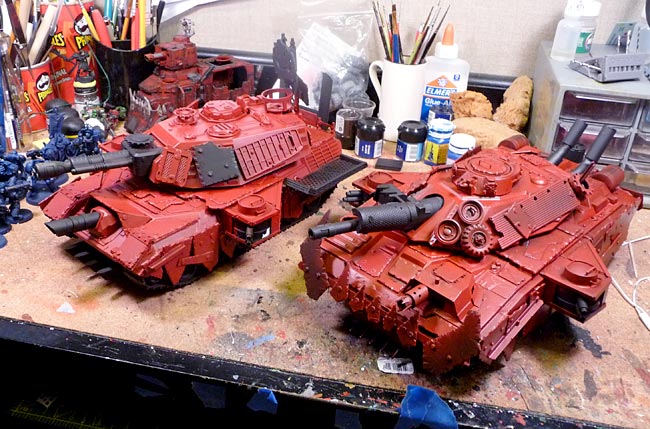
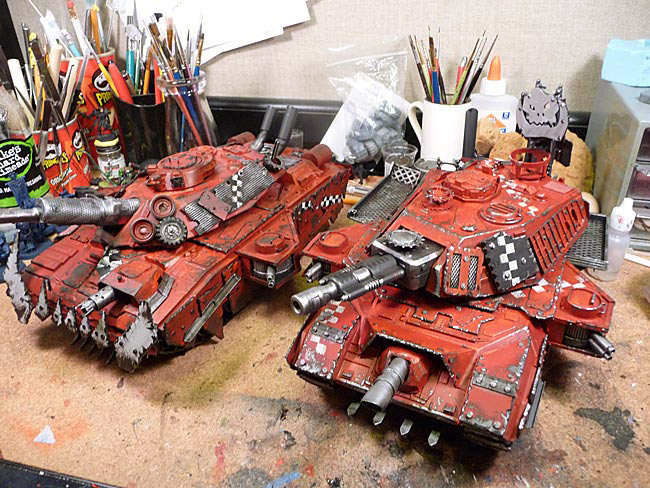
Did the drybrushing highlighting and started the basing for the metals - edges of cut panels, guns/exhausts, etc. I also did the checks for one tank. Turned out alright I think. I'll be doing something different for the other tank. These pics are some of the first ones I could get color corrected to show the true red (your screens may vary...).
Tonight I hope to get the second tanks black basing done and stenciling (for a lack of a better word) as well as the details, then maybe the chipping finished over the weekend. I'd like to wrap this up by Sunday to give me enough time to complete both Pulsa Rokkits in time for the instore Apoc Demo coming up. Yes, I've decided to do the Pulsas next. They'll add more visual impact to the game and the crazy rules should be more fun than the ability to shoot down flyers, we'll have some other units for that.
Later!
Sukigod
Member
TUTORIAL TIME!
Biff Gunhed over at Warseer asked about the "stippling"method I use to weather the paintjobs on my vehicles now. I'ce reached that point and made a pictorial demo of how to do it (at least how I do it)
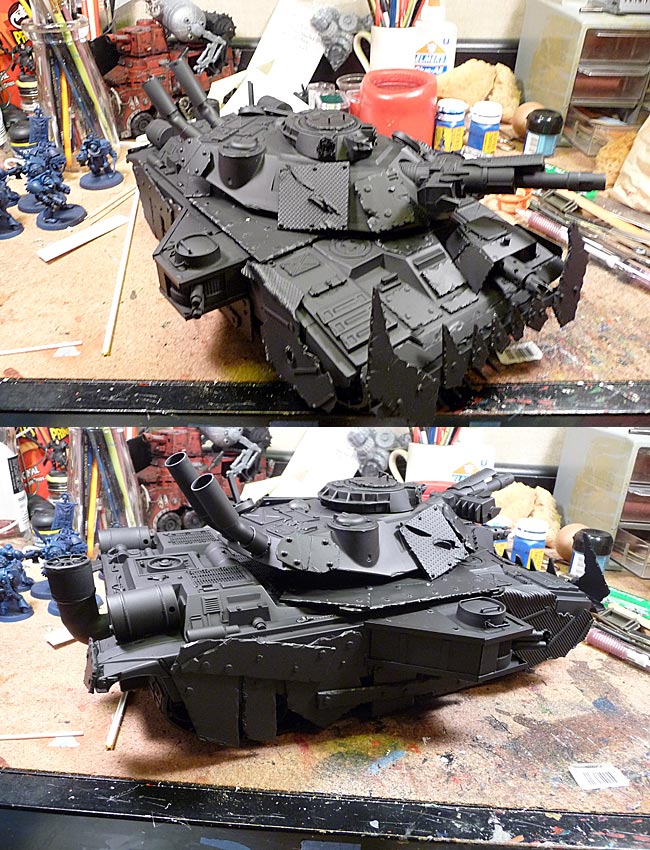
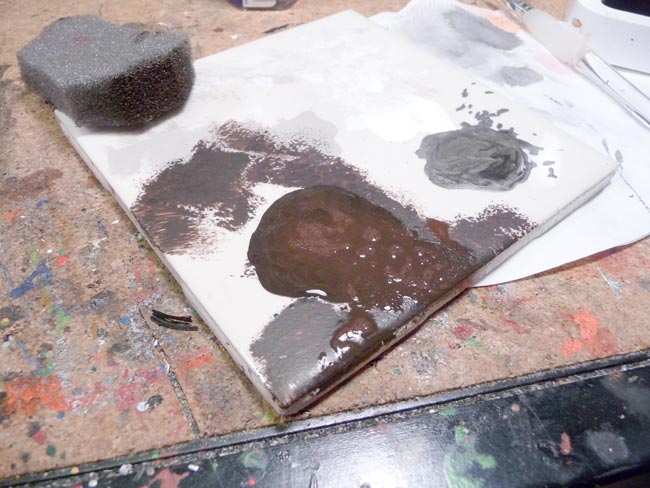
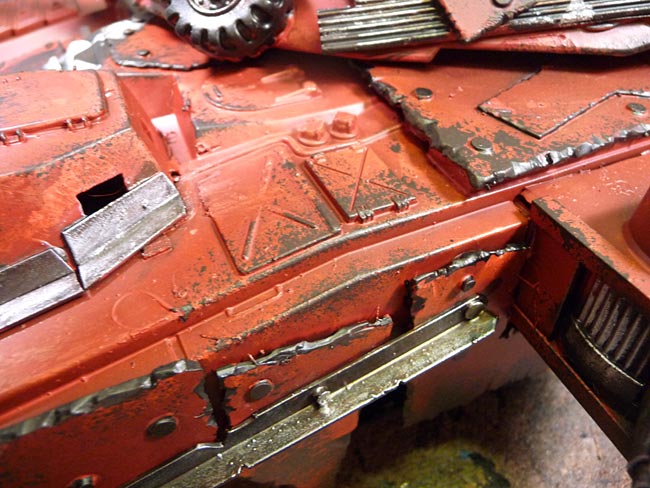
I choose a Chaos Black/Scorched Brown as a "primer", or base color for my wearing. It seems most natural for a red based paint job and works well for me. The grey sponge at the upper left is either a blister sponge or one I cut from a larger piece of some kind of packing foam. I'll use this, let it dry out, then cut off another angle and keep doing this 'til I run out.
Now our test subject painted up...
Here's the sponge dipped into the paint and then kinda "sponged" off a bit on my tile palette - this is similar to removing most of the paint for dry brushing.

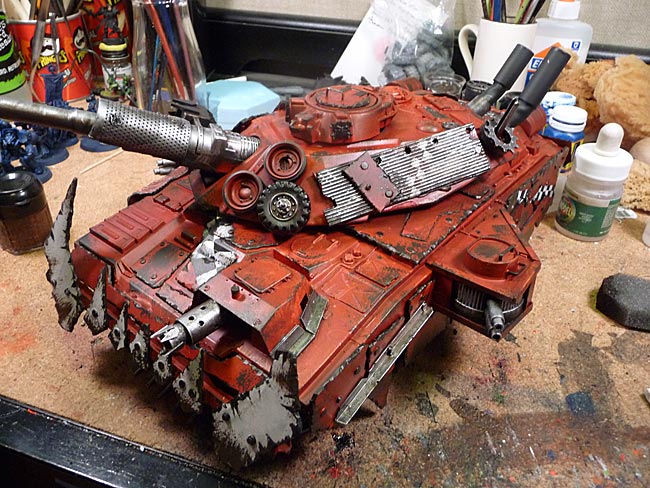
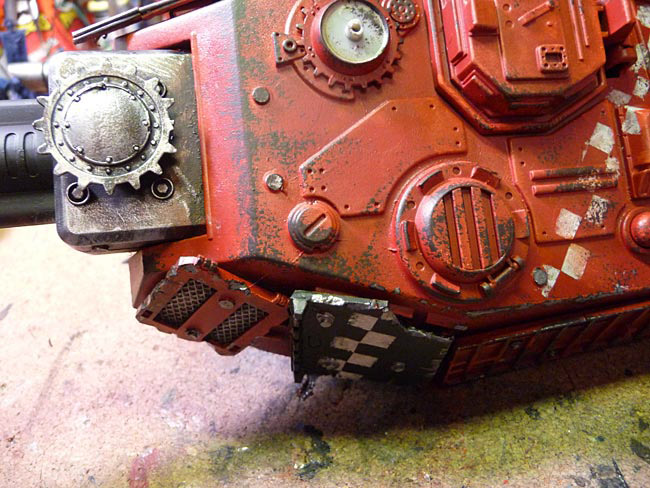
Apply the sponge to the surface of the model, focusing your attention on edges, places wear natural wear patterns would occur and places you want to muck up basically.

You can leave more paint on for larger areas of wear, take some time to experiment on how much you need to achieve the effect you want. TIP: If you're unsure as to how the first dab or two are going to look and are afraid of "ruining" something, test it in a spot lower on the vehicle and in the back, somewhere out of the way of normal viewing angles.
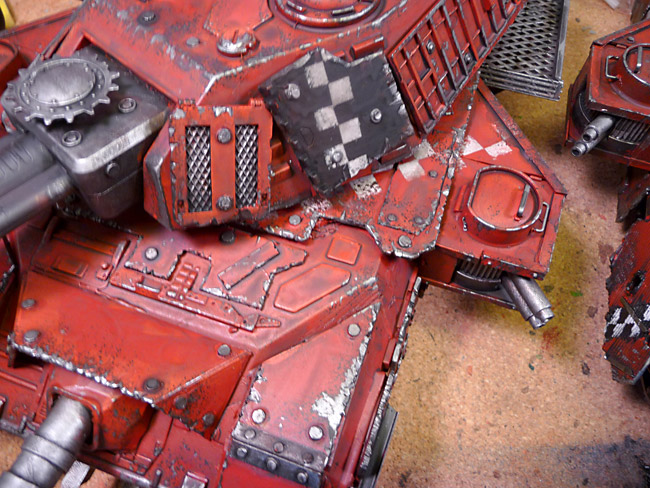
Here's the vehicle all dabbed up...
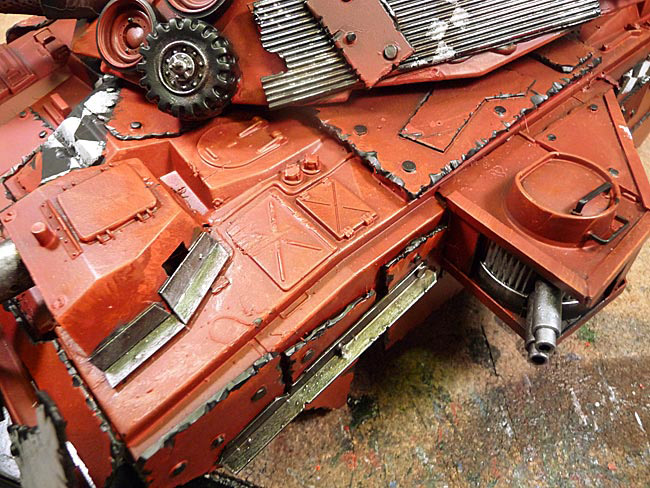
And here's a close up of the area I started at...
Coming Up: Part II
Biff Gunhed over at Warseer asked about the "stippling"method I use to weather the paintjobs on my vehicles now. I'ce reached that point and made a pictorial demo of how to do it (at least how I do it)
I choose a Chaos Black/Scorched Brown as a "primer", or base color for my wearing. It seems most natural for a red based paint job and works well for me. The grey sponge at the upper left is either a blister sponge or one I cut from a larger piece of some kind of packing foam. I'll use this, let it dry out, then cut off another angle and keep doing this 'til I run out.
Now our test subject painted up...
Here's the sponge dipped into the paint and then kinda "sponged" off a bit on my tile palette - this is similar to removing most of the paint for dry brushing.
Apply the sponge to the surface of the model, focusing your attention on edges, places wear natural wear patterns would occur and places you want to muck up basically.
You can leave more paint on for larger areas of wear, take some time to experiment on how much you need to achieve the effect you want. TIP: If you're unsure as to how the first dab or two are going to look and are afraid of "ruining" something, test it in a spot lower on the vehicle and in the back, somewhere out of the way of normal viewing angles.
Here's the vehicle all dabbed up...
And here's a close up of the area I started at...
Coming Up: Part II
Sukigod
Member
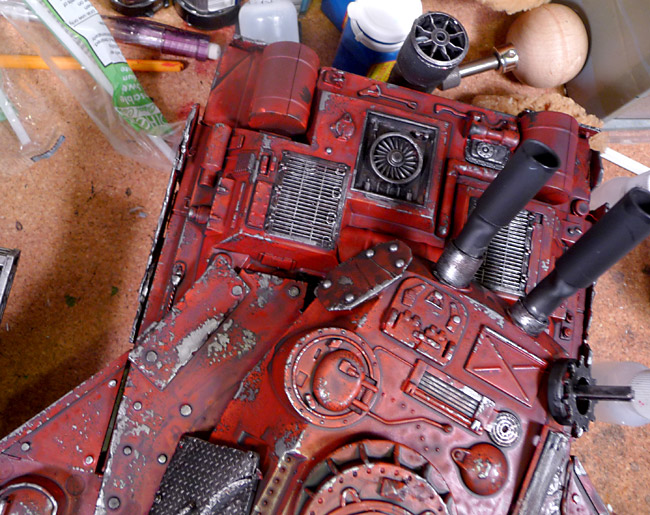
Part II
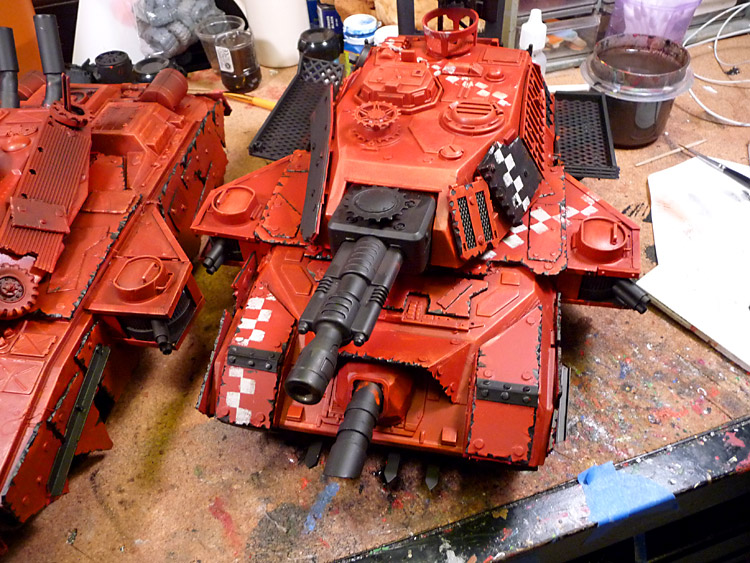
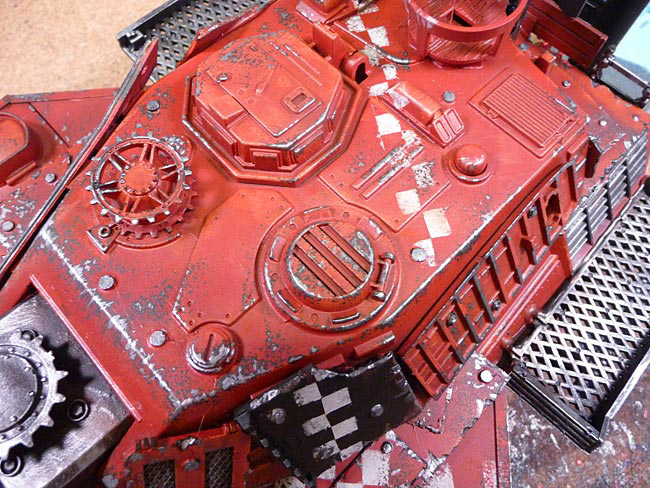
I did the base color for both tanks at hte same time and I'll show the second step on the turret of the second tank.Here it is all dabbed up.
I used a 20/00 brush for this part - no particular reason, it's just what I happened to grab. It does happen to help when touching small pinpoints as you'll notice in the final step.I applied a thinned down Boltgun Metal to any part of the sponged paint from the last step where it goes over and edge. I also fill in some of thelarger areas that are basically solid fills and then feather off the edges. I also dab the tip of the brush in some, but not all, of the smaller spots. Put the silver closer to the main area or starting point of the wear and let it fall off as you get further away.
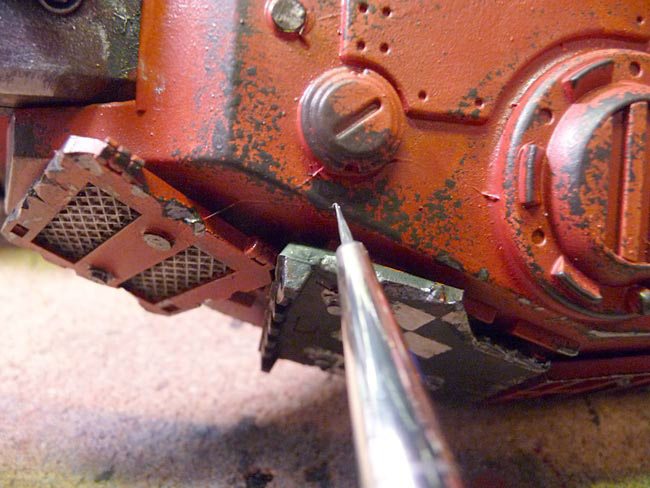
Here's the turret when finished. Note that as I get farther away from an edge (say the front crest of the turret), there's less metal color and eventually only the brown/black spots? You can increase the amount of wear by adding more brown but not have to add any more metal as the metal that's already there tells you it's chipped paint and your eye fills in the rest of the story. This means you don't have to be absolutely literal in you application of the Boltgun Metal.
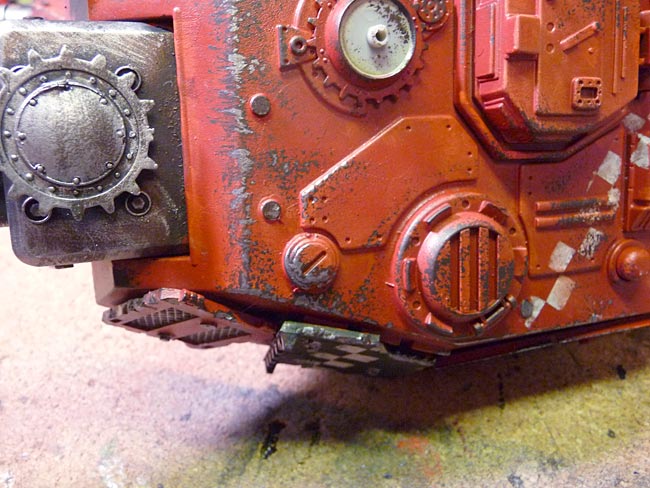
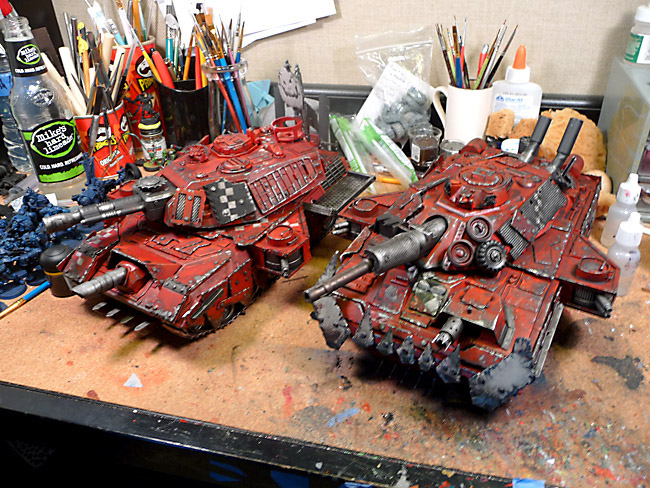
The turret put back on the tank...
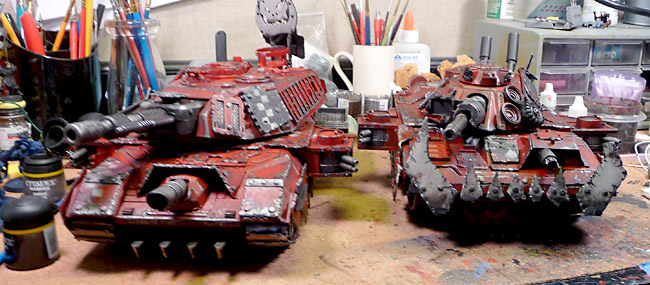
And both tanks as they are now.
I've only done the metal parts on one so far. I spent about 2 hours doing the base chip color anddoing the metal on one tank. I figure it'll be about another hour to finish up the metals on the second tank. The next step will be to dirty it up with a coating of Badab Black and some Devlin Mud for variation.Then the final details and sealing.
Later!
I did the base color for both tanks at hte same time and I'll show the second step on the turret of the second tank.Here it is all dabbed up.
I used a 20/00 brush for this part - no particular reason, it's just what I happened to grab. It does happen to help when touching small pinpoints as you'll notice in the final step.I applied a thinned down Boltgun Metal to any part of the sponged paint from the last step where it goes over and edge. I also fill in some of thelarger areas that are basically solid fills and then feather off the edges. I also dab the tip of the brush in some, but not all, of the smaller spots. Put the silver closer to the main area or starting point of the wear and let it fall off as you get further away.
Here's the turret when finished. Note that as I get farther away from an edge (say the front crest of the turret), there's less metal color and eventually only the brown/black spots? You can increase the amount of wear by adding more brown but not have to add any more metal as the metal that's already there tells you it's chipped paint and your eye fills in the rest of the story. This means you don't have to be absolutely literal in you application of the Boltgun Metal.
The turret put back on the tank...
And both tanks as they are now.
I've only done the metal parts on one so far. I spent about 2 hours doing the base chip color anddoing the metal on one tank. I figure it'll be about another hour to finish up the metals on the second tank. The next step will be to dirty it up with a coating of Badab Black and some Devlin Mud for variation.Then the final details and sealing.
Later!
")
porkchop806
New member
this has to be one of the best wips ive ever checked out it was as intersting as chrom's shadow sword interior wip total epic sauce love it
Sukigod
Member
Thanks porkchop, glad ya like it!
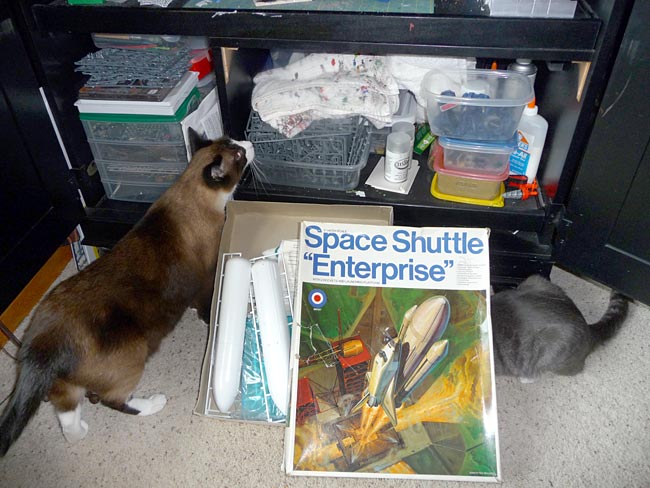
Started my second set up Apocalypse units tonight - two pulsa rokkits. I'm far enough along and have enough paint on the skullhammas that I won't be embarrassed to deploy them as is if I don't finish painting the details before Oct. 2nd. I'm more concerned about having enough time to finish the construction and base painting on these next two units before then so off I went.
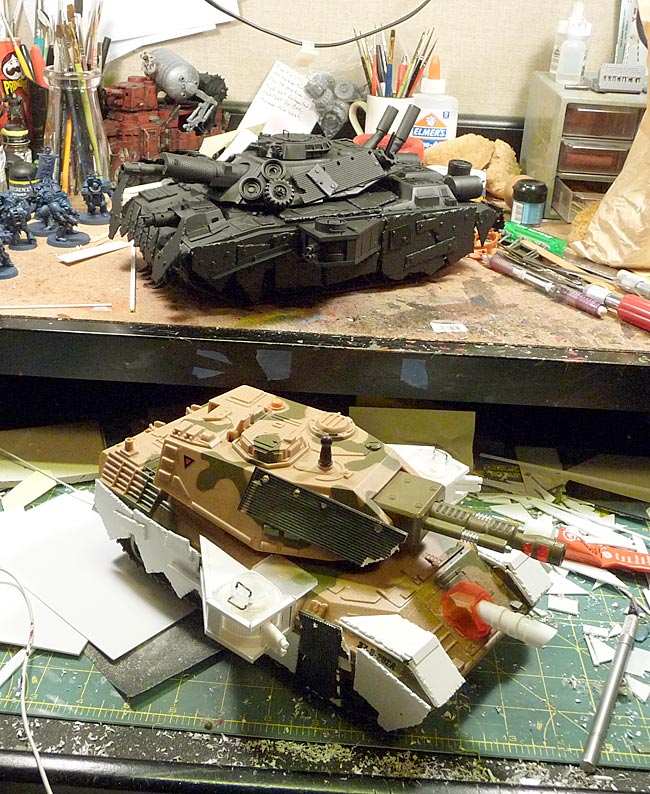
My trusty furred assistants Punchy (at left) and Rowdy (hidden at right, he's hard to see when he's hiding!) are checking out the base model I'm using for my pulsas.
The booster rockets will be both parts of on I'll be kalling "Sneeky Git" and the main fule tank will be named "Fat Bob". Here's the base pieces with a burna Barry boy.
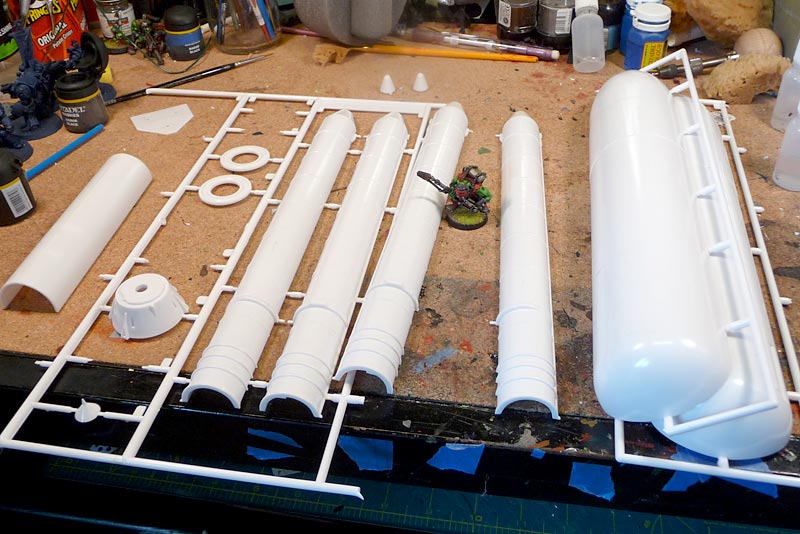
I got some masonite (thanks Chris!) and cut out some appropriate sized bases for the models and glued the main pieces together. I'm using a heavy duty piece of cardboard tubing of the same diameter of the big fuel tank for the "shot" version since I don't need to worry about a pointed noise on it.
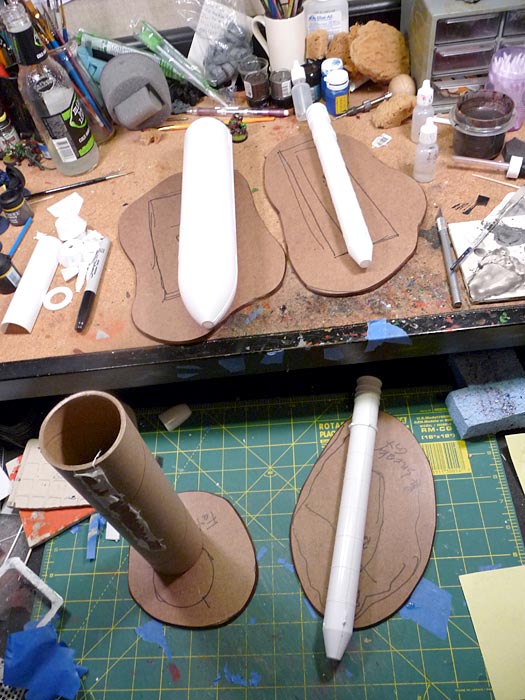
I've got the "after firing" pieces cut and hot glued down to the bases and a hut made for Sneeky Git. Here's a Barry shot and a Skullhamma shot for scale.
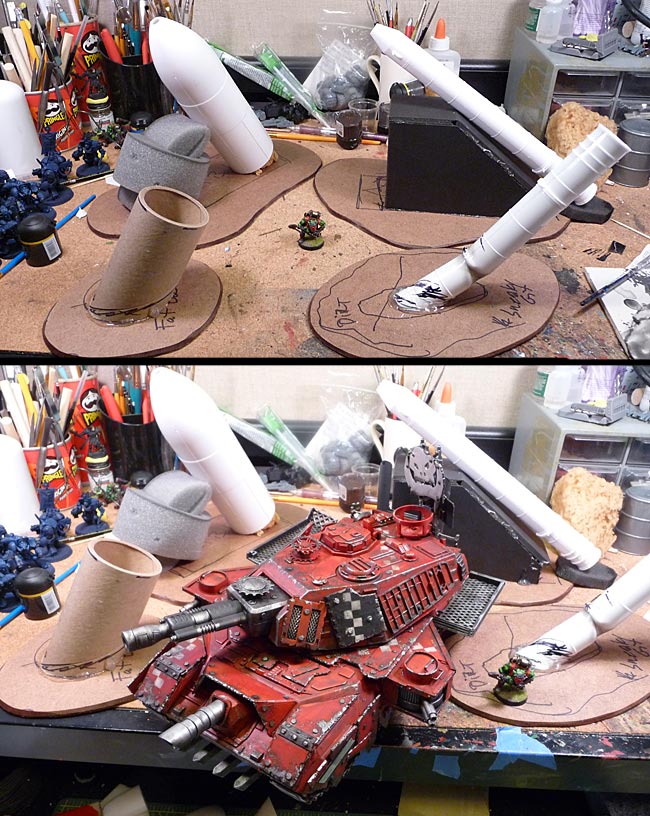
Thanks all for tonight, we'll see where I get tomorrow. I expect the progress on these to go rather quickly as they're not as detailed or busy as the skullhammas were.
Later!
Started my second set up Apocalypse units tonight - two pulsa rokkits. I'm far enough along and have enough paint on the skullhammas that I won't be embarrassed to deploy them as is if I don't finish painting the details before Oct. 2nd. I'm more concerned about having enough time to finish the construction and base painting on these next two units before then so off I went.
My trusty furred assistants Punchy (at left) and Rowdy (hidden at right, he's hard to see when he's hiding!) are checking out the base model I'm using for my pulsas.
The booster rockets will be both parts of on I'll be kalling "Sneeky Git" and the main fule tank will be named "Fat Bob". Here's the base pieces with a burna Barry boy.
I got some masonite (thanks Chris!) and cut out some appropriate sized bases for the models and glued the main pieces together. I'm using a heavy duty piece of cardboard tubing of the same diameter of the big fuel tank for the "shot" version since I don't need to worry about a pointed noise on it.
I've got the "after firing" pieces cut and hot glued down to the bases and a hut made for Sneeky Git. Here's a Barry shot and a Skullhamma shot for scale.
Thanks all for tonight, we'll see where I get tomorrow. I expect the progress on these to go rather quickly as they're not as detailed or busy as the skullhammas were.
Later!
