Pegazus's Pile of Pminiatures (WIP)

PegaZus

Stealth Freak
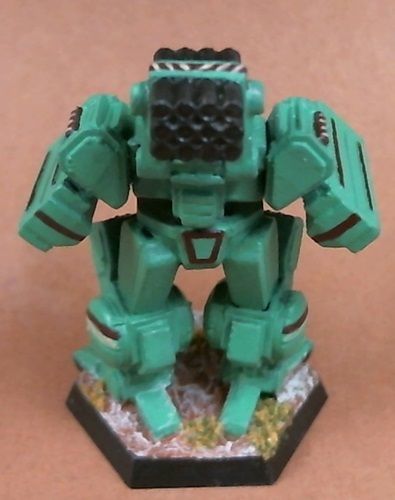
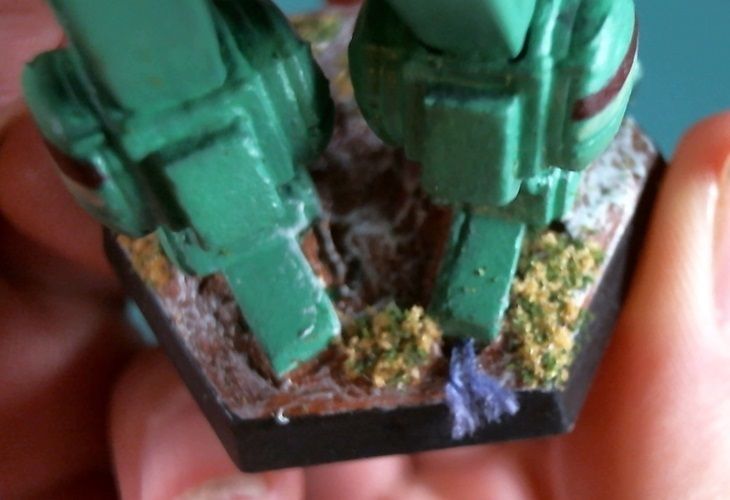
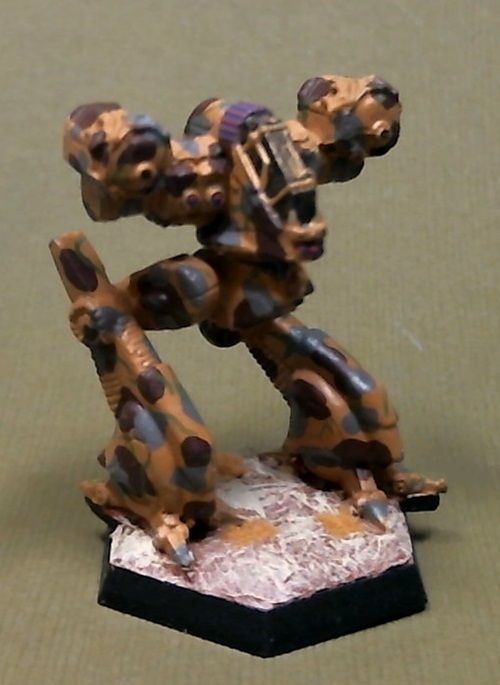
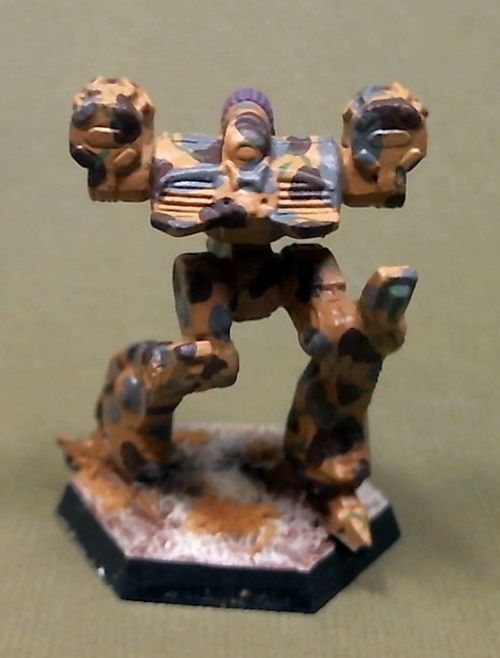
Nice. Did you get your ACE core set yet? I am thinking i will just prime, shoot some zenithal lighting, wash heavily, and pivk out barrels and cockpits. Keeping it even simpler for game pieces.

Sadly, no. I was one of the large minority who got glitched. But it'll get here Monday. Then a gift from my wife, Surface 2 tablet, on Tuesday. Then I anticipate a Reaper order on Wednesday. Did the 12 Days promo today to get the Cap'n Willie Sharp mousling. Going to do another for the Christmas familiars on the 10th. Planning another 2 CAV metal figures then to push me to the $35.

As for the coming box of robot goodness, I plan to do three video series on the Tiamat, the Assassin, and the Razor, in a little video how-to coordination with Girot, who will be doing the Dictator-B, the Cougar, and the Specter. I've already done the tanks (er, infantry fighting vehicles) that I'd planned to go along with them, but I think I've got another package. Had to check, I do. Dropzone Commander Galdius Heavy Tanks. But the reason I mentioned all this, is because of the below little fun-n-games:

Marble_01_zps138eb648.jpg


That's just some nail polish put on top of water, then the plastic (and sticks in the background) dipped down into it. Promises to be some interesting patterns on the figures. I'll probably do it on something other than the video series, but it's intriguing enough to make it worth playing around with.

Just for my own sanity, here's the projects I've currently got (and would consider "active"):
Savannah mobile airfield
"Secret Project" for my YouTube subscribers
Mini2Print's Stone Troll
"True Engineered" CAV Dropship (my own design from scratch, for the 3D printer)

On the horizon:
CAV Tiamat video series
CAV Assassin video series
CAV Razor video series
Reapercon mini entry
Wife's Trick R Treaters (Reaper Halloween Special Editions; figure I need to get those done pronto)

That's a full plate for me. Probably enough that I'll be swamped by my Bones II KS package. I need to find a way to store all of that. Guess I could start using some foam storage cases.
 

PegaZus

Stealth Freak
Got started on the Tiamat this weekend. Nothing much, but a simple layer of Blue Liner on it. On my way on this! Woo hoo!

Going to do a simple paint scheme. Other than the liner, I'm planning on just four other colors, all of which were selected randomly by the computer. Those four turned out to be about what I wanted anyway, so it worked out. I'll reveal the four colors in subsequent videos and posts.

Tiamat_001_zps9aeb2e6a.jpg


+6 pts, 515 pts total
 
Last edited:

PegaZus

Stealth Freak
Got the base coat of paint on, Clear Blue. It made things a lot darker than I'd thought, but it didn't turn out badly. On to the next few steps!

Tiamat_002_zpsc5e1d7ca.jpg


+6, 521 pts total
 

PegaZus

Stealth Freak
And I continue on with the Tiamat. This time, I've added my second color, LED Blue, to pick out some details and such. I've also decided I need to paint something for fun, and not worry about doing a WIP. Pondering what I'll do with that.

Tiamat_003_zpsd0e7fcd1.jpg


+6 pts, 527 pts total
 

PegaZus

Stealth Freak
Are you sticking with the Reaper bases? I ordered some 40mm as the Reaper ones seemed woefully undersized.
I plan to. I'm not going to use a lot of area when I base them, as I'm trying to stick very close to what someone new to the hobby/game would have on hand or could get. Might have to do a complete scrounge of the backyard for that.
 

KruleBear

Active member
Makes sense, i ordered the Lipko bases at the end of December and they just got here Thursday. The minis look more natural on the 40mm bases, so I am glad i got 'em.
 

PegaZus

Stealth Freak
Had a busy week, and sudden plans for the weekend that took me elsewhere, so this is much late. I've "finished" the Tiamat! I say that with quotes because I'm in process of basing him and getting the next video created. Worked up some of the final two colors randomly chosen to use, and happily they worked out really well for the cockpit and whatever the little nozzles underneath are supposed to be. Turned them into heat sinks, or exhaust ports, or something like that.

Tiamat_004_zpsec3992e8.jpg

Tiamat_005_zps50ac4341.jpg


+6 pts, 533 pts total
 

PegaZus

Stealth Freak
Here's a quick one I did. Randomly went into the box of Bones (KS I) and pulled these out. Pretty simple paint job.

First off, 9064 Brown Liner as both primer and base color. Next, 913 Forest Green, 9134 Clotted Red, 9050 Antique Gold, 9126 Gunmetal Blue, and 9280 Nightmare Black were all used to paint individual beetles. Afterwards, I probably would have stuck with just the red and gold. Those looked the best on the base color.

77130VerminBeetleSwarm_zps3fd8e67a.jpg


Finished up my first CAV Bones! Got the basing all done, and that took me a while. Not because it was hard, but because I couldn't figure out what to do.

Tiamat_006_zps4ae9a433.jpg


Tiamat_007_zps218944df.jpg


Tiamat_008_zpsbc0dcba9.jpg


Tiamat_009_zps7a049e66.jpg


Now on to the next CAV for the next video series.

+10 pts, 543 pts total
 

PegaZus

Stealth Freak
I worked up a three part video review of 2015 ReaperCon. Anybody that went will probably be bored to tears, but those who couldn't go might be interested. And others that didn't go might be bored to tears anyway. I do show some of the possible upcoming Bones III Kickstarter figures. They threw out the caveat that not everything out for display was a lock to be in their next KS.


I have gotten some critique that the last video is just me talking while my hands are on screen. Eh, people will just have to deal with that. Also, the camera didn't focus well on the blister packs, and I was too tired to try to fight it properly.


Part 1: Forumites, the painting competition, and classes.
Part 2: Games, loot, and factory tour
Part 3: Bones III and conclusion


Oh, and I didn't post the little attempt at a diorama, so here's that too:


PegaZus

Stealth Freak
Over on the Reaper forumns, they had a Memorial Day Binge Painting challenge. Paint as many as you can during the weekend. So I bit, since I've been pretty slow on things, and jumped in ambiously with 28 figures pulled from the Bones I Kickstarter packages. Originally, I went in for just the skeletons, but then found mummies and zombies and vermin that would be simple to paint. Managed to get 17 completely finished (for as far as I planned to get them), and paint actually applied to all 28. I'm counting this as a success.


Mummy%20Front_zpsbz2s77q4.jpg
Mummy%20Back_zpsptd4wbv3.jpg


Skeletons (6):

skellies%20front_zpseaj0yozq.jpg

skellies%20back_zpsbjomnn2j.jpg


Spiders (2):

spider%20front_zpsfy2kfoei.jpg

spider%20back_zpslqwbbpf1.jpg


Spider Swarm (2)

spider%20swarm_zpsyyglvzqh.jpg


Scorpions (2):

scorp%20front_zpsgncasrgr.jpg

scorp%20back_zpsv96b1wtg.jpg


Beetle (2):

beetle%20front_zpsxyuat3km.jpg

beetle%20back_zpslerjkfa3.jpg


And my favorite of the group, rat swarm (2):

rat%20swarm%201_zps0hohg7x3.jpg

rat%20swarm%202_zpsr2cgulpq.jpg


Sort of bummed the rat swarm didn't photo nearly as well as it looks in real life. But oh well, they're posted!

+13 pts, 556 pts total
 

PegaZus

Stealth Freak
Wow, it has been a while. But that's what happens when vacations and overtime kill all of your painting time.

First up, I finished off my Nicki Minaj color-themed Specter CAV. This was the third figure I've painted from the CAV Kickstarter. The first video I put up asked my subscribers for input on what color scheme to use. Nobody picked anything, so you can see the result in the second video. I'll not post the first video since it's just me using brown liner over the Bones figure. Now for pictures!

CAV%20Specter%20Front_zpstax2qhlm.jpg
CAV%20Specter%20Back_zpsuwgkw63t.jpg

CAV%20Specter%20%20Left_zpsmygxso7l.jpg
CAV%20Specter%20Right_zpsjm2sgpzh.jpg


And sadly, I forgot to make this part of the video and the initial set of photos, but I did put in one little funny joke on the base. Because it's all about the base, right? Oh, wait. Wrong pop singer. But poor, poor Nicki. Never saw the Specter coming.

CAV%20Specter%20Back%20Foot_zps7kvj8hcy.jpg


Now for 2/3rds of the videos. You can go back and watch the first if you'd really like to.


+15 pts, 571 pts total

And looking back at my video manager, realized I never posted up the second CAV I painted, the Assassin:


+5 pts, 576 pts total

And for a final closing, thought I'd toss in the swag I got from Japan back in June. I really should update more often.


PegaZus

Stealth Freak
Finally getting around to posting this one. It's the last of the four CAV I agreed to paint before I opened it up to anything else I wanted to paint on video. Then again, very low views on these, so I might paint something else next. Who knows.

Went with a brown camo scheme on this, so gave it a desert base. Didn't turn out too bad, and it's now up in the display cabinet.

Razor%20Left%20Front_zpsfjk1ztq2.jpg
Razor%20Right%20Front_zpslqxobg1n.jpg

Razor%20Back_zpssrdxu5lx.jpg


And here's the video, should you care to see:


+8 pts, 584 pts total
 

KruleBear

Active member
I got a kick out of how you selected the colors for the Specter.

I pulled out my CAV minis today and gave a couple to little man who is into robots at the moment. I'm thinking I will just block in colors and use washes liberaly so a two year old can toss them around without stressing me. I was going to ignore the mold line and just wash the minis for prep. However there is a lot of bent guns in torsos, I assume boil and freeze would fix this problem.

How have you been tackling prep?
 

PegaZus

Stealth Freak
Been a long time, but hobby things are slowly coming back into the realm of the possible. Spent the day taking gallery shots of (nearly) all my figures since 2013. Yeah, ouch. Missed the strumpet and the rats. Will get those gallery pics taken this weekend I hope. It'll be 32 gallery shots (plus the two I forgot). Some of them have been documented here on this thread, but others I deemed too ... pedestrian? Something I painted up, but felt I had no reason to post them in the gallery. Guess it finally got to me and finally found an itch to put them all in.

I'll be editing this post to include links to each one as I get them done. Might be a couple of days of plunking away at it.

Oh, and long delayed answer to Krule, I've been tackling prep like I would any Bones figure. Hot dip then ice bath. It seems rather hit or miss on if it actually stays that way. As such, I'm 100% for Bones figures for gaming and such, but think for anything I would spend more than an hour or two on in a misguided attempt to paint something to high quality I'll vote metal. I'm too the point where I think trying to take mold lines off Bones isn't worth the effort. My opinions might change. The grey ones that just got delivered might act differently.

Massive list of gallery postings (which may not be viewable until approved):
Blacksmith, Reaper Townsfolk II pack (02584)
Seerer (Beggar Conversion), Reaper Townsfolk II (02584)
Pirate Crew (Reaper Bones KS)
Scratchbuilt Sci Fi Terrain
Well of Chaos (77136)
Federation Fleet Box
Crocostimpy (Sebeki Master of Words)
Concussion CAV with Juno A1 Infantry Fighting Vehicle
Centurion CAV with Juno A1 Infantry Fighting Vehicle
Tiamat CAV
Vermin Beetle Swarm
Mummy - Reaper Bones 77144
Skeletons - Reaper Bones 77001 77018 77017
Vermin Spiders - Reaper 77126
Vermin Scorpions - Reaper Bones 77125
Vermin Beetles - Reaper Bones 77127
Rat Swarm - Reaper Bones 77129
CAV Specter - Reaper Bones
CAV Razor - Reaper Bones
Tau Defenders
Bones Zombies, Ghast, & Zombies (77014 77159 77053)
Bat Swarm - Reaper Bones 77046
Ghost King - Reaper Bones 77161
Mummy Captain - Reaper Bones 77145
Mummy Warrior - Reaper Bones 77146
Right by the Wights Diorama - Reaper Wight CAV 94007
CAV Assassin - Reaper Bones 94004
Christmas Terrain
3D Printed Terrain (Dragonlock) with fungus

Points: Er, yeah. I'll get to that. I don't remember what I was giving myself for a gallery posting, and I'll get to that at the end of things.

EDIT: So, 29 gallery postings, which is 290 pts, 874 pts total. Not that it really matters at this point. Self control is so hard. But now I get to do the post I was wanting to do!
 
Last edited:

PegaZus

Stealth Freak
Finally! Posting all those gallery pictures was a pain. I'm bound and determined to not let myself get that behind again. Yeah, we all know that'll happen again.

Anyway, speed painted a lizard man! (Reaper Bones (77155)) Spent about 45 minutes of total real time working on it, and was really surprised how well he came out. No waiting for coats to dry or anything like that, just a little bit of pre-planning.

So, gallery link, then image and video link!

Speedpainted Lizard Man - Reaper Bones 77155

IMG_0197_zpsg9btaufa.jpg


Plus 15 pts, 889 pts total
 

PegaZus

Stealth Freak
I recently bought five orc figures to print on my 3D printer from Dragon Lock, so I figured I might as well add to my WIP as I paint one of them. I picked the one I though looked the best, and would print the best.

The printer I've got is a Dremel PLA printer, and I've been using the default software that came with the machine. They've since partnered with Auto Desk's Print Studio to add the ability to do supports, repairs and that sort of thing.

Aside: I've been playing around with it while writing this post, and found a rather unusual thing happened. Print Studio had an "optimize rotation" button, which, being shiny and candy-like, I pressed. It put the orc snout down, and touching the bed in several spots. That's... an interesting idea of how to print it. Might do that just to compare. It might actually print better.

The settings I used for it are below. It's a pretty basic printer, and I've done some dungeon terrain from their Kickstarter back at some point. I've also printed up large stuff, and attempted a CAV scale wooden pallet (yeah, that was too small).

.10 mm layers
.25 mm first layer
3 shells
35% infile, lines
80mm/s with 100 mm/s travel speed
220°C
Fan on, 45°overhang

So using the values above, here's the first picture. It's printed out in black.

Orc04_As_Printed_zpsogj3l5u5.jpg


If one looks at the ax handle, at the top knob you'll see a little curly que. That's what happens when the printer doesn't have any supports across a location. By default (as shown in the settings), it's looking for a next layer that's no more than 45° angled to the next one. Well, that doesn't work very well with sudden horizontal surfaces such as the bottom of the torso portion of the figure. There's a lot of curly bits under the "kilt" (English failure for me noggin'), but I could always paint those as decorative tassels, really thick hair, etc.

All told, it used less than 1.5m of PLA, which using the price I pay, comes out to about 30 cents for the material. That's really affordable for building up masses of mobs for a group to plow through. But let's get painting, and I'll start documenting some insights into this figure.

Orc04_Primed_zpsblnpwkz0.jpg


Now it's really easy to see what we're up against. This is just automotive filling grey primer. And there's a lot that it didn't fill. But, it's a mook, and cheap, so let's not worry about winning any awards with it. (I've got a resin printer Kickstarter I've back, OLO, so it may do this at a better resolution; we'll see). There's that big curly string at the bottom of the base. That's a vine tendril maybe. The handle of the ax... that's... uh, very worn and aged wood. Yeah. The snout is... uh... lots of hair. Yeah. That's the ticket.

Okay, so it's going to be pretty obviously a 3D printed figure. Meh. Mook. Cheap. Skip it. Let's start a base coat. I'm using Olive Drab, and going over the areas that are skin... and places that I think are skin.

Orc04_BaseSkin_zpsl6sxtplx.jpg


Here's where some insight comes in on how we can make this look better.

Thought #1: There's no way a wash is going to work on this. It'll just exacerbate the layering. Not much to do there but avoid washes. If I'm going to want to do shadows, it's going to be by the brush.

Thought #2: Forget painting sculpted details. Anything I can do to add detail however, will probably help hide the layering. Fancy patterns to simulate fabric (which might be really well looking, as I've got half the "weave" already built in), or insignia, or other such clutter will be useful in hiding the layers.

Now, in the, (ouch) four hours I've been writing this post, I hit upon using the support features of Print Studio. Here's what it looks like if I print it in the same position. I believe all the yellow areas are locations where it's unsupported, and will frizz on me. Eh. Let's see what happens.

Orc04_Supports_zpsvisfr6vk.jpg


And since it's pretty easy and cheap, let's do that strange optimized rotation, with supports. It looks like this:

Orc04_Optimized_Supports_zpsuce2csnb.jpg


That's... interesting. But for science! I proceed!
 

Schwarz-Brot

New member
Good to see people tinkering with new techniques.
But man, this does not work. You may as well chose chess figures as proxies. Or coloured stones, painted with some faces.

I don't know if you can push the resolution any further. You may try printing slower. Traveling speeds of 80mm/s are huge. In the end hobby level 3d-printers are simply not able to achieve the smooth surfaces miniature fans want. A resin based printer may be better. I wish you luck!

I really see the fitting place for 3d-printing in terrain pieces with large even surfaces which can easily be cleaned up or may not need any cleaning at all.
 

PegaZus

Stealth Freak
Good to see people tinkering with new techniques.
But man, this does not work. You may as well chose chess figures as proxies. Or coloured stones, painted with some faces.

Well, I'd disagree a bit on the proxies. I'd much rather have a slight mess of a figure as a proxy than a chess piece. Although, thinking about it, making them flats instead of 3D might make them much more useful proxies. Like a round token object. It could contain stats and other things. Hmm. That would be an easy thing to work up for online sales. But back on point, I'm still optimistic I can pull off something that makes things work and give a better appearance.

While it isn't exactly as useful, I have had the thought that making sculpting dollies would be a useful printed object. Something that has the pose desired and the basic anatomy and musculature done. Then it's a smaller task to "skin" the figure with greenstuff or other putties, and then start the details. Benefit here is that it could be possible to have parametric muscles that would go with the model's poses, so once made, a multitude of unique figures could be sculpted quicker.

I don't know if you can push the resolution any further. You may try printing slower. Traveling speeds of 80mm/s are huge. In the end hobby level 3d-printers are simply not able to achieve the smooth surfaces miniature fans want. A resin based printer may be better. I wish you luck!

I really see the fitting place for 3d-printing in terrain pieces with large even surfaces which can easily be cleaned up or may not need any cleaning at all.

The resolution of my printer is set at the highest it can go, so the layering is as good as I'm going to be getting. Making it go slower may allow for a less layered look, as the plastic has time to stay heated a bit longer and flow more, but I think it would be at the expense of having more stuff dripping along the unsupported areas. It just occurred to me that the overhangs might actually do better, as the plastic (with nothing underneath) might cool off quicker. Sort of feels like I'm trying to have it both ways on heating and cooling. I might try it, just to see the results.

The terrain I have printed, I've been very happy with, minus all the things that have failed on my prints, and so can see that being a for-sure thing. Larger figures might be a much better way to go as well.
 
Back To Top
Top